Scout Meeting Challenge: Patrols Have Fun With Scout Stave Launchers

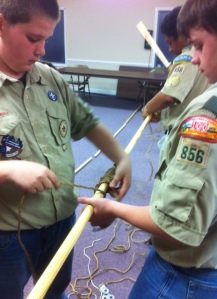
First of all, let’s acknowledge what appears to be the source for this easy-to-execute design, the website for: Scouts South Africa where you can download a pdf of the design and directions. The activity surrounding the construction of this launcher incorporates sound square lashing technique, teamwork (of course), a geometric study of angles and trajectory, some concentration, and lots of laughter. The ensuing fun can be a real blast, indoors or outdoors*.

Link to: Larger Image
Assembling their Launcher

Here’s what each patrol will need:

  • six Scout Staves
  • seven 6-foot x 1/4-inch  lashing ropes
  • three short lengths of cord (to secure the shot holder to the structure if your using surgical tubing)
  • one pre-made “shot-holder”
  • large supply of newspaper and masking or scotch tape
  • large enough room to spread out

In a nut shell, here’s what happens:

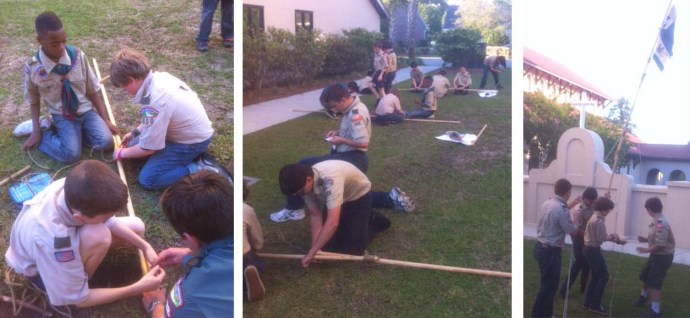
An indoor or outdoor area is set up so there’s plenty of room to launch the “shots.”  Each patrol is provided the necessary materials along with the design drawing. They are each assigned their own designated area (about 10′ x 10′) in which they must stay. On signal, they race to build their Scout Stave Launcher. Using the newspaper and tape, they will also have to set to work and make a supply of “shots.” As soon as they are ready, they can proceed to launch tightly, taped-together newspaper “shots” at designated targets in the shooting area. They can also launch the “shots” for distance.

It should be noted, the “locking bar” (refer to the drawing) is only lashed to the bottom crossbar of the A-frame. The angle of fire is adjusted by moving the “locking bar” up and back. Printable  Diagram

Each launching can serve as a point of reference to adjust the “locking bar” and, if necessary, the position of the elastic bands. Remember, the patrol must stay within their duly designated area. Used “shots” can be retrieved at defined intervals, during which no further launching can take place until an “all clear” is sounded.

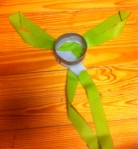
Canvas Pouch Shot Holder

Making a Shot Holder—the most simple approach:

  1. Cut out an equilateral triangle with 12-inch sides from a piece of canvas. 10-oz canvas will work if you double one triangle on top of another.
  2. Place a grommet on each corner of the triangle(s).
  3. Reeve a 24-inch length of surgical tubing through each grommet and  make a loop by joining the ends of each with a tight knot.
  4. If you choose, you can add another grommet to the middle and use it to fashion a pull line.

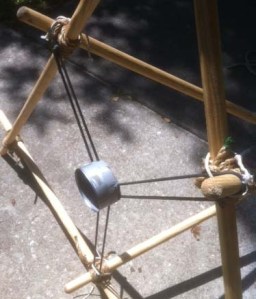
Tin can shot holder—another approach that works well is as follows:

For each shot holder, you’ll need a can and a length of surgical tube, inner tube, or some kind of  stretch band. Six feet works well with Scout staves.

Ballista rigged with surgical tubing. (Notice the cord used to secure the tubing to the structure.
Launcher rigged with surgical tubing. (Notice the cord used to secure the tubing to the structure.

Prepare the cans. Using 12.5 oz. cans (commonly filled with canned chicken or beef) cut three slits in the bottom the same width as the rubber strips or more narrow if you’re using surgical tubing. Flatten the sharp edges as much as possible against the inside of the can and then apply tape to serve as a cushion between the slits and the stretch material.

Sample Shot Holder made from a strip of a 6' Exercise Stretch Band and a 12.5 oz Can
Sample Shot Holder made from a strip of a 6-foot  Exercise Stretch Band and a 12.5-ounce Can

The stretch material. One bicycle inner tube can be cut into three to four 6′ strips each of which are just the right size for one shot holder. If you can’t easily obtain inner tube, heavy duty exercise stretch bands work okay, but are less durable. What works best by far are six foot lengths of 1/4″ surgical tubing! They’re the most stretchy and can withstand a lot of strain. Surgical tubing can be purchased through scuba supply companies.

Attach the rubber. Tie together the ends of the rubber strip or surgical tube making one loop with a circumference of approximately six feet. Feed the loop through one slit in the can. The objective here is to extend an even-sized loop through each slit, by forming bights in the loop and threading them through the other two slits.

*Outdoor action can give rise to a host of variations. “Shots” can consist of tennis balls, and targets can be set up at varying distances. Depending on the elastic bands used to make the shot holder, this simple design can easily launch well over a hundred feet.

NOTE: Eye protection and supervision by an NCS trained shooting sports director is required for this activity.

SCOUT MEETING CHALLENGES MAIN PAGE

Scout Meeting Challenge: Flagpole Race

VIEW VIDEO: Simple Flagpole Raising Demonstration

Put it together, lift it up, and tie it down!

Several campcraft skills come into play in order to successfully complete this Simple Flagpole challenge. Each patrol flies their patrol flag from a 14′ flagpole they construct using the following materials:

  • four Scout Staves (or 3 Scout Staves if their patrol flag is already tied to a 5′ pole)
  • six 6-foot x 1/4-inch lashing ropes
  • three 15-foot dining fly guylines
  • three long stakes
  • one mallet

On signal, each patrol flies their flag by:

  1. joining the staves together with round lashings
  2. attaching the three guylines about 3/4 the way up from the bottom with  roundturns with two half hitches or rolling hitches
  3. hammering in the three stakes forming an equilateral triangle
  4. tying the guylines at the stakes with taut-line hitches
  5. adjusting the tension on the lines to securely hold their flagpole in a vertical position

Patrol Flags Flying!

SCOUT MEETING CHALLENGES MAIN PAGE

Scout Meeting Challenge: Catch the Snapper

What we’re doing here is challenging each patrol to build a device that will set off and “catch” a cocked rat trap (the snapper) placed 15 feet away.

Spacing their round lashings.
The lashings have to be tight and well-spaced.

This simple interpatrol challenge is fine for team building and simultaneously a whole lotta fun! The only lashings required are round lashings, but applying a sensible approach to spacing them effectively is also necessary. As with all pioneering projects, in order to pull them off the whole crew’s got to pull together. So it is with the simple process of racing to join the Scout staves together, and then setting about angling the long “fishing pole” so the sinkers will hover just right over the cocked rat trap.

CatchTheSnapper
Activities That are FUN!

Procedure. Using two tight Round Lashings to join each of the staves together, each patrol forms a long “fishing pole,” and attaches a cord with a weight tied on to the end. Using this device to pick up their snapper, there are two objectives here: one is to catch the snapper as quickly as possible, the other is to work together and successfully complete the task as smoothly as possible. Basically, three rules apply: no patrol member is permitted to cross a line between their work area and the cocked rat traps 15 feet away, the only thing allowed to touch the snapper is the weight at the end of their “fishing pole,” and all materials must be used.

Angling to Catch the Snapper

  • four 5-foot  Scout staves
  • six 6-foot lashing ropes
  • one 3-foot light cord
  • a weight (fishing sinker or some heavy metal washers)
  • rat trap(s)


Careful handling of the rat traps is required!
Left: Setting out the Rat Traps  / Right: Catching the Snapper

SCOUT MEETING CHALLENGES MAIN PAGE

Scout Meeting Challenge: Indoor Ladder Race

The square lashing is the basic type of lashing for most pioneering projects. The more a Scout ties them, the more they become like second nature. That means, when the tying of an efficient and tight square lashing is “no sweat,” building a pioneering structure will be easier and more successful. This, of course, makes the experience more fun.

Think about it. The basic and easy-to-build Double A-frame Monkey Bridge depends upon 10 to 14 tight square lashings.  A simple Single Lock Bridge with planks on the walkways needs 48.

Almost ready to climb!

So, to assure the Scouts are ready and able to tackle projects that are challenging, fun, and rewarding, they need to feel confident and happy they can easily tie tight square lashings.

Touching the ceiling!

This challenge is very simple, but, it’s fun, and requires each patrol to tie eight tight square lashings. It’s great for new Scouts and a useful team-building activity and practice session “disguised” as a fun, fast-paced interpatrol competition.

Materials for Each Patrol:

  • two 8-foot x 4-inch spars
  • four 3-foot x 2-inch ladder rungs
  • eight 15-foot x 1/4-inch lashing ropes

Method: with the above materials, each patrol will lash together a ladder with four rungs, spacing the rungs FROM THE BOTTOM ABOUT ONE FOOT APART, using eight square lashings. When sturdy, the whole patrol will stand the ladder up and take turns climbing to the top.

Indoor Ladder Race
6-foot Ladder Legs for Lower Ceilings

SCOUT MEETING CHALLENGES MAIN PAGE