Favorite Scout Meeting Challenge: Lift Seat

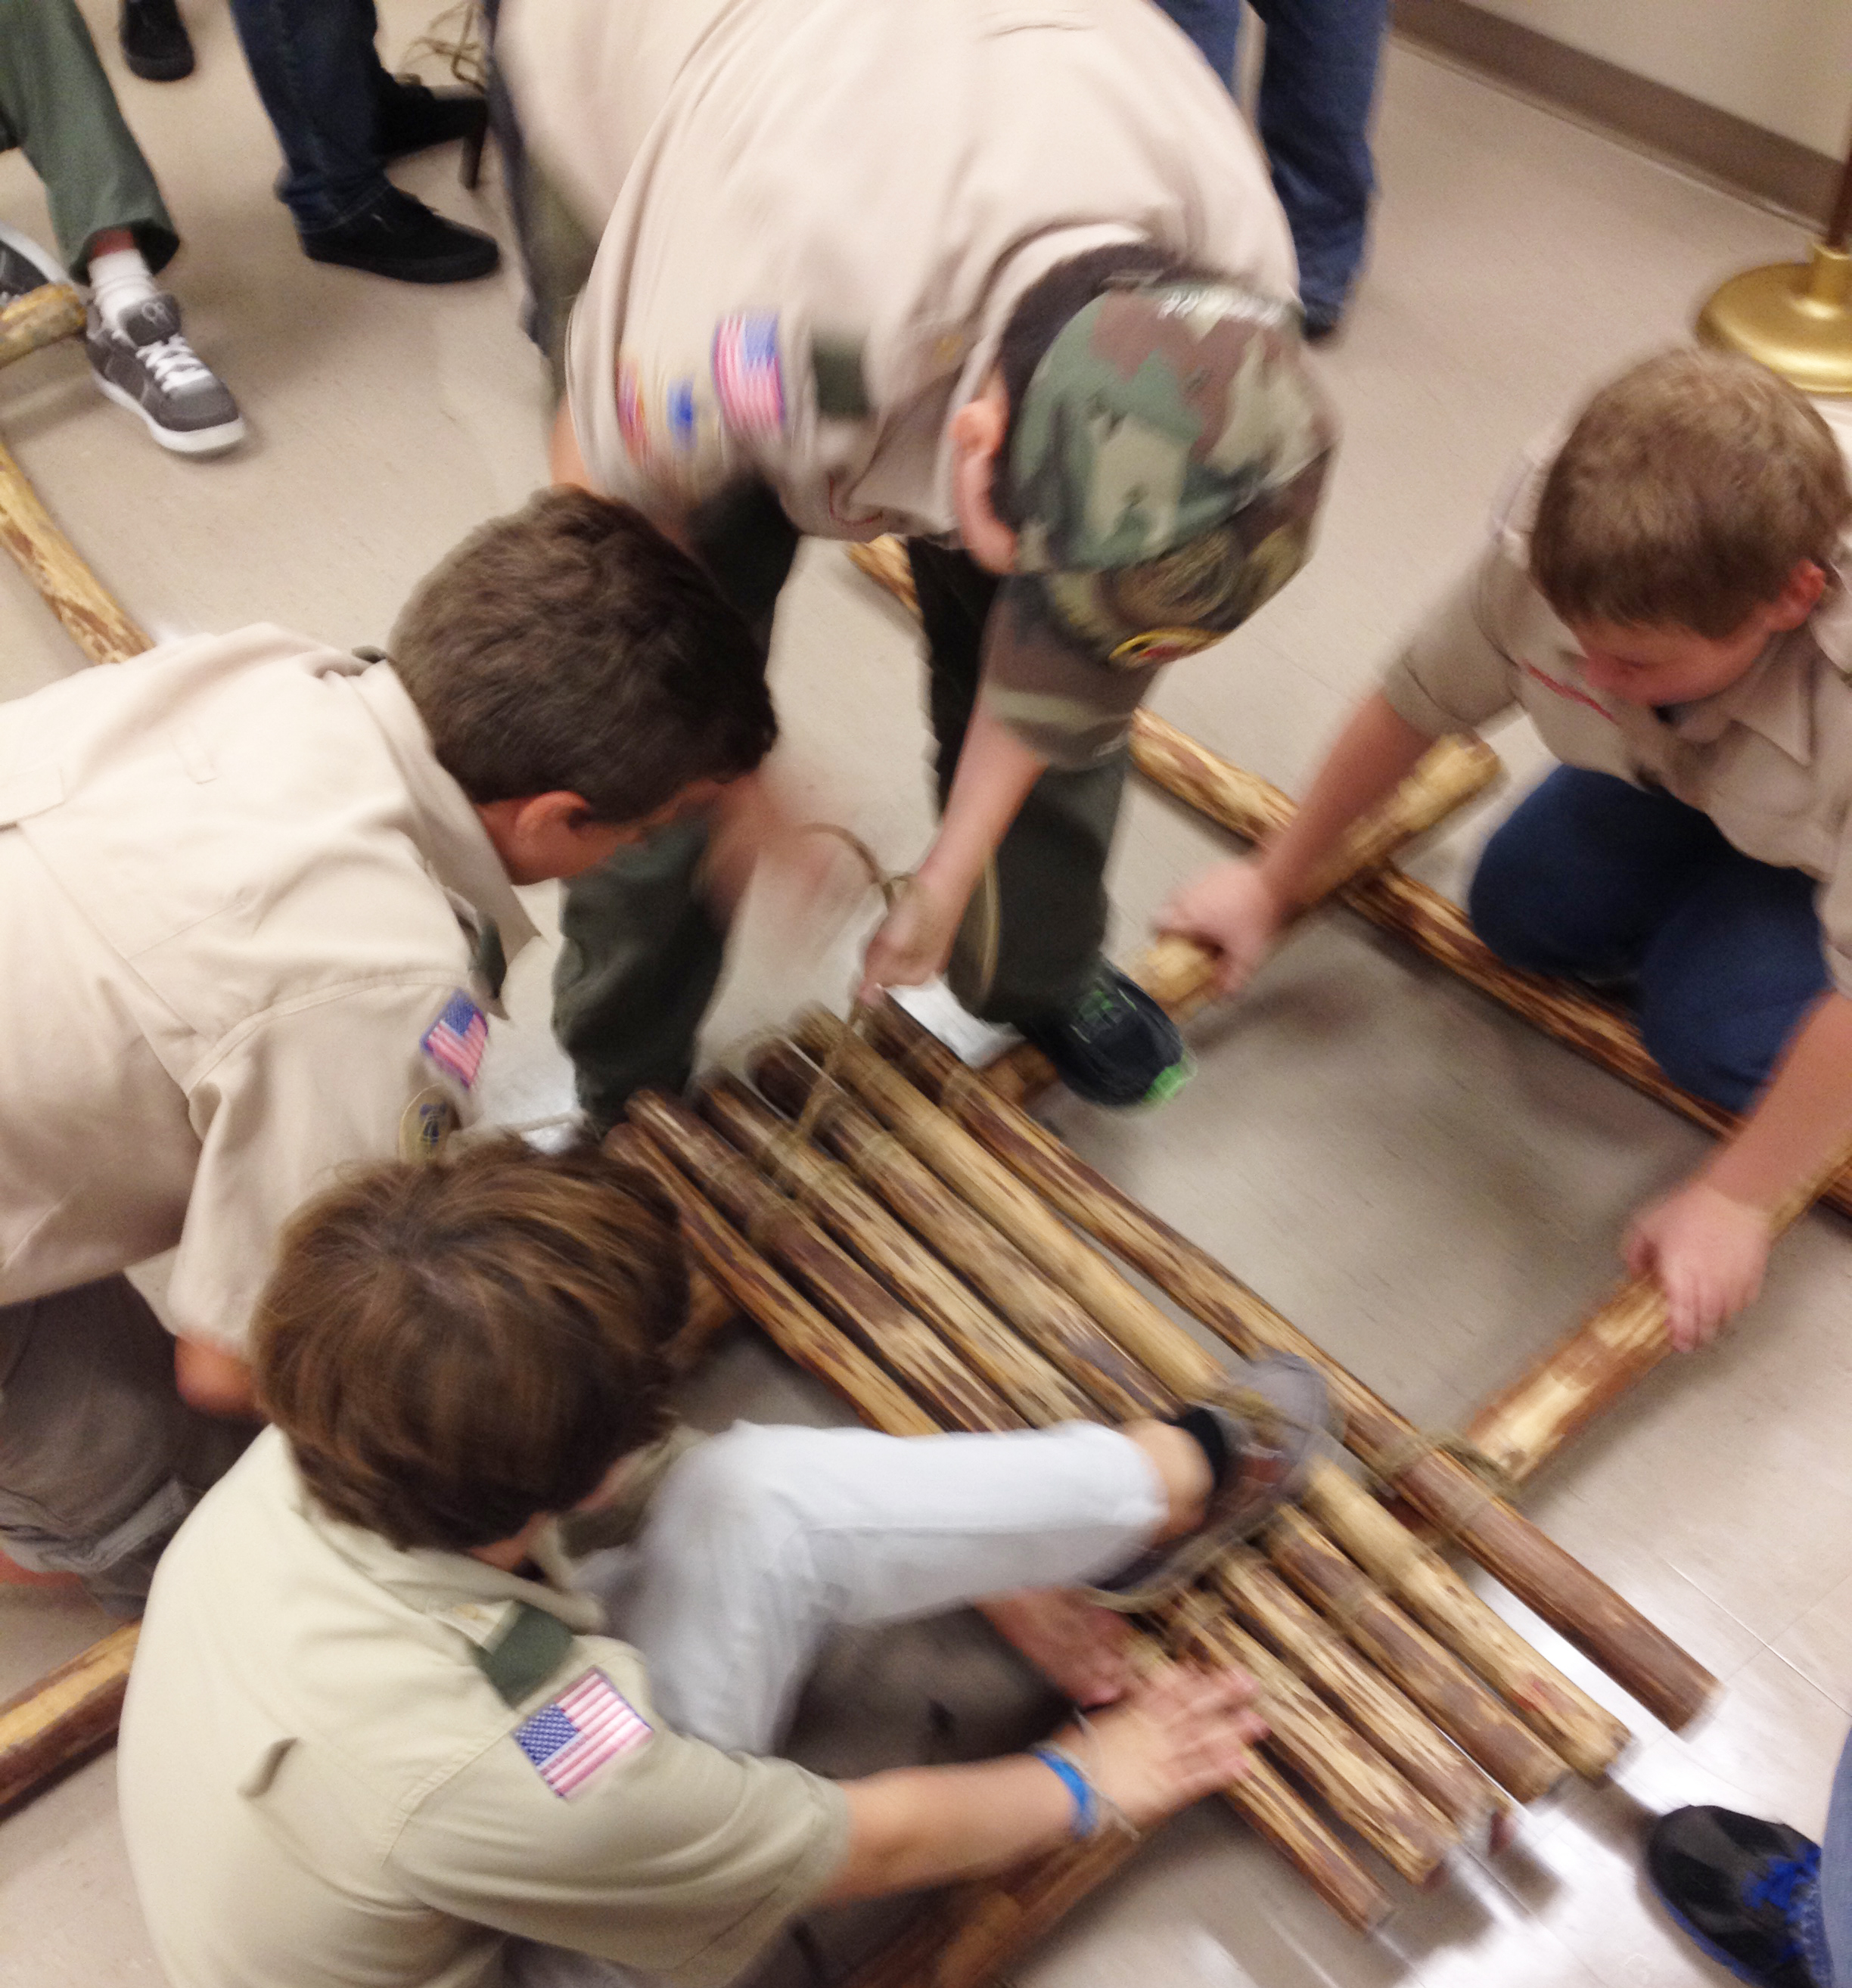
In the ever-important pursuit to pair each knotting and lashing instructional session with a fun activity that puts the newly-acquired skill into action, here’s a simple one that can be used as an entertaining culmination in conjunction with learning the Double Floor Lashing. Besides being lots of fun, the simple structure can subsequently be used to add some levity when making an entrance or forming a procession during Scout gatherings. It’s along the same lines as carrying an individual on the shoulders to express admiration. But, it’s much more “glamorous” and a whole lot more regal! Here’s all you’ll need for each patrol:

  • two 6-foot x 3-inch spars as carrying poles
  • six 3-foot x 2-foot platform spars as the seat
  • two 20-foot lashing ropes
The Floor Lashing has to be Tight!

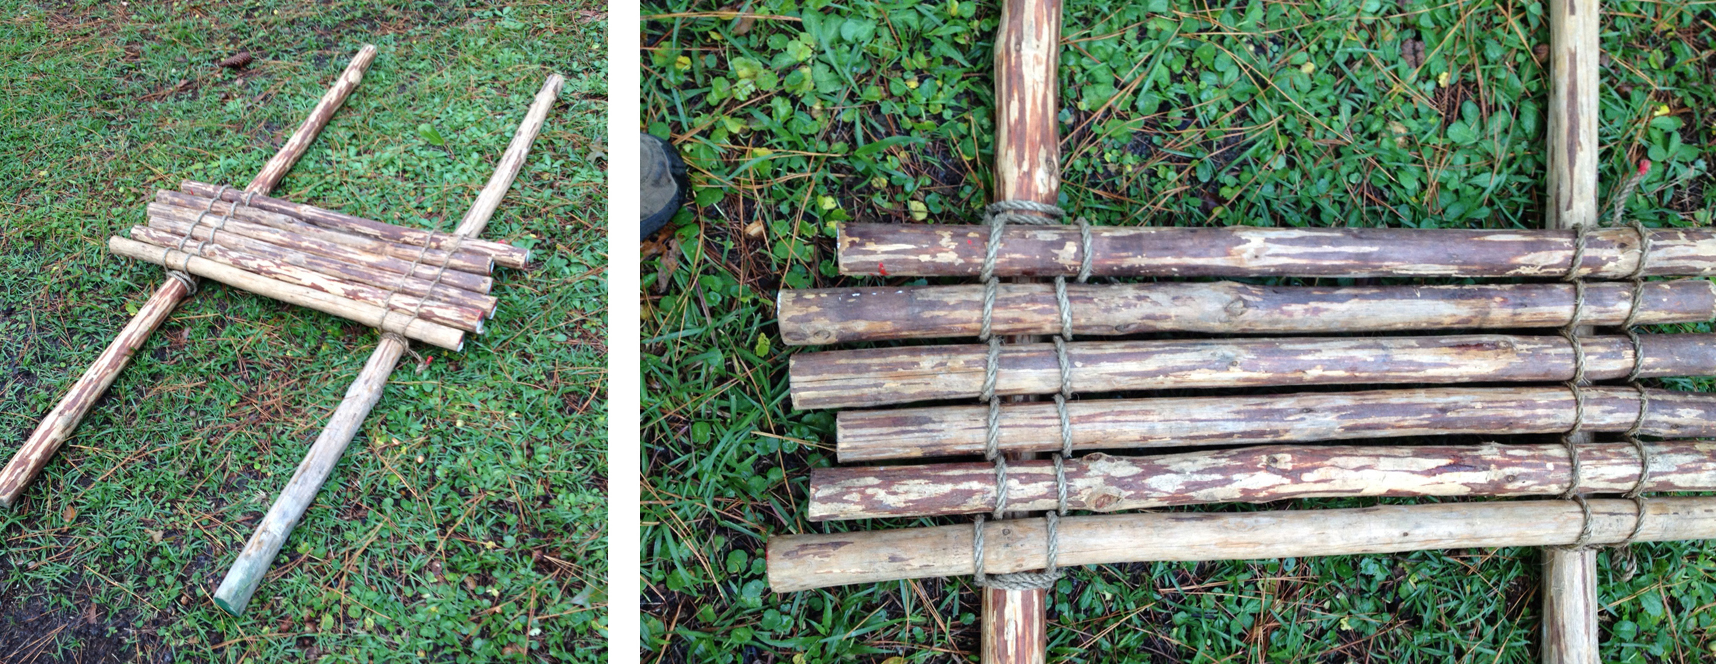
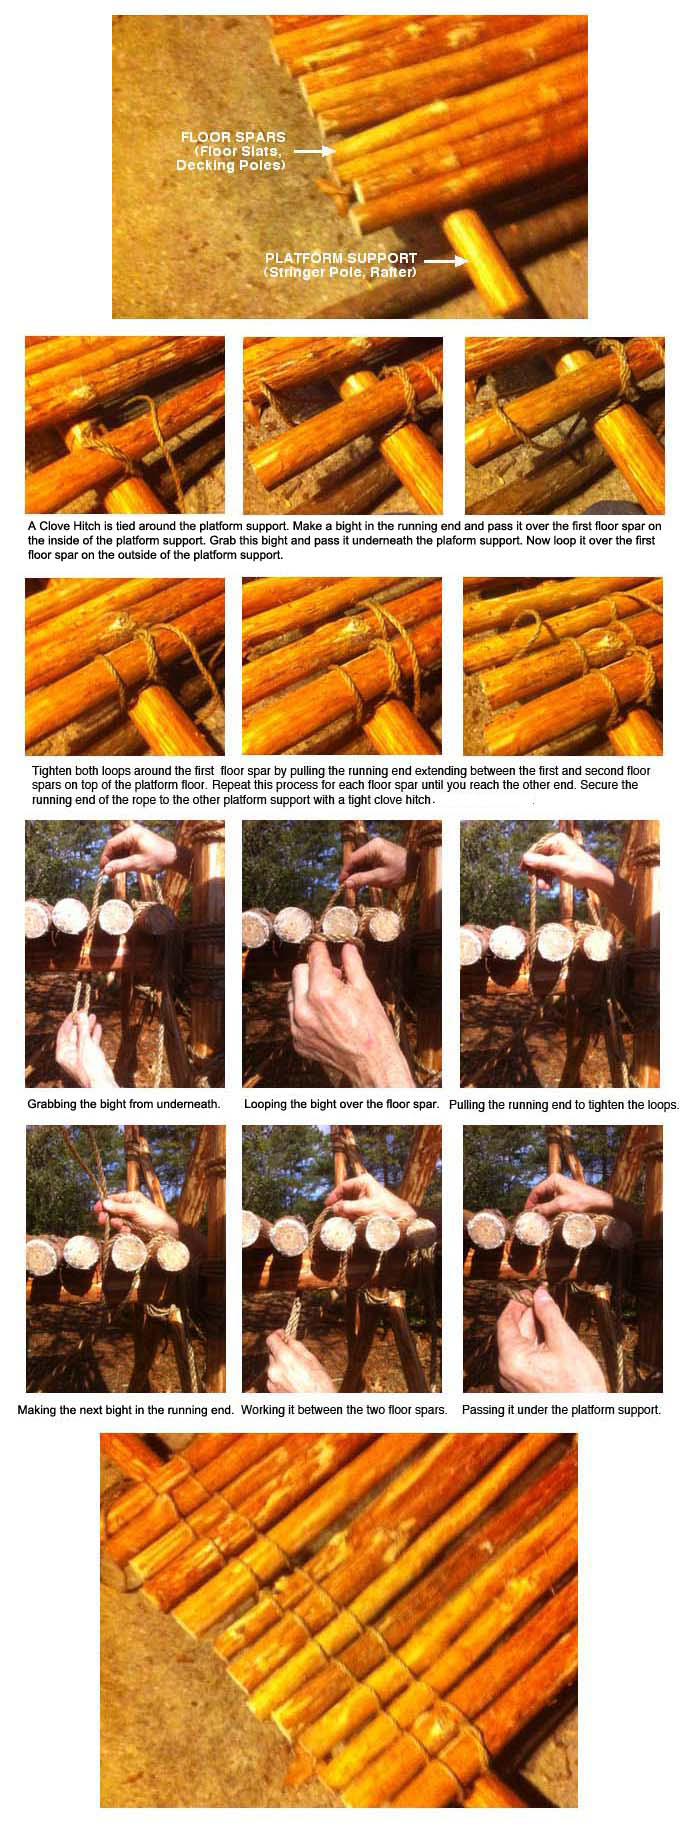
The procedure’s just as simple as the materials. The patrol lays the two 6-foot spars parallel to one another and lashes on the 3-foot platform poles with two floor lashings using the lashing ropes. That’s it. One thing is necessary, though—the Floor Lashing has to be pulled tight after binding each individual platform spar. No square lashings are used to connect the carrying poles, just the floor lashings. Of course, to make the lift seat more secure for repeated use, the carrying poles can be connected at each end with an additional 3-foot spar and two square lashings. And if you want to really get elaborate, lash together a framework over the platform using Scout Staves, and add a lattice work of braided nylon cord. While your at it, lash on one or more flags!

Th Most Simple Construction for a Lift Seat
The Most Simple Design for a Lift Seat

Double Floor Lashing

VIEW VIDEO: How to Tie a Double Floor Lashing


View the pictorial illustrations below!
Scroll down for a revealing pictorial illustration!

With the Double Floor Lashing, the floor spars (floor slats, decking poles) are attached (looped) in two places, on either side to each platform support (stringer pole, rafter). This means, when pulled tight, this lashing makes the platform floor, raft, deck, or walkway, more secure. View Video

  • The lashing starts with a simple clove hitch around a platform support on the inside of the first floor spar. Secure the short end of the rope by wrapping it round the running end forming a twisting pattern in the same direction as the rope’s weave.
  • Make a bight in the running end and pass it over the first floor spar on the inside of the platform support.
  • Grab this bight and pass it underneath the platform support.
  • Now loop it over the first floor spar on the outside of the platform support.
  • Tighten both loops around the first floor spar by pulling the running end extending between the first and second floor spars on top of the platform floor.
  • Repeat this process for each floor spar until you reach the other end.
  • Secure the running end of the rope to the other end of the platform support with tight half hitches.

NOTE: Throughout the whole Double Floor Lashing process, except when pulling the running end to tighten the loops around each floor spar (or securing the end of the rope to the platform support), you’re always working with a bight in the rope.

The whole process can be done simultaneously on the other platform support, or completed one support at a time.

Double Floor Lashing

Depending on the size of the platform, a good length of lashing rope is needed for this floor lashing—a 50-foot length for a platform six feet long, a 35-foot length for a four foot platform. Shorter lengths can always be tied together if you run out of running rope during the process. When building a platform that will be walked over or stood upon, use 1/4-inch manila. If you’re lashing a platform for a Chippewa Kitchen, binder twine works fine.