A Scoutmaster had the pleasure of witnessing one of the patrols in his troop out-perform 30 others at a council camporee. What’s significant was they were competing in an activity they had never tried before. Why were they so successful? Simple. They knew how to work well together. The interpatrol challenges at their troop meetings back home provided repeated opportunities to hone their teamwork skills—each was a team building challenge. Many required pioneering skills and were preparatory to building various pioneering structures, and the process gave rise to knowing how to pitch in and get the job done.
Pioneering requires good, cooperative teamwork. Without it, the project just won’t get built. As necessary as it is to have the required skill sets under their belts, the crew tackling the construction of any larger pioneering structure will also need to put into action all the qualities embodied in the execution of solid teamwork.
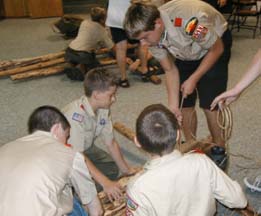
Scout patrols are teams. In order to get things done, especially on an outing, they must communicate, cooperate, and pull together. A good team building event furnishes each patrol member with a way to contribute to the successful accomplishment of the task at hand. Besides being challenging and fun, effective Team Building Activities afford a patrol the opportunity to pool their resources and share leadership. Of course, amongst the team members, there’s always plenty of provision for providing helpful support, along with a good show of Scout spirit.
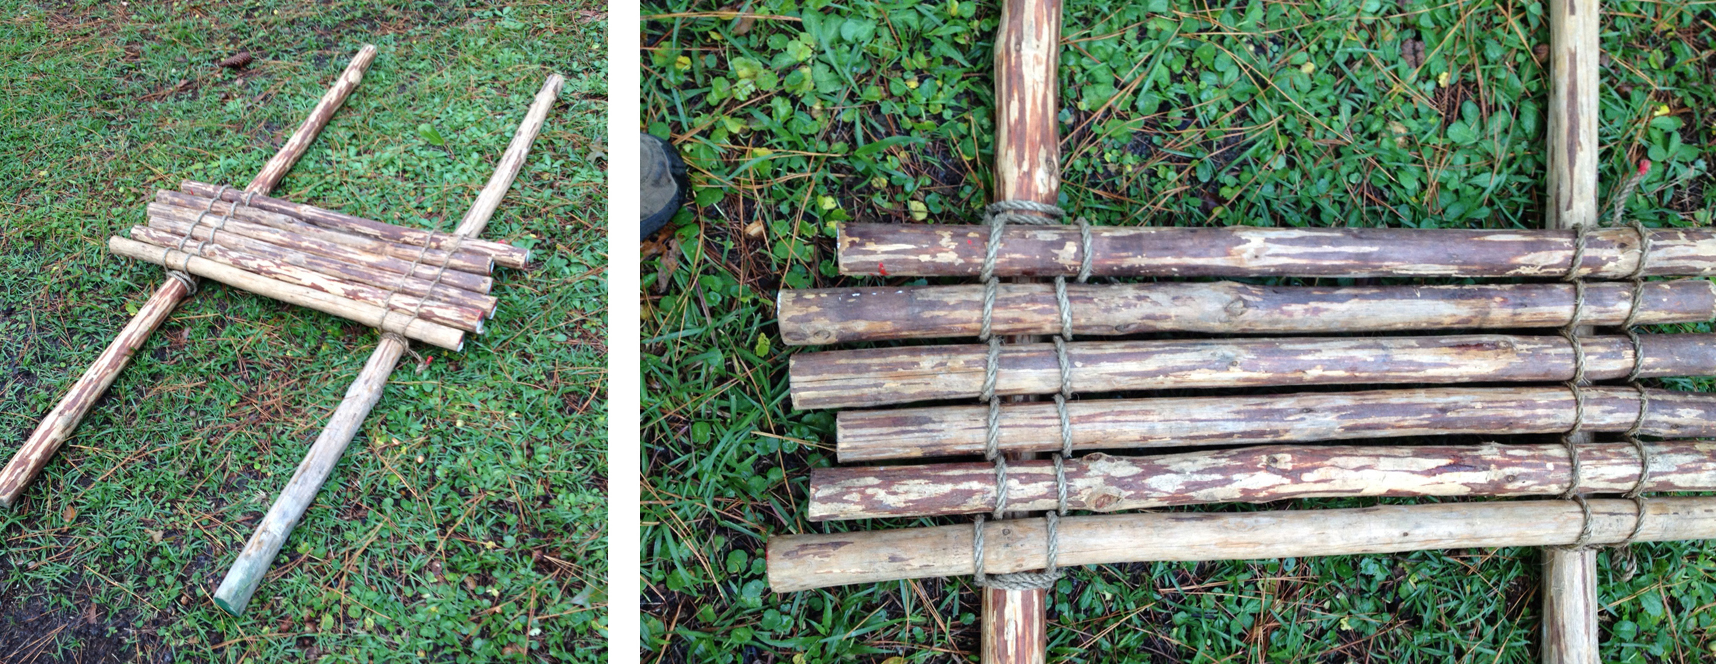
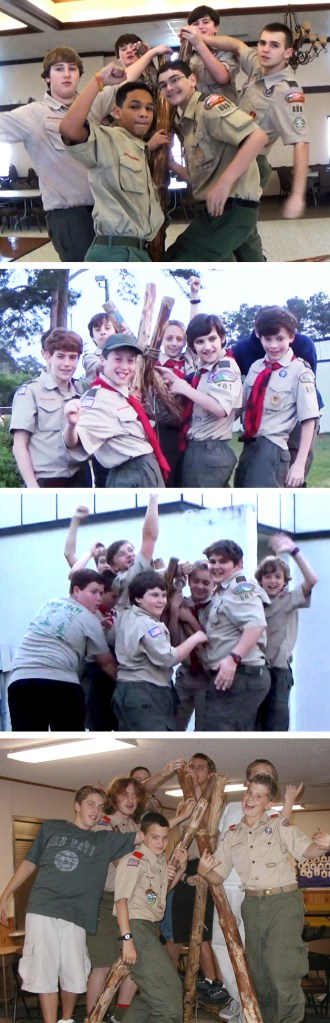
In the ever-important pursuit to pair each knotting and lashing instructional session with a fun activity that puts the newly-acquired skill into action, here’s a simple one that can be used as an entertaining culmination in conjunction with learning the Double Floor Lashing. Besides being lots of fun, the simple structure can subsequently be used to add some levity when making an entrance or forming a procession during Scout gatherings. It’s along the same lines as carrying an individual on the shoulders to express admiration. But, it’s much more “glamorous” and a whole lot more regal! Here’s all you’ll need for each patrol:
two 6-foot x 3-inch spars as carrying poles
six 3-foot x 2-foot platform spars as the seat
two 20-foot lashing ropes
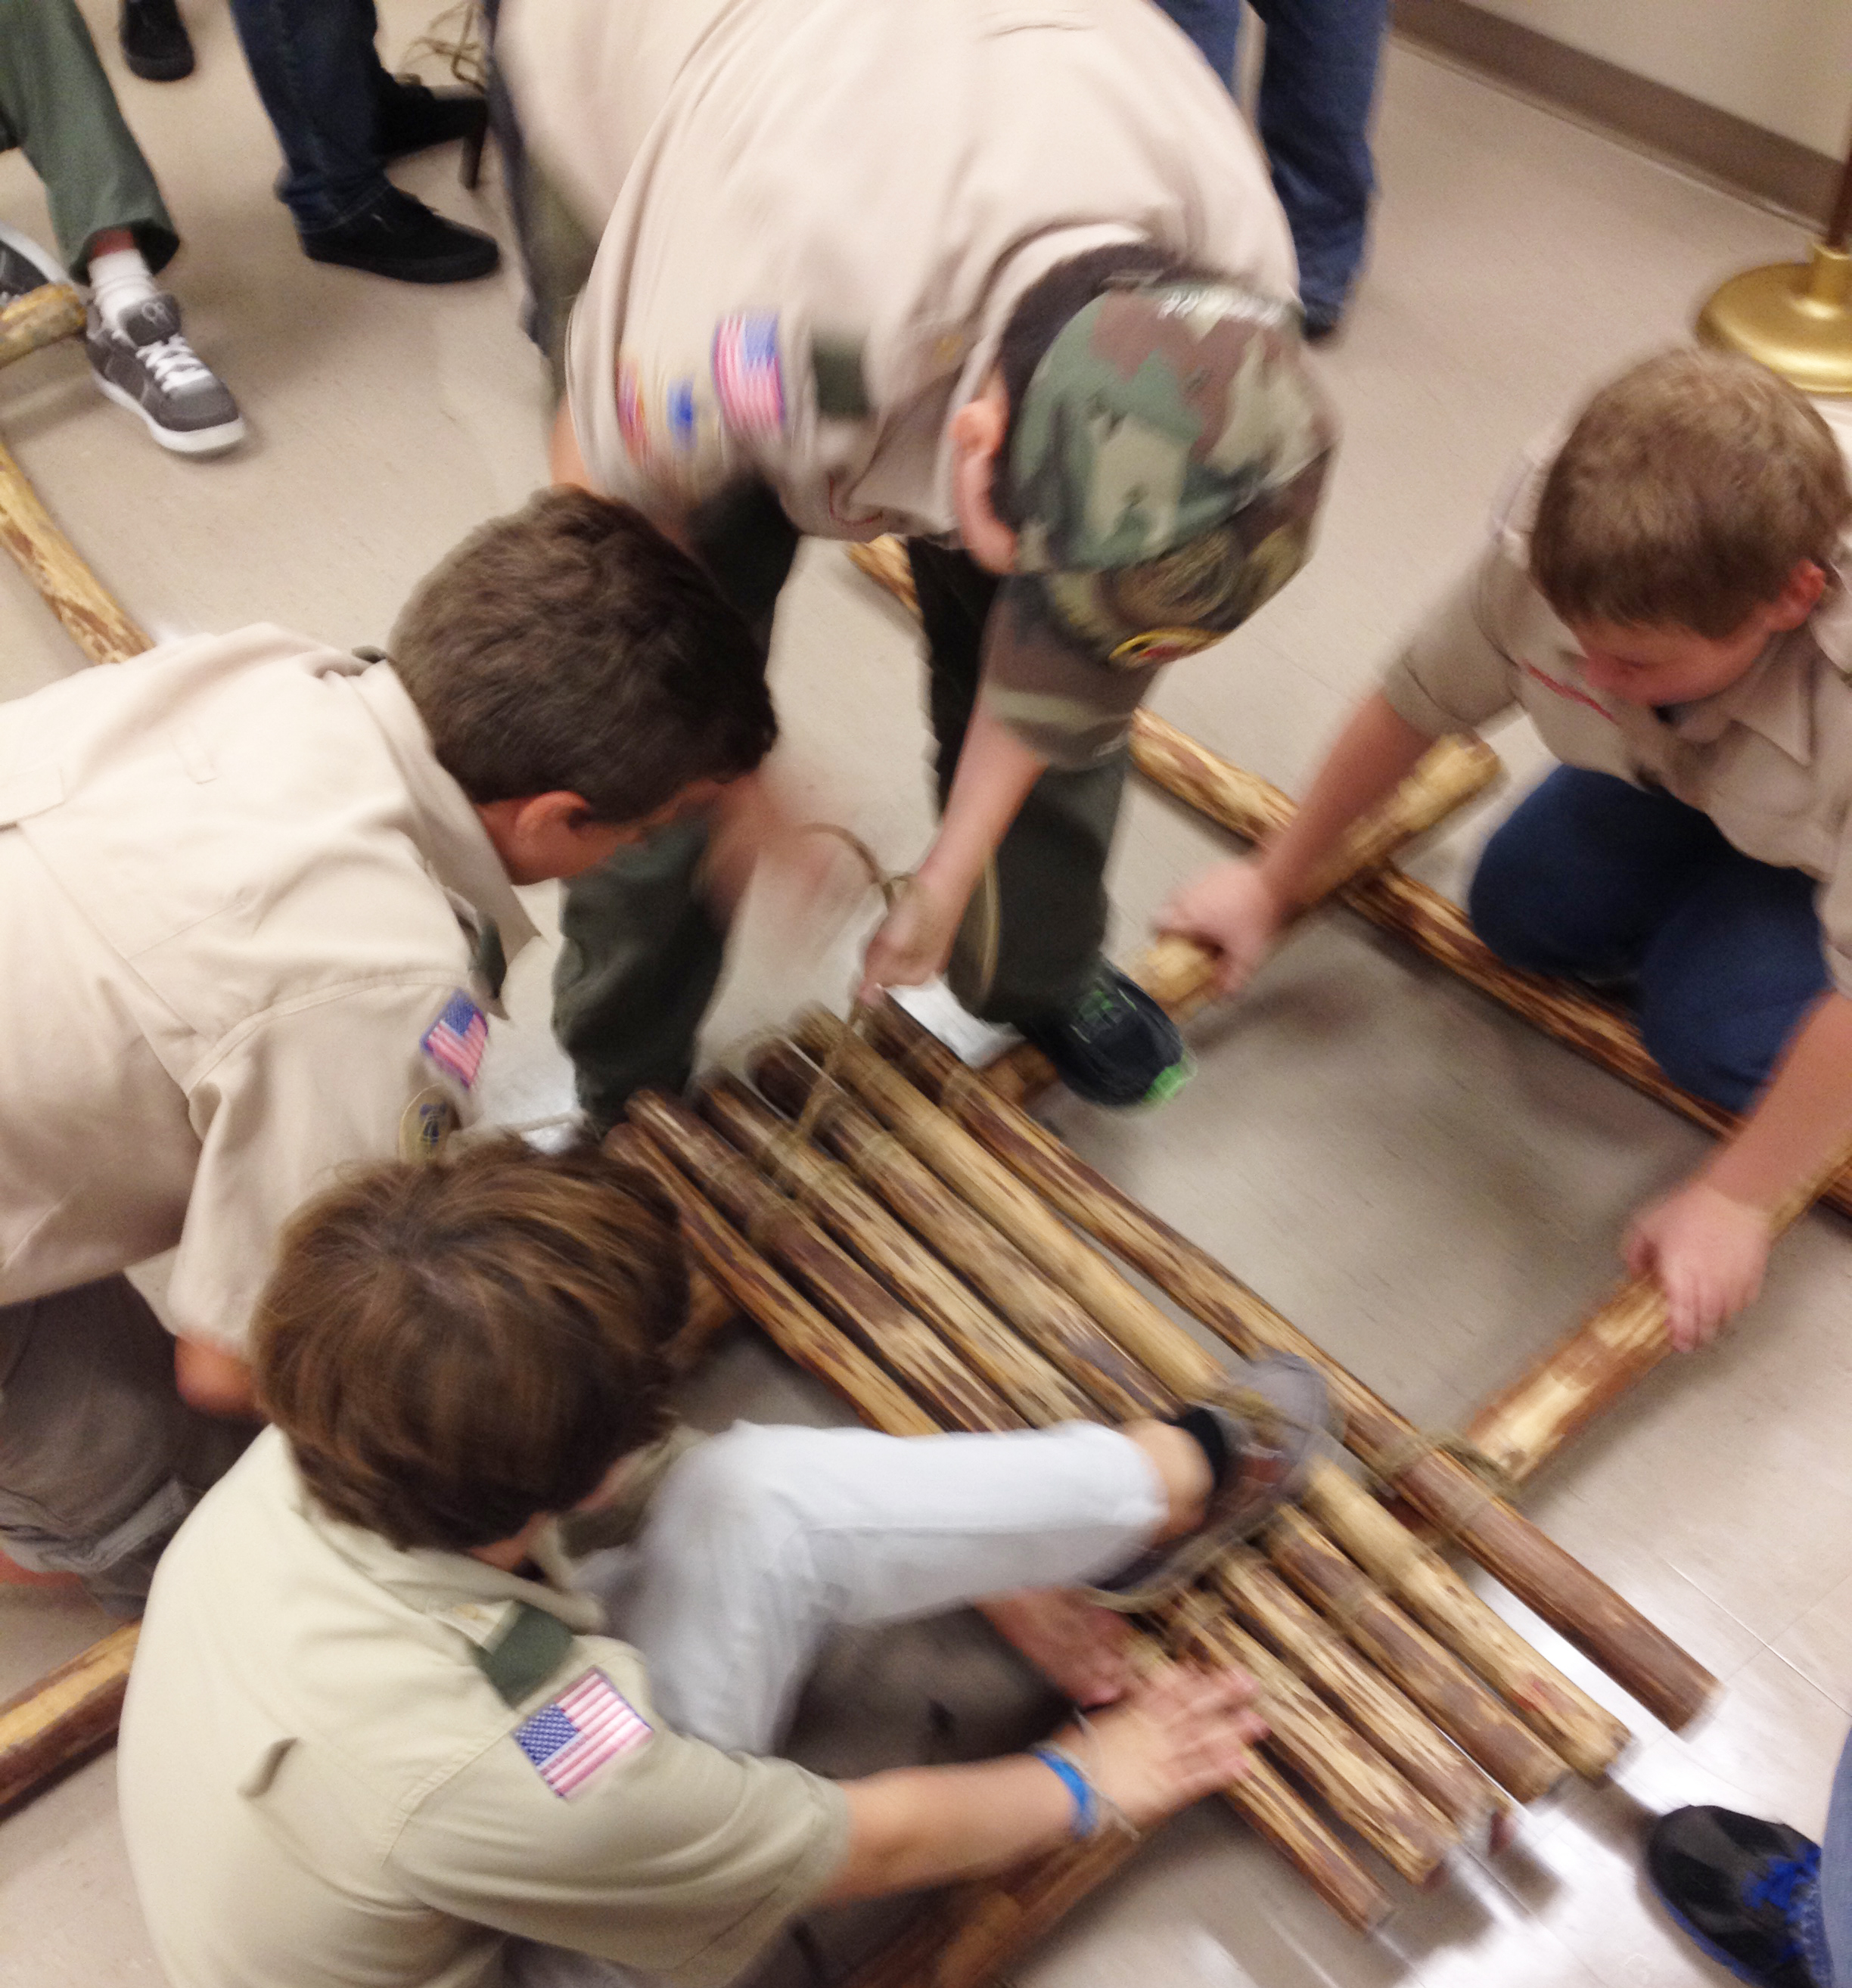
The Floor Lashing has to be Tight!
The procedure’s just as simple as the materials. The patrol lays the two 6-foot spars parallel to one another and lashes on the 3-foot platform poles with two floor lashings using the lashing ropes. That’s it. One thing is necessary, though—the Floor Lashing has to be pulled tight after binding each individual platform spar. No square lashings are used to connect the carrying poles, just the floor lashings. Of course, to make the lift seat more secure for repeated use, the carrying poles can be connected at each end with an additional 3-foot spar and two square lashings. And if you want to really get elaborate, lash together a framework over the platform using Scout Staves, and add a lattice work of braided nylon cord. While your at it, lash on one or more flags!
Why troop meeting pioneering activities? Because a race or challenge revolving around pioneering skills is involving and fun, and requires cooperation and teamwork. Choosing a successful activity is a sure-fire proposition—there are a host of pioneering-related Scout meeting challenges that are tried and true and ready to do. Just make sure the Scouts are ready to put the skills into action before implementing the activity.
What are pioneering skills? They’re definitely more than just knowing the ropes.
Knots
Lashings
Organization
Planning
Teamwork
What makes it fun? One thing about pioneering—it’s primarily a twofold process. First something’s built, then something’s used (enjoyed). So, when pioneering skills are a central focus of the interpatrol event, the element of fun ultimately enters the picture as the challenge’s culmination! For example, Everyone on the Tripod is a wonderful interpatrol competition. If the challenge was for each patrol merely to race and build a tripod, the activity would be a dud. It’s that final act where everyone gets to climb on board resulting in the inevitable smiling and cheers of success that make it fun! Simple concept, right? By the same token, the real fun is not building an H-Frame Trestle to make a chariot, it’s racing it; it’s not joining Scout Staves together to make a long fishing pole, it’s catching the rat trap; it’s not constructing a Scout Stave Launcher, it’s seeing how far and accurately it can launch projectiles.
Chariot races are fun and here’s about the easiest version around. Once Scouts are familiar with the shear lashing and square lashing, they can make an A-Frame to serve as a simple carrying structure (chariot). The race can be run in a variety of ways:
The Simple Pick Up and Carry Approach
Pick up the chariot and carry it (advisable if the playing field is a well-cared for lawn)
Drag the chariot (works well in wide open fields)
Run relay-style heats on a short course (where space is limited)
Lay out a longer course
Materials for each Patrol
two 8-foot x 4-inch spars for the A-frame legs
one 6-foot x 3-inch spar for the ledger
three 15-20-foot x 1/4-inch manila lashing ropes
Shear Lashings are Applied to the Tips of the Legs
Procedure Patrols discuss their plan of attack. It’s decided who is to tie what lashings, who is to assist, who will ride and who will carry (or drag as conditions dictate).
A-Frames are Formed
On signal, patrols lash together an A-frame using a shear lashing at the tips of the 8-foot spars and square lashings at the butt ends for the 6-foot ledger. (If desired, three square lashings can be tied.) When the chariot is built, it is raced around a preset course or to a turn around line and back.
The Atomic Pile provides an excellent opportunity for team building while also effectively honing individual leadership skills. Additionally, it can provide an opportunity to test what can be termed “group leadership,” which will manifest to a greater or lesser degree the ability of a group to lead itself when there is no one assigned the leadership role.
The following Atomic Pile structure is only one simple version, designed for short-term use. It works very well during a troop meeting. When featured for extended use, like at a camporee or public gathering, a more solidly-built construction is in order.
The log is steadied on top of a corner square.
Suggested Materials
four 8 to 10-foot x 2-inch poles for corner uprights
twelve 4-inch diameter wooden discs -or- 4-inch squares of lumber, four of them painted with the numeral “5,” four with “10,” and four with “20”
one 4-inch diameter log, 15 inches long with a large eye hook on one side and a flat, even surface on the other
four small single pulleys
four 40-foot lengths of 1/4-inch braided nylon cord for the pulleys
four 25-foot lengths of 1/4-inch braided nylon cord for the boundary lines and guylines
four 3-foot lengths of 1/8-inch nylon cord to attach pulleys to the corner uprights
four 30-inch pioneering stakes to stabilize the corner uprights
eight 10-15-foot x 1/4-inch manila lashing ropes for connecting the pioneering stakes to the uprights
four smaller stakes for the guylines, to help steady the corner uprights
Atomic Drop Components
BUILDING THE STRUCTURE
Putting up an Atomic Pile activity is well within the capability of most patrols, and by dividing the tasks, can be completed in under 30 minutes. However, building the Atomic Pile is not as key to team building and leadership development as is actually using the structure.
How will the corner uprights stay erect? It will be impractical to keep the corner uprights in a rigid vertical position with three guylines like a flagpole. So, you’ve got three choices to hold them up:
Use a post hole digger to sink the uprights into the ground deep enough to firmly support them.
Drive in a pioneering stake and then lash the upright to the stake to hold it up.
Do both 1 and 2 (often recommended).
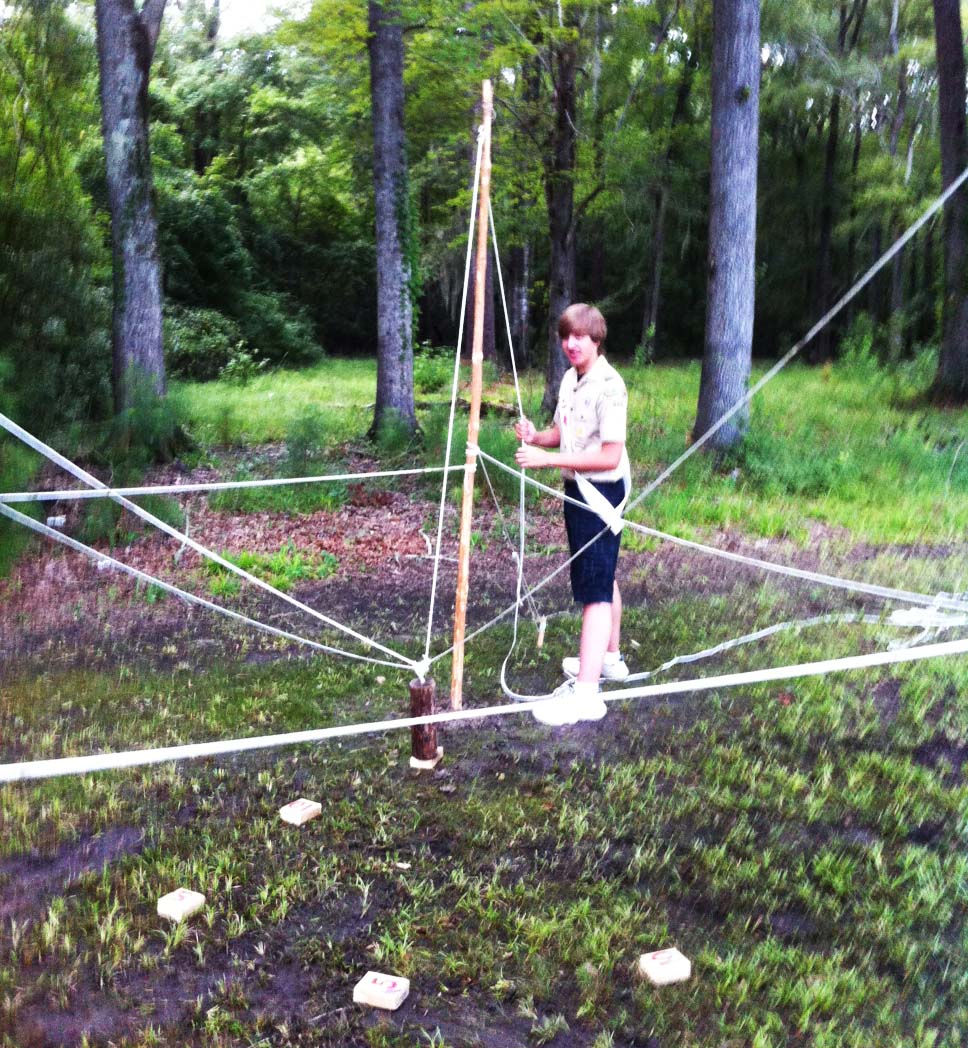
Raise the corner uprights. In the flat place the Atomic Pile will be situated, lay the 10-foot poles out in a 10′ x 10′ square. Just outside the 90° angle formed by the poles, either dig a hole deep enough to support the first upright, or firmly drive in a pioneering stake straight into the ground.
Boundary Cords / GuyLines
Before standing up the pole, using a 3-foot cord, attach a pulley about an inch from the tip with a prusik. Wrap the cord as many times as needed so the pulley hangs down a couple of inches. Using a 40-foot cord, reeve one end through the pulley and then tie that end to the eye hook of the 4-inch-diameter log with a roundturn with two half hitches. Place the log in the center of the square.
When you’re ready, place the butt end of the pole into the hole and tamp it down firmly, or lash the butt end tightly to the pioneering stake with two round lashings. Of course, depending on how rigid the pole is standing, as needed, do both.
Repeat the process for the three other corner uprights.
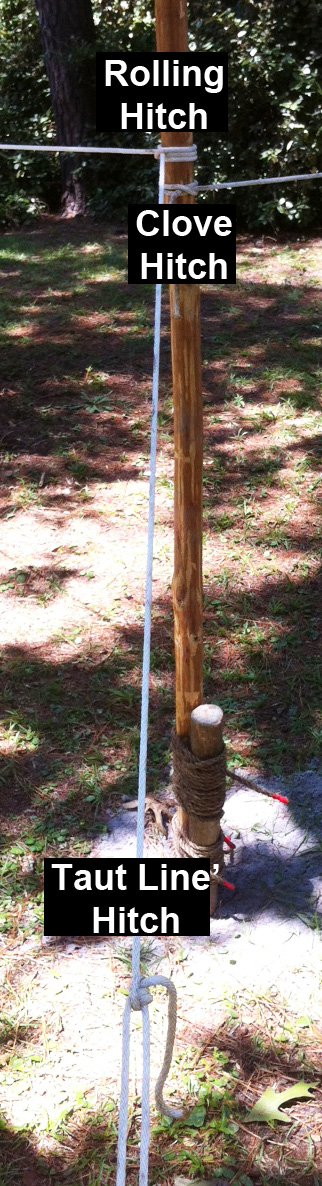
Tie on the boundary lines. About 4 feet up from the ground, with a clove hitch, tie one end of a 25-foot cord to a corner upright. Walk the cord to the next pole in the square and with a rolling hitch, tie it on so the cord is parallel to the ground, keeping the line taut. The running end of the cord should extend out about 15 feet from where the rolling hitch was tied. This will serve as a guyline for that corner pole.
Repeat the process with the other three 25-foot cords, starting with a clove hitch tied right next to the rolling hitch.
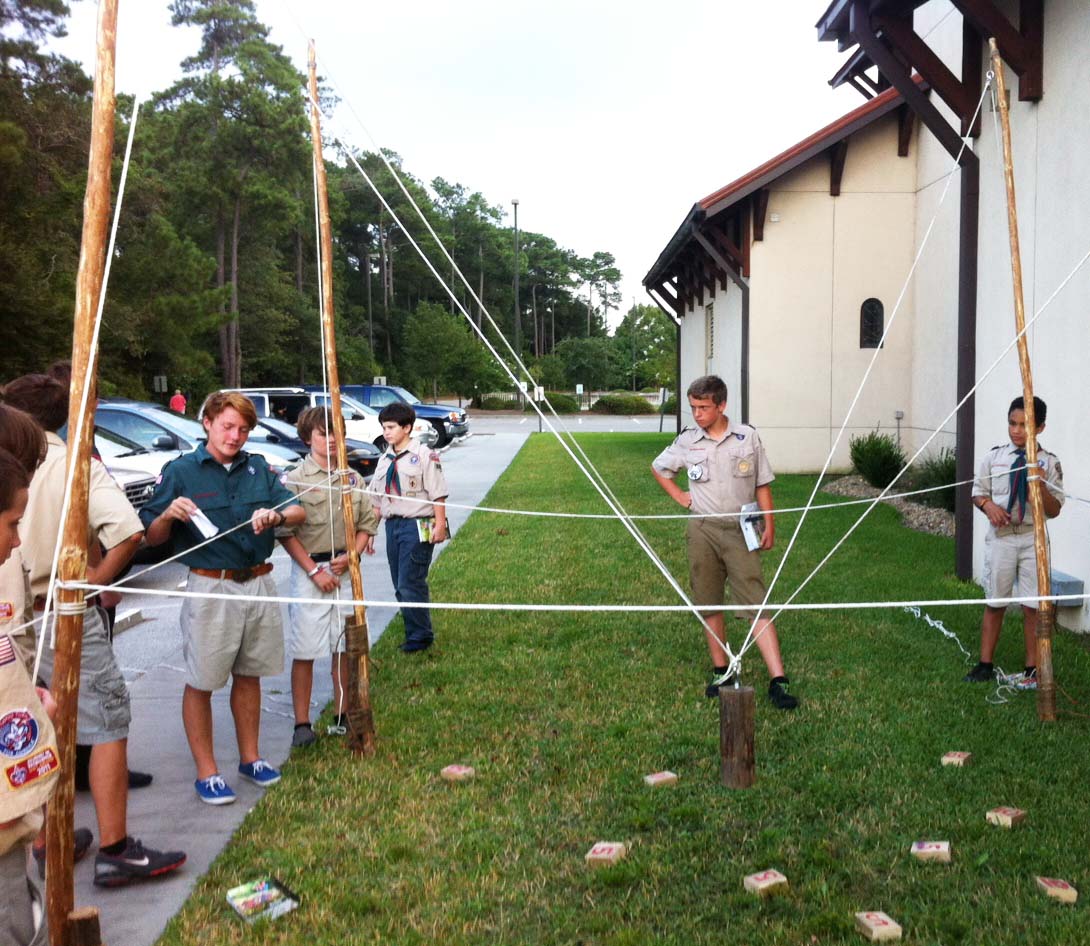
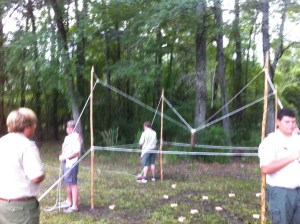
Set up for a Troop Meeting and Played with during Pre-opening Gathering Period
Secure the guylines. Firmly hammer in a smaller stake 45° out from each corner upright, about 8 feet away. Attach the length of cord extending from the rolling hitch to the stake with a taut-line hitch. Pull it tight. This will add a little extra support.
The only thing left to do is position the 4 inch discs or blocks inside the 10′ x 10′ square. The four 20s can be placed near the corners, the 5s can be placed near the center, and the 10s between the center and the corners.
Scouts face away from the “Atomic Pile” and rely on the leader’s directives.
Challenges. An Atomic Pile presents a variety of alternatives in the way of activities, and even spectators are afforded their own form of entertainment observing the progress and prowess of those at the pulley ropes. This is especially pronounced when patrol teams compete against one another.
Within a preset time limit, using a heads on approach, groups of four can be challenged to balance the log for five seconds on as many discs (or blocks) as they can. This simple challenge can be self-led, that is, without a fifth Scout issuing commands, or can be conducted with an assigned leader who does not handle a pulley rope.
Instead of the quantity of discs, scores can be achieved in accordance with the point value painted on each disc.
Scouts man each pulley rope, but instead of facing the square, each must turn their back to the discs. Naturally, in order to maneuver the log from this position, they must rely on an assigned leader to direct their actions.
Incorporating the Atomic Pile into the meeting.
The Atomic Pile can be utilized by groups of Scouts during the gathering period preceding the opening ceremony.
During the meeting, individual patrols can be assigned a period where they engage in the activity by themselves, either to hone their leadership skills or practice for an interpatrol competition.
As an interpatrol activity, patrols can enter their teams to compete against one another in any of the challenges listed above.
The real challenge built into this activity comes into play after the lashing is finished. The patrol is simply building a very well-lashed A-frame. As with all pioneering endeavors, teamwork is essential. With this interpatrol challenge, it’s absolutely necessary! Cossing the Alligator Pit affords a superlative team building opportunity. Read about and view one patrol’s very impressive accomplishment!
Alligator Pit
Materials for each patrol:
two 8-foot x 4-inch spars to serve as A-frame shear legs
one 6-foot x 3-inch spar to serve as a ledger at the base (crossbar)
three 15-foot x 1/4-inch lashing ropes
six 20-foot x 1/4-inch lashing ropes (for guylines)
Method: The “Alligator Pits” are marked on the ground, one for each patrol, 15′ x 15′ square. Patrols line up on one side of their pits. On signal the patrols lash together an A-Frame “walker” using either three square lashings or two square lashings with a shear lashing at the top. At the top they attach two 20-foot lashing ropes, and attach two more ropes at each corner of the crossbar, using roundturns with two half hitches. These are the guylines. The patrol then stands the “walker” upright, and one member climbs on the crossbar. One Scout mans each guyline to help steady and to help propel the Scout on the crossbar as he tries to “walk” the A-Frame across the pit. Only the A-frame “walker” is allowed inside the pit. Note: This activity should only be held indoors if the floor is carpeted. Generally, tile or wood floors will be too slippery and hence minimize the likelihood of success.
Great Team Working Challenge! (Each Scout handling a guyline needs to be vigilant!)
Some years ago a newly-formed and very young troop, barely a year old, attended a Council-wide Camporee. One of the patrol competitions was an Everyone on the Tripod race. They entered three patrols. When the smoke cleared, and the judging was completed, out of over fifty patrols present at the camporee, they placed first, second and third. Why? Well, one reason was they were familiar with the activity having done it at a couple of troop meetings as an interpatrol competition. But, perhaps the main keys to their new-found success was they had an active pioneering program in place, and had been taught the Mark II Square Lashing and the tripod lashing found in an old edition of the BSA Fieldbook (Tripod Lashing with Plain Turns).
This is a WONDERFUL interpatrol challenge!
Lashing the Tripod Legs Together
Materials required for each patrol:
three 8-foot x 3 to 4-inch tripod leg spars
three 6-foot x 3-inch tripod support spars
six 15-foot x 1/4-inch lashing ropes
one 20-foot x 1/4-inch lashing rope
Here’s the Procedure:
On signal, patrol members lash the three 8-foot spars into a tripod, using the 20-foot rope.
Lashing on the Support Spars
When finished, they set up the tripod and using six square lashings, lash a 6-foot spar between each of the legs.
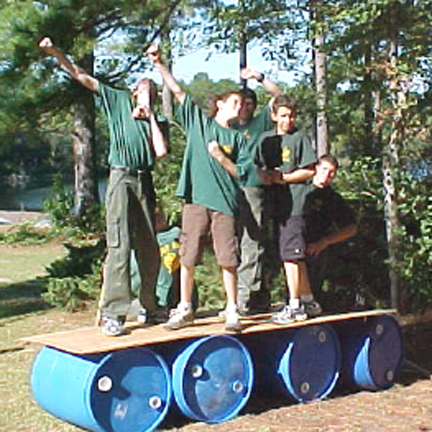
When all lashings are completed and the tripod is strong and secure, all the patrol members stand on the 6-foot spars, making sure their weight is evenly distributed.
Of course, this challenge lends itself equally, if not more so, to being presented outdoors.
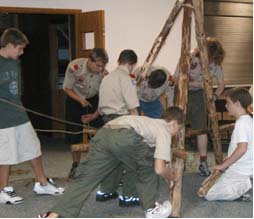
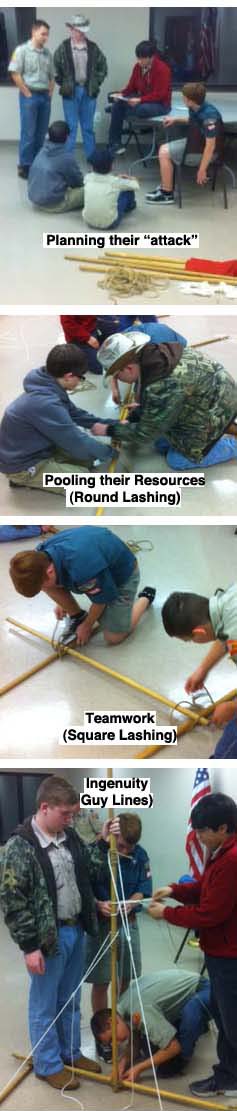
When the patrols have learned their round lashing and square lashing, they’ll be ready for this indoor challenge which gives them an opportunity to use what they’ve learned in a new way. Additionally, they get to plan their “attack,” pool their resources, use their ingenuity, and put into practice the teamworking skills necessary to complete the task.
Materials needed for each patrol:
six 5-foot Scout Staves
seven 6 to 10-foot x 1/4-inch manila lashing ropes
four light guylines
one 15-foot light line (for halyard)
one 3-foot cord (to make top loop for halyard)
two pencil-sized sticks (if needed to secure patrol flag to halyard through existing grommets)
their patrol flag
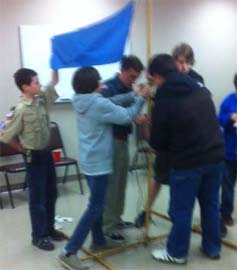
The challenge. Ask the patrols to each build a self-standing flagpole capable of raising and lowering their patrol flag. Have the necessary materials on hand, and present them with the following design:
NOTE: This challenge can be presented without the design! If no design is provided, and just the challenge is given as stated above, the Scouts will be confronted with having to figure out their own approach that will work! However, the design is ingenious and sooner or later worthy of being shared.
Some thoughts:
1) This self-standing flagpole is ideal when a flagpole is desired indoors (or outdoors when there’s no way to drive stakes into the ground or dig a hole).
Set a time limit and make it a race.
2) Depending on the ceiling’s height, the flagpole can be built higher merely by lashing on additional pole sections.
3) To shorten the pole if the ceiling is lower than 10 feet, just round lash two staves together.
4) Naturally, following the design, the Patrol Leader can have members of his patrol divide the tasks so that the pole and the support frame are constructed simultaneously.
Got it up!
5) The method of placing two 5-foot staves end to end, and lashing a third joining stave in the middle where the two others touch can be seen as somewhat of a departure, but will yield a very stable 10-foot flagpole, provided the four Round Lashings are tight and well-spaced.
6) The 3′ cord for the halyard loop can be fastened to the top stave in a variety of ways: a bowline with a clove hitch, a bowline with two half hitches, a doubled over rolling hitch, etc., etc.
7) The guylines can also be attached in a variety of ways (and will be), though rolling hitches around both the pole and the support frame are recommended.