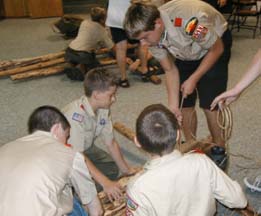
Atomic Pile Team Building ChallengeFrom left to right: Corner Rope Handler, 2 Observers, Signal Caller
This activity is so named because it’s supposed to simulate the manipulation of radioactive graphite discs in an atomic pile. Like all good team building challenges, it requires concentration, cooperation, and strict attention to the Scout who’s calling the signals.
The object of the challenge is to place and balance the log on top of wooden “cookies” (discs). The log is maneuvered by pulling in or paying out line from four ropes, each of which are threaded through a pulley and controlled by an individual Scout. The discs can vary in height, color, position or can be numbered, all to correspond with how many points they’re worth.
An additional test of skill can be introduced by challenging the Scouts handling the ropes to turn around so their backs are facing the log. In this way, they can’t see the position of the log and placement of the wooden “cookies,” and hence must rely only on the verbal commands of the signal caller.
Some years ago a newly-formed and very young troop, barely a year old, attended a Council-wide Camporee. One of the patrol competitions was an Everyone on the Tripod race. They entered three patrols. When the smoke cleared, and the judging was completed, out of over fifty patrols present at the camporee, they placed first, second and third. Why? Well, one reason was they were familiar with the activity having done it at a couple of troop meetings as an interpatrol competition. But, perhaps the main keys to their new-found success was they had an active pioneering program in place, and had been taught the Mark II Square Lashing and the tripod lashing found in an old edition of the BSA Fieldbook (Tripod Lashing with Plain Turns).
This is a WONDERFUL interpatrol challenge!
Lashing the Tripod Legs Together
Materials required for each patrol:
three 8-foot x 3 to 4-inch tripod leg spars
three 6-foot x 3-inch tripod support spars
six 15-foot x 1/4-inch lashing ropes
one 20-foot x 1/4-inch lashing rope
Here’s the Procedure:
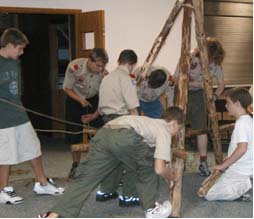
On signal, patrol members lash the three 8-foot spars into a tripod, using the 20-foot rope.
Lashing on the Support Spars
When finished, they set up the tripod and using six square lashings, lash a 6-foot spar between each of the legs.
When all lashings are completed and the tripod is strong and secure, all the patrol members stand on the 6-foot spars, making sure their weight is evenly distributed.
Of course, this challenge lends itself equally, if not more so, to being presented outdoors.
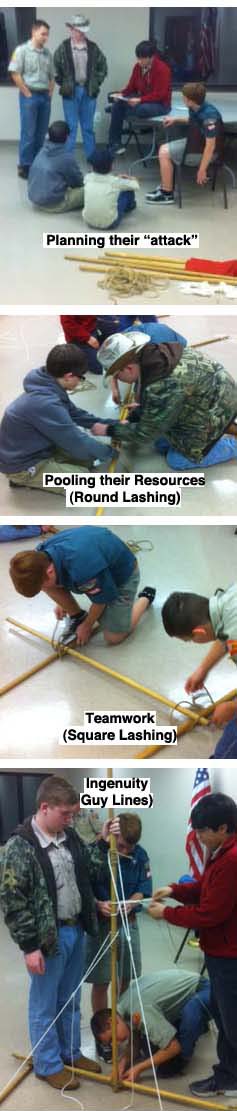
When the patrols have learned their round lashing and square lashing, they’ll be ready for this indoor challenge which gives them an opportunity to use what they’ve learned in a new way. Additionally, they get to plan their “attack,” pool their resources, use their ingenuity, and put into practice the teamworking skills necessary to complete the task.
Materials needed for each patrol:
six 5-foot Scout Staves
seven 6 to 10-foot x 1/4-inch manila lashing ropes
four light guylines
one 15-foot light line (for halyard)
one 3-foot cord (to make top loop for halyard)
two pencil-sized sticks (if needed to secure patrol flag to halyard through existing grommets)
their patrol flag
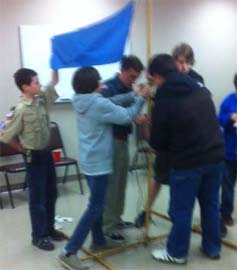
The challenge. Ask the patrols to each build a self-standing flagpole capable of raising and lowering their patrol flag. Have the necessary materials on hand, and present them with the following design:
NOTE: This challenge can be presented without the design! If no design is provided, and just the challenge is given as stated above, the Scouts will be confronted with having to figure out their own approach that will work! However, the design is ingenious and sooner or later worthy of being shared.
Some thoughts:
1) This self-standing flagpole is ideal when a flagpole is desired indoors (or outdoors when there’s no way to drive stakes into the ground or dig a hole).
Set a time limit and make it a race.
2) Depending on the ceiling’s height, the flagpole can be built higher merely by lashing on additional pole sections.
3) To shorten the pole if the ceiling is lower than 10 feet, just round lash two staves together.
4) Naturally, following the design, the Patrol Leader can have members of his patrol divide the tasks so that the pole and the support frame are constructed simultaneously.
Got it up!
5) The method of placing two 5-foot staves end to end, and lashing a third joining stave in the middle where the two others touch can be seen as somewhat of a departure, but will yield a very stable 10-foot flagpole, provided the four Round Lashings are tight and well-spaced.
6) The 3′ cord for the halyard loop can be fastened to the top stave in a variety of ways: a bowline with a clove hitch, a bowline with two half hitches, a doubled over rolling hitch, etc., etc.
7) The guylines can also be attached in a variety of ways (and will be), though rolling hitches around both the pole and the support frame are recommended.