Outdoor skills aren’t just for the monthly campout. There are plenty of ways your Scouts can hone their outdoor skills on a regular basis, like during unit meetings.
Here is this week’s tip that the BSA’s national camping subcommittee shared with us. Special thanks to Larry Green for the tips and text below. For previous camp hacks and tips from the subcommittee, click here.
Once Scouts can demonstrate an acquired skill, they should be given opportunities to do something fun with it that provides a challenge that illustrates how the skill is used, and an opportunity requiring them to rely upon the skill in order to complete the task.
When properly planned, well-prepared, and effectively presented, these kinds of engaging activities contribute greatly to making a Scout meeting fun with positive outcomes.
Putting skills into action keeps Scouts involved, requires them to use teamwork, and provides the grounds for experiencing success. Bringing skills to life during a troop meeting in a manner that nearly simulates the way they’re used in the field, is always a good way to reinforce what Scouts learn, while honing their skills to keep them sharp.
Here are some fun activities and games your Scouts can do while incorporating skills they’ve learned:
50-Foot Rescue Relay
Hitching Race
Taut-line Hitch Race
Reactor Transporter Challenge
For more team-building activities and skills challenges, click here.
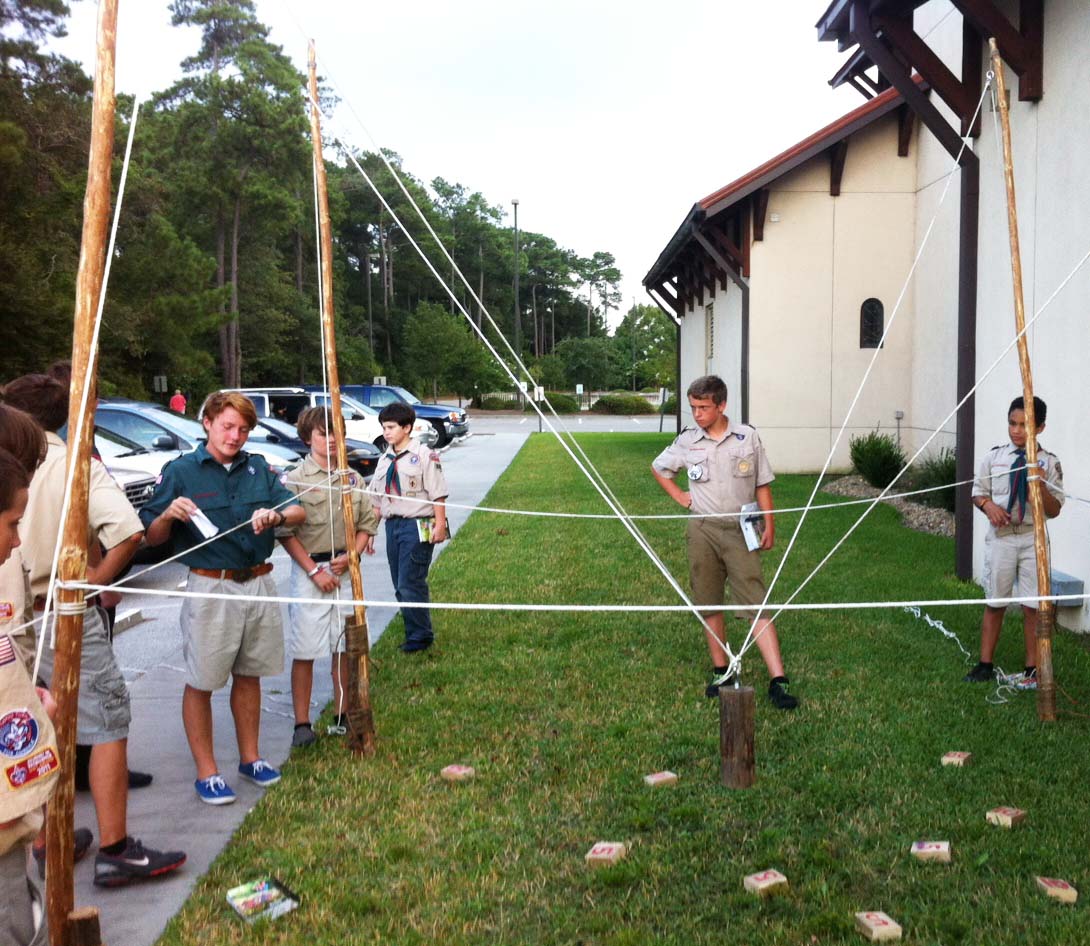
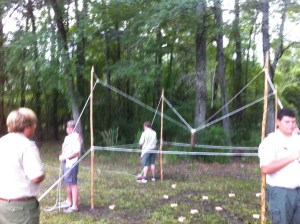
Troop 86 from Sumter, SC wanted to do a pioneering project and they selected the Double A-Frame Monkey Bridge. Great place to start, and a great way to illustrate sequential programming. What skills enter into the picture? A whole bunch! And with each step along the way, there’s an activity wherein each campcraft skill can be put into action, in a fun way, as reinforcement.
B.-P. wrote: “I am inclined to suggest to Scouters that in addition to the technical details of knotting, lashing, and anchorages, there is an educative value in Pioneering since it gives elementary training in stresses, mensuration, etc.” In addition to the “mensuration” skills that come into play when setting out the area for the bridge’s A-frames and anchors, a good deal of measuring takes place to assure the A-frames are as close to identical as possible, the pairs are joined together in similar fashion, an the spanner ropes are spread evenly. (Hand in hand with the building, Scouts do a lot of planning.)
SEQUENTIALLY-PRESENTED SKILLS AND RELATED ACTIVITIES
Open-Ended Clove Hitch – How else would you want to secure the hand ropes to the A-frames? — How-to Video / Activity Video —
Using Half Hitches to tie a Clove Hitch – A simple process always makes it easy to tie a clove hitch and finish many types of lashings. Several are used to attach the spanner ropes. — How-to Video / Activity Video —
Round Lashing – Three or four can be used to join together the bottoms of the A-frames on each side. Round lashings can also be used to attach a flag pole(s) to an A-frame(s). — How-to Video / Activity Video —
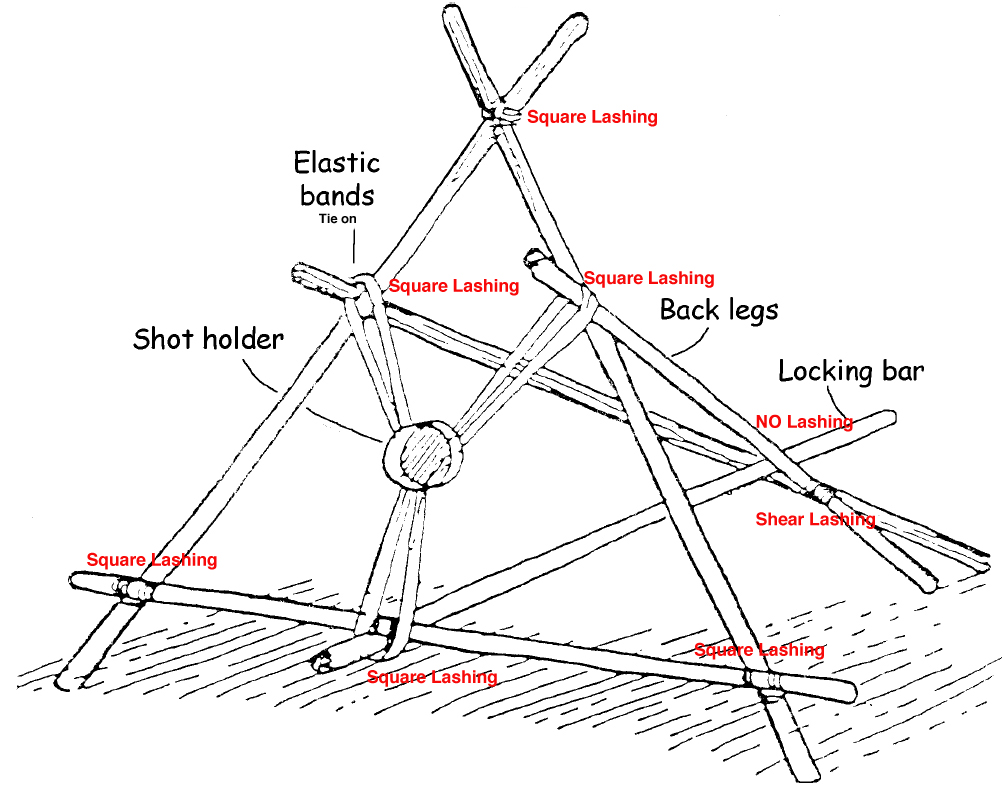
Square Lashing – This project can use fourteen of them for both building the A-frames and then joining them together. — How-to Video / Activity Video —
3-2-1 Anchor – The skill is to carefully drive in the stakes at the proper angle and applying the tourniquets to join the groupings. — Explanatory Video —
Roundturn with Two Half Hitches – You can use this pioneering knot to attach the hand ropes to the anchors. — How-to Video / Activity Video —
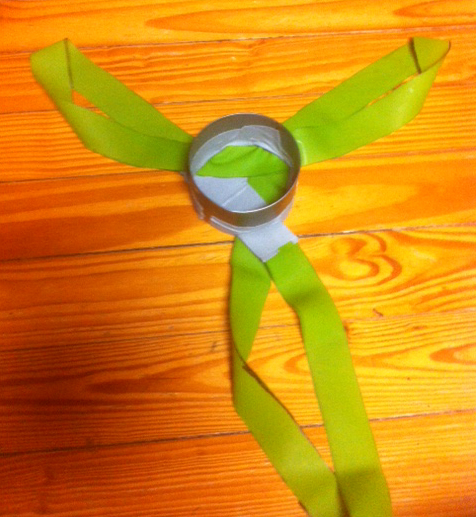
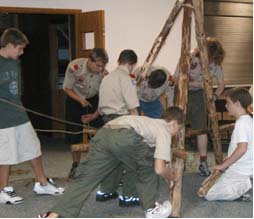
First of all, let’s acknowledge what appears to be the source for this easy-to-execute design—the Scouts of South Africa.. The activity surrounding the construction of this launcher incorporates sound square lashing technique, teamwork (of course), a geometric study of angles and trajectory, some concentration, and lots of laughter. The ensuing fun can be a real blast, indoors or outdoors*.
Assembling their Launcher
Here’s what each patrol will need:
six Scout Staves
seven 6-foot x 1/4-inch lashing ropes
three short lengths of cord (to secure the shot holder to the structure if your using surgical tubing)
one pre-made “shot-holder”
large supply of newspaper and masking or scotch tape
large enough room to spread out
In a nut shell, here’s what happens:
An indoor or outdoor area is set up so there’s plenty of room to launch the “shots.” Each patrol is provided the necessary materials along with the design drawing. They are each assigned their own designated area (about 10′ x 10′) in which they must stay. On signal, they race to build their Scout Stave Launcher. Using the newspaper and tape, they will also have to set to work and make a supply of “shots.” As soon as they are ready, they can proceed to launch tightly, taped-together newspaper “shots” at designated targets in the shooting area. They can also launch the “shots” for distance.
It should be noted, the “locking bar” (refer to the drawing) is only lashed to the bottom crossbar of the A-frame. The angle of fire is adjusted by moving the “locking bar” up and back. Printable Diagram
Each launching can serve as a point of reference to adjust the “locking bar” and, if necessary, the position of the elastic bands. Remember, the patrol must stay within their duly designated area. Used “shots” can be retrieved at defined intervals, during which no further launching can take place until an “all clear” is sounded.
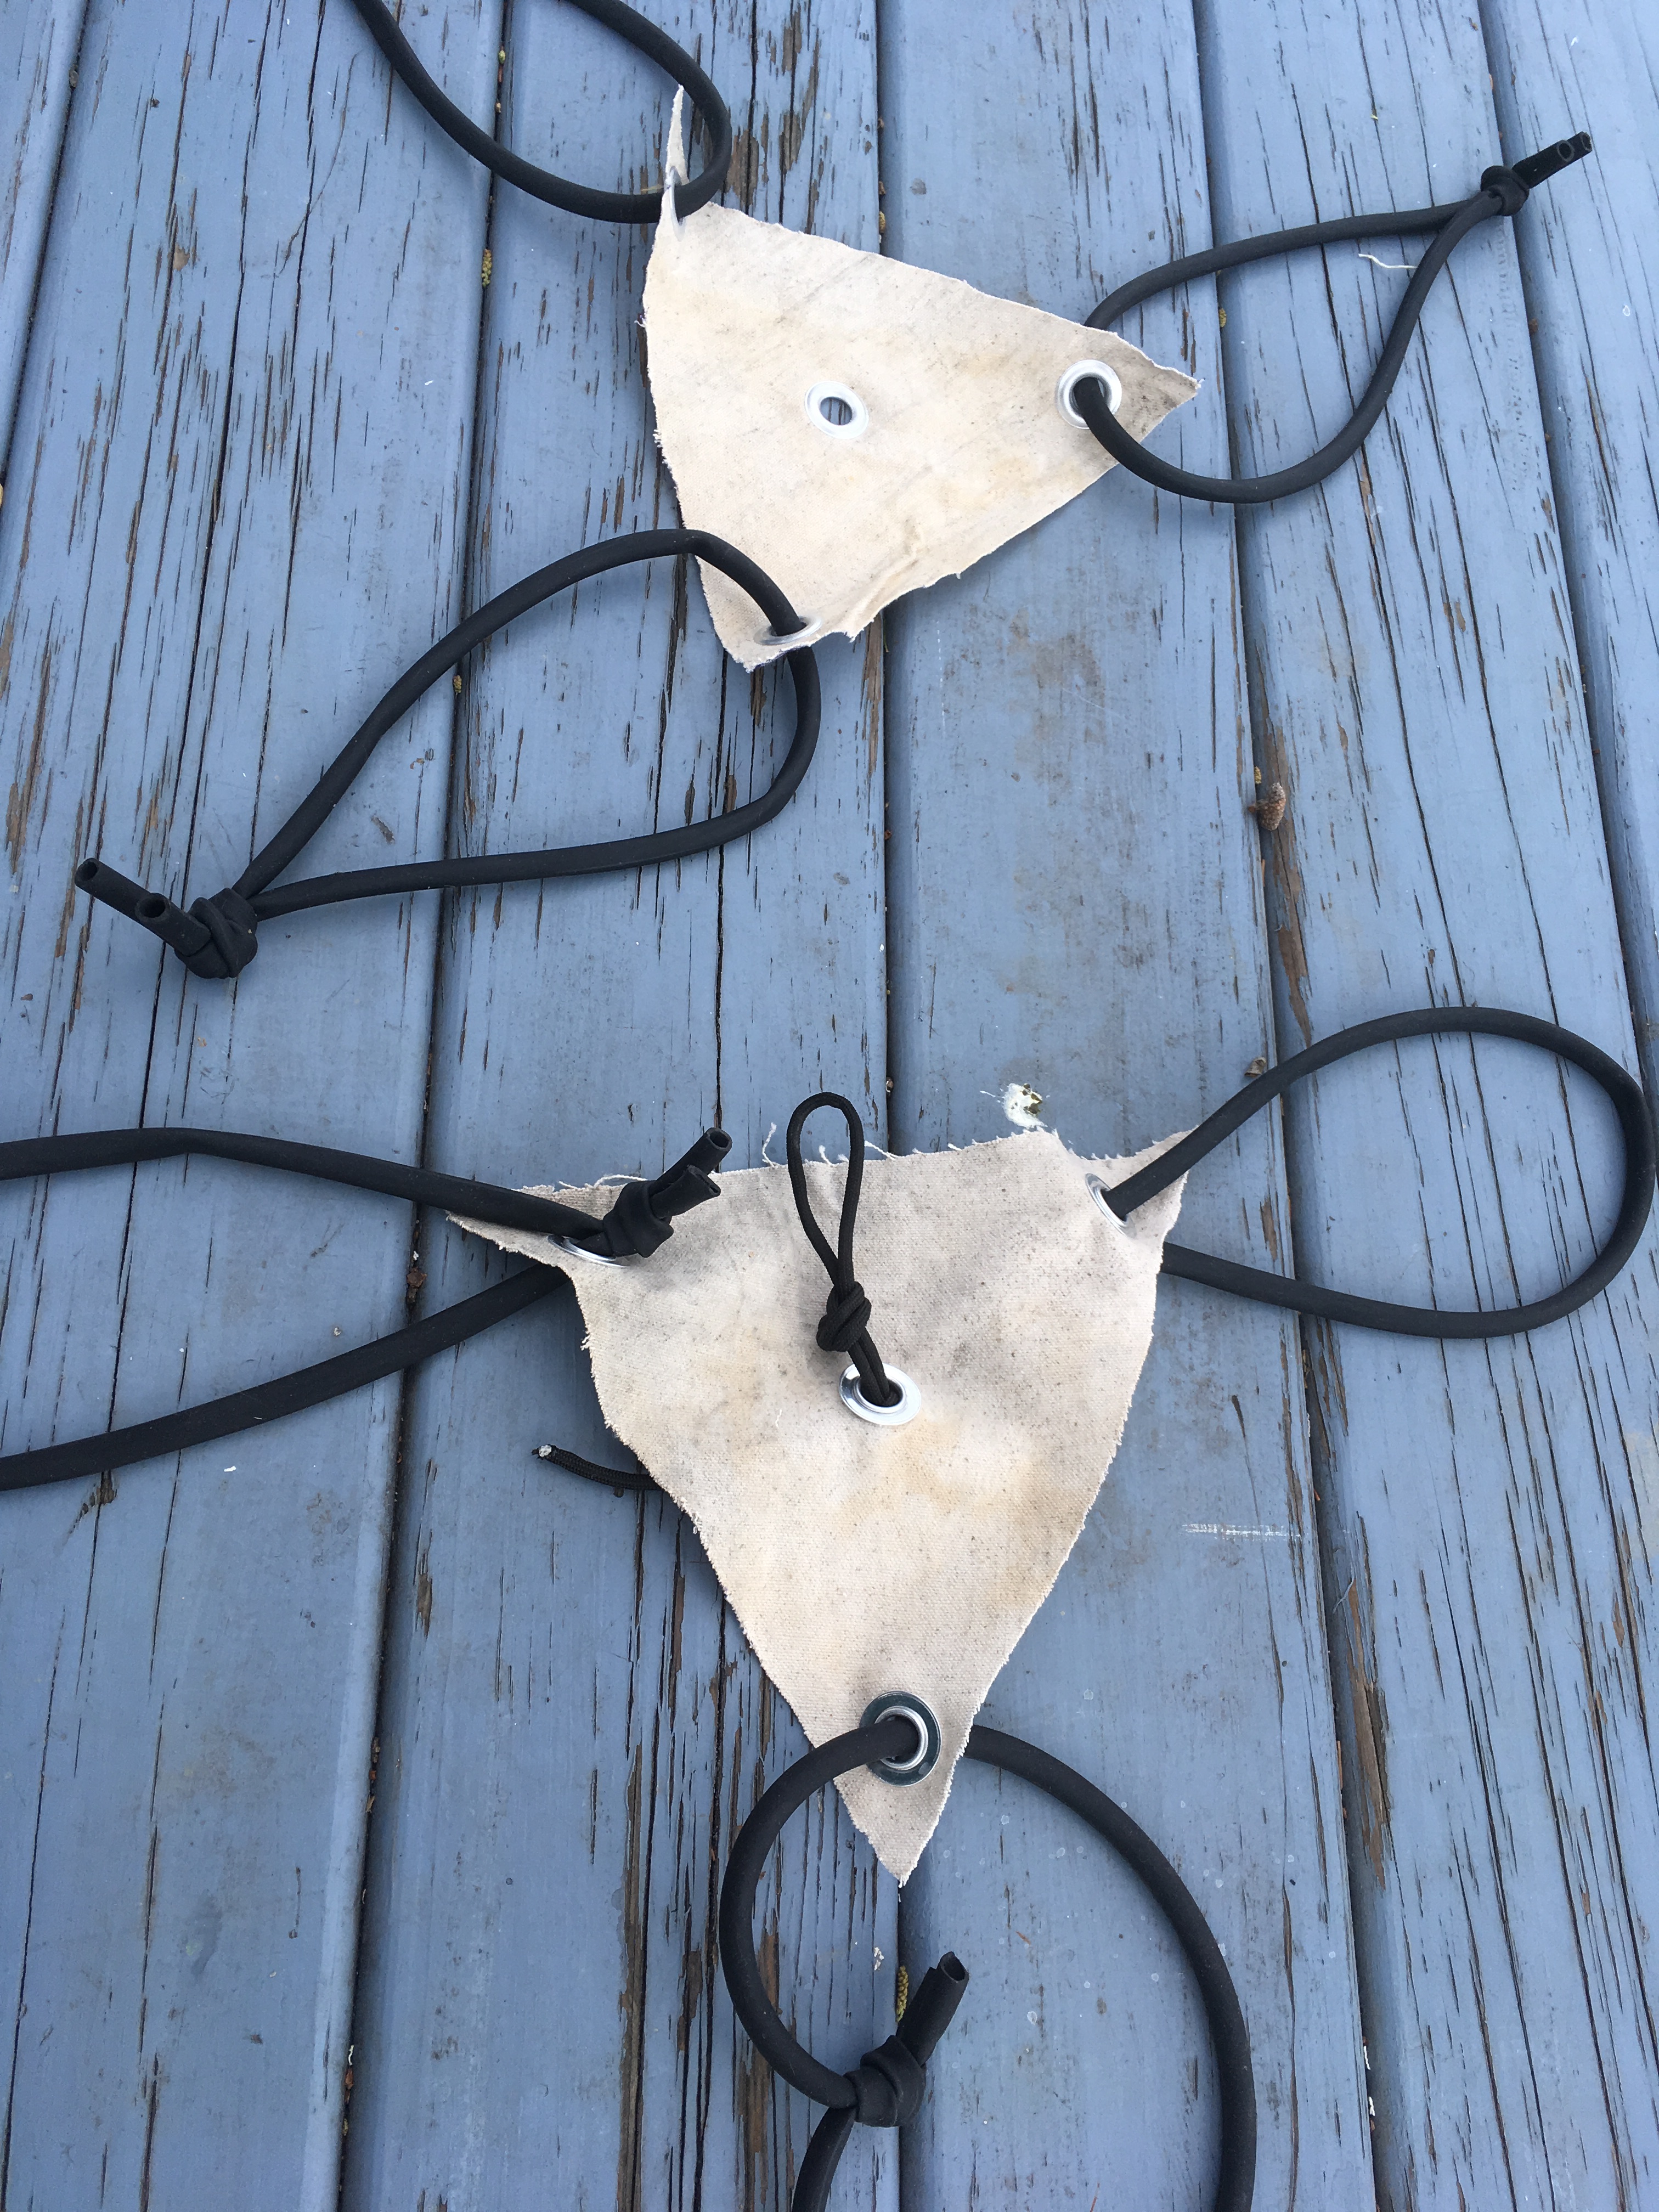
Canvas Pouch Shot Holder
Making a Shot Holder—the most simple approach:
Cut out an equilateral triangle with 12-inch sides from a piece of canvas. 10-oz canvas will work if you double one triangle on top of another.
Place a grommet on each corner of the triangle(s).
Reeve a 24-inch length of surgical tubing through each grommet and make a loop by joining the ends of each with a tight knot.
If you choose, you can add another grommet to the middle and use it to fashion a pull line.
Tin can shot holder—another approach that works well is as follows:
For each shot holder, you’ll need a can and a length of surgical tube, inner tube, or some kind of stretch band. Six feet works well with Scout staves.
Launcher rigged with surgical tubing. (Notice the cord used to secure the tubing to the structure.
Prepare the cans. Using 12.5 oz. cans (commonly filled with canned chicken or beef) cut three slits in the bottom the same width as the rubber strips or more narrow if you’re using surgical tubing. Flatten the sharp edges as much as possible against the inside of the can and then apply tape to serve as a cushion between the slits and the stretch material.
Sample Shot Holder made from a strip of a 6-foot Exercise Stretch Band and a 12.5-ounce Can
The stretch material. One bicycle inner tube can be cut into three to four 6′ strips each of which are just the right size for one shot holder. If you can’t easily obtain inner tube, heavy duty exercise stretch bands work okay, but are less durable. What works best by far are six foot lengths of 1/4″ surgical tubing! They’re the most stretchy and can withstand a lot of strain. Surgical tubing can be purchased through scuba supply companies.
Attach the rubber. Tie together the ends of the rubber strip or surgical tube making one loop with a circumference of approximately six feet. Feed the loop through one slit in the can. The objective here is to extend an even-sized loop through each slit, by forming bights in the loop and threading them through the other two slits.
*Outdoor action can give rise to a host of variations. “Shots” can consist of tennis balls, and targets can be set up at varying distances. Depending on the elastic bands used to make the shot holder, this simple design can easily launch well over a hundred feet.
NOTE: Eye protection and supervision by an NCS trained shooting sports director is required for this activity.
A Scoutmaster had the pleasure of witnessing one of the patrols in his troop out-perform 30 others at a council camporee. What’s significant was they were competing in an activity they had never tried before. Why were they so successful? Simple. They knew how to work well together. The interpatrol challenges at their troop meetings back home provided repeated opportunities to hone their teamwork skills—each was a team building challenge. Many required pioneering skills and were preparatory to building various pioneering structures, and the process gave rise to knowing how to pitch in and get the job done.
Pioneering requires good, cooperative teamwork. Without it, the project just won’t get built. As necessary as it is to have the required skill sets under their belts, the crew tackling the construction of any larger pioneering structure will also need to put into action all the qualities embodied in the execution of solid teamwork.
Scout patrols are teams. In order to get things done, especially on an outing, they must communicate, cooperate, and pull together. A good team building event furnishes each patrol member with a way to contribute to the successful accomplishment of the task at hand. Besides being challenging and fun, effective Team Building Activities afford a patrol the opportunity to pool their resources and share leadership. Of course, amongst the team members, there’s always plenty of provision for providing helpful support, along with a good show of Scout spirit.
Related to Scout Pioneering are a variety of campcraft challenges that can be incorporated into the troop meeting agenda. A relevant upside is, these activities require putting skills into action that were gained during instructional sessions. Appropriately, these skills come into play in a way that is challenging and fun.
A Fun Interpatrol Activity: Nothing Succeeds like Success!
Of course, campcraft encompasses more than just Pioneering, though Pioneering is often central to the rewarding experience inherent in Scouting’s outdoor program. The campcraft challenges in this post also include activities related to general knotting, woods tools, fire building, navigation, and some first aid Scout skills too.
Healthy competition between patrols can have a positive outcome when handled in the right spirit. Naturally, when patrol makeup is homogenous, there’s more of a level playing field. But, when patrols are organized by age, to compensate for the difference in skill levels, certain handicaps might be introduced. In this instance or when individual patrol attendance is disproportionate, dividing the troop into equal crews is also always a practical approach.
Scoring and points are arbitrary—no hard, fast rule. Keeping track of patrol points for these activities (and awarding points for various other criteria) can be adopted and contribute towards patrol spirit. But, the presentation of the activities themselves carry their own rewards translating into involvement, enthusiasm, and fun.
In the ever-important pursuit to pair each knotting and lashing instructional session with a fun activity that puts the newly-acquired skill into action, here’s a simple one that can be used as an entertaining culmination in conjunction with learning the Double Floor Lashing. Besides being lots of fun, the simple structure can subsequently be used to add some levity when making an entrance or forming a procession during Scout gatherings. It’s along the same lines as carrying an individual on the shoulders to express admiration. But, it’s much more “glamorous” and a whole lot more regal! Here’s all you’ll need for each patrol:
two 6-foot x 3-inch spars as carrying poles
six 3-foot x 2-foot platform spars as the seat
two 20-foot lashing ropes
The Floor Lashing has to be Tight!
The procedure’s just as simple as the materials. The patrol lays the two 6-foot spars parallel to one another and lashes on the 3-foot platform poles with two floor lashings using the lashing ropes. That’s it. One thing is necessary, though—the Floor Lashing has to be pulled tight after binding each individual platform spar. No square lashings are used to connect the carrying poles, just the floor lashings. Of course, to make the lift seat more secure for repeated use, the carrying poles can be connected at each end with an additional 3-foot spar and two square lashings. And if you want to really get elaborate, lash together a framework over the platform using Scout Staves, and add a lattice work of braided nylon cord. While your at it, lash on one or more flags!
Why troop meeting pioneering activities? Because a race or challenge revolving around pioneering skills is involving and fun, and requires cooperation and teamwork. Choosing a successful activity is a sure-fire proposition—there are a host of pioneering-related Scout meeting challenges that are tried and true and ready to do. Just make sure the Scouts are ready to put the skills into action before implementing the activity.
What are pioneering skills? They’re definitely more than just knowing the ropes.
Knots
Lashings
Organization
Planning
Teamwork
What makes it fun? One thing about pioneering—it’s primarily a twofold process. First something’s built, then something’s used (enjoyed). So, when pioneering skills are a central focus of the interpatrol event, the element of fun ultimately enters the picture as the challenge’s culmination! For example, Everyone on the Tripod is a wonderful interpatrol competition. If the challenge was for each patrol merely to race and build a tripod, the activity would be a dud. It’s that final act where everyone gets to climb on board resulting in the inevitable smiling and cheers of success that make it fun! Simple concept, right? By the same token, the real fun is not building an H-Frame Trestle to make a chariot, it’s racing it; it’s not joining Scout Staves together to make a long fishing pole, it’s catching the rat trap; it’s not constructing a Scout Stave Launcher, it’s seeing how far and accurately it can launch projectiles.
Team Building Opportunity. The challenge referred to as Crossing the Alligator Pit is an activity that requires 100% cooperation and teamwork. The Scout on the A-Frame “walker” is totally reliant on his fellow Scouts to keep him aloft and facilitate his forward progress. The whole time that he’s bringing into play his balance along with his leg, shoulder and arm muscles, it’s the members of his patrol that not only greatly increase the effect of his movements, but also keep him from spilling over.
Crossing the Alligator Pit can initially be tackled using what we can term “group leadership,” where several members of the patrol all contribute their opinions on how to best get the “walker” moving and not falling over. As the successful crew experiences the necessity of coordinating the handling of the guylines with the movements of the Scout on the “walker,” invariably one Scout will need to assume the role of calling the shots and keeping everyone on their toes.
The farther they went, the more skillful they became!
Scout Spirit! This was best exampled during a District Camporee devoted to Junior Leader Training. Scouts from Troop 822 out of Mount Vernon, SC poured themselves into the activity and not only mastered the challenge, but provided spectators with some fun and excitement as well. They approached the task of building their A-Frame with enthusiasm. Finishing in good form, they wasted no time in standing up the structure and holding it in position with their guylines. As soon as their rider climbed on board, it became obvious: it was the top two lines that required the most unfaltering attention to keep the A-Frame vertical. The Scout on the A-Frame was exuberant as he discovered how to swing the walker forward one leg at a time. The patrol then totally got the hang of how to use the bottom guylines to add that real oomph to the “walker” propelling it forward. As they smoothly traversed the fifteen feet of the “alligator pit,” their leader reminded us of a coxswain, rhythmically yelling out, “Pull!” to the crew manning the oars in a boat race. “One, two, THREE!…one two, THREE!…one two, THREE!” On each “THREE!” the rider swung one leg of the “walker” forward, as the Scout manning that leg’s forward guyline simultaneously heaved on his rope, while the others remained alert to help guide and steady the A-Frame. Their “walker” actually walked in rhythm and it was quite a spectacle!
Getting Tired, but Still Happy, and None the Worse for Wear
They kept on going!Crossing the Alligator Pit is more challenging than the majority of other interpatrol competitions, demanding a full measure of concentration and cooperation. With a well-lashed A-Frame and a rider who gets the knack of balancing his weight and swinging the legs of the “walker,” a patrol that can keep their structure upright will eventually be able to successfully cover the fifteen foot distance. Fifteen feet is fifteen feet and decently doable, especially on flat terrain. A hundred and fifty feet up a hill is a horse of a different color, and that’s what this patrol from Troop 822 challenged themselves to do. They kept going across the field up a hill towards the dining hall, and they didn’t stop until they reached the top! When they finally stopped, it was already getting dark outside. Their persistence, and teamwork was nothing short of amazing! These Scouts went far, and it makes sense that with all their determination, they’ll continue to go far in whatever direction they set out for themselves.
Chariot races are fun and here’s about the easiest version around. Once Scouts are familiar with the shear lashing and square lashing, they can make an A-Frame to serve as a simple carrying structure (chariot). The race can be run in a variety of ways:
The Simple Pick Up and Carry Approach
Pick up the chariot and carry it (advisable if the playing field is a well-cared for lawn)
Drag the chariot (works well in wide open fields)
Run relay-style heats on a short course (where space is limited)
Lay out a longer course
Materials for each Patrol
two 8-foot x 4-inch spars for the A-frame legs
one 6-foot x 3-inch spar for the ledger
three 15-20-foot x 1/4-inch manila lashing ropes
Shear Lashings are Applied to the Tips of the Legs
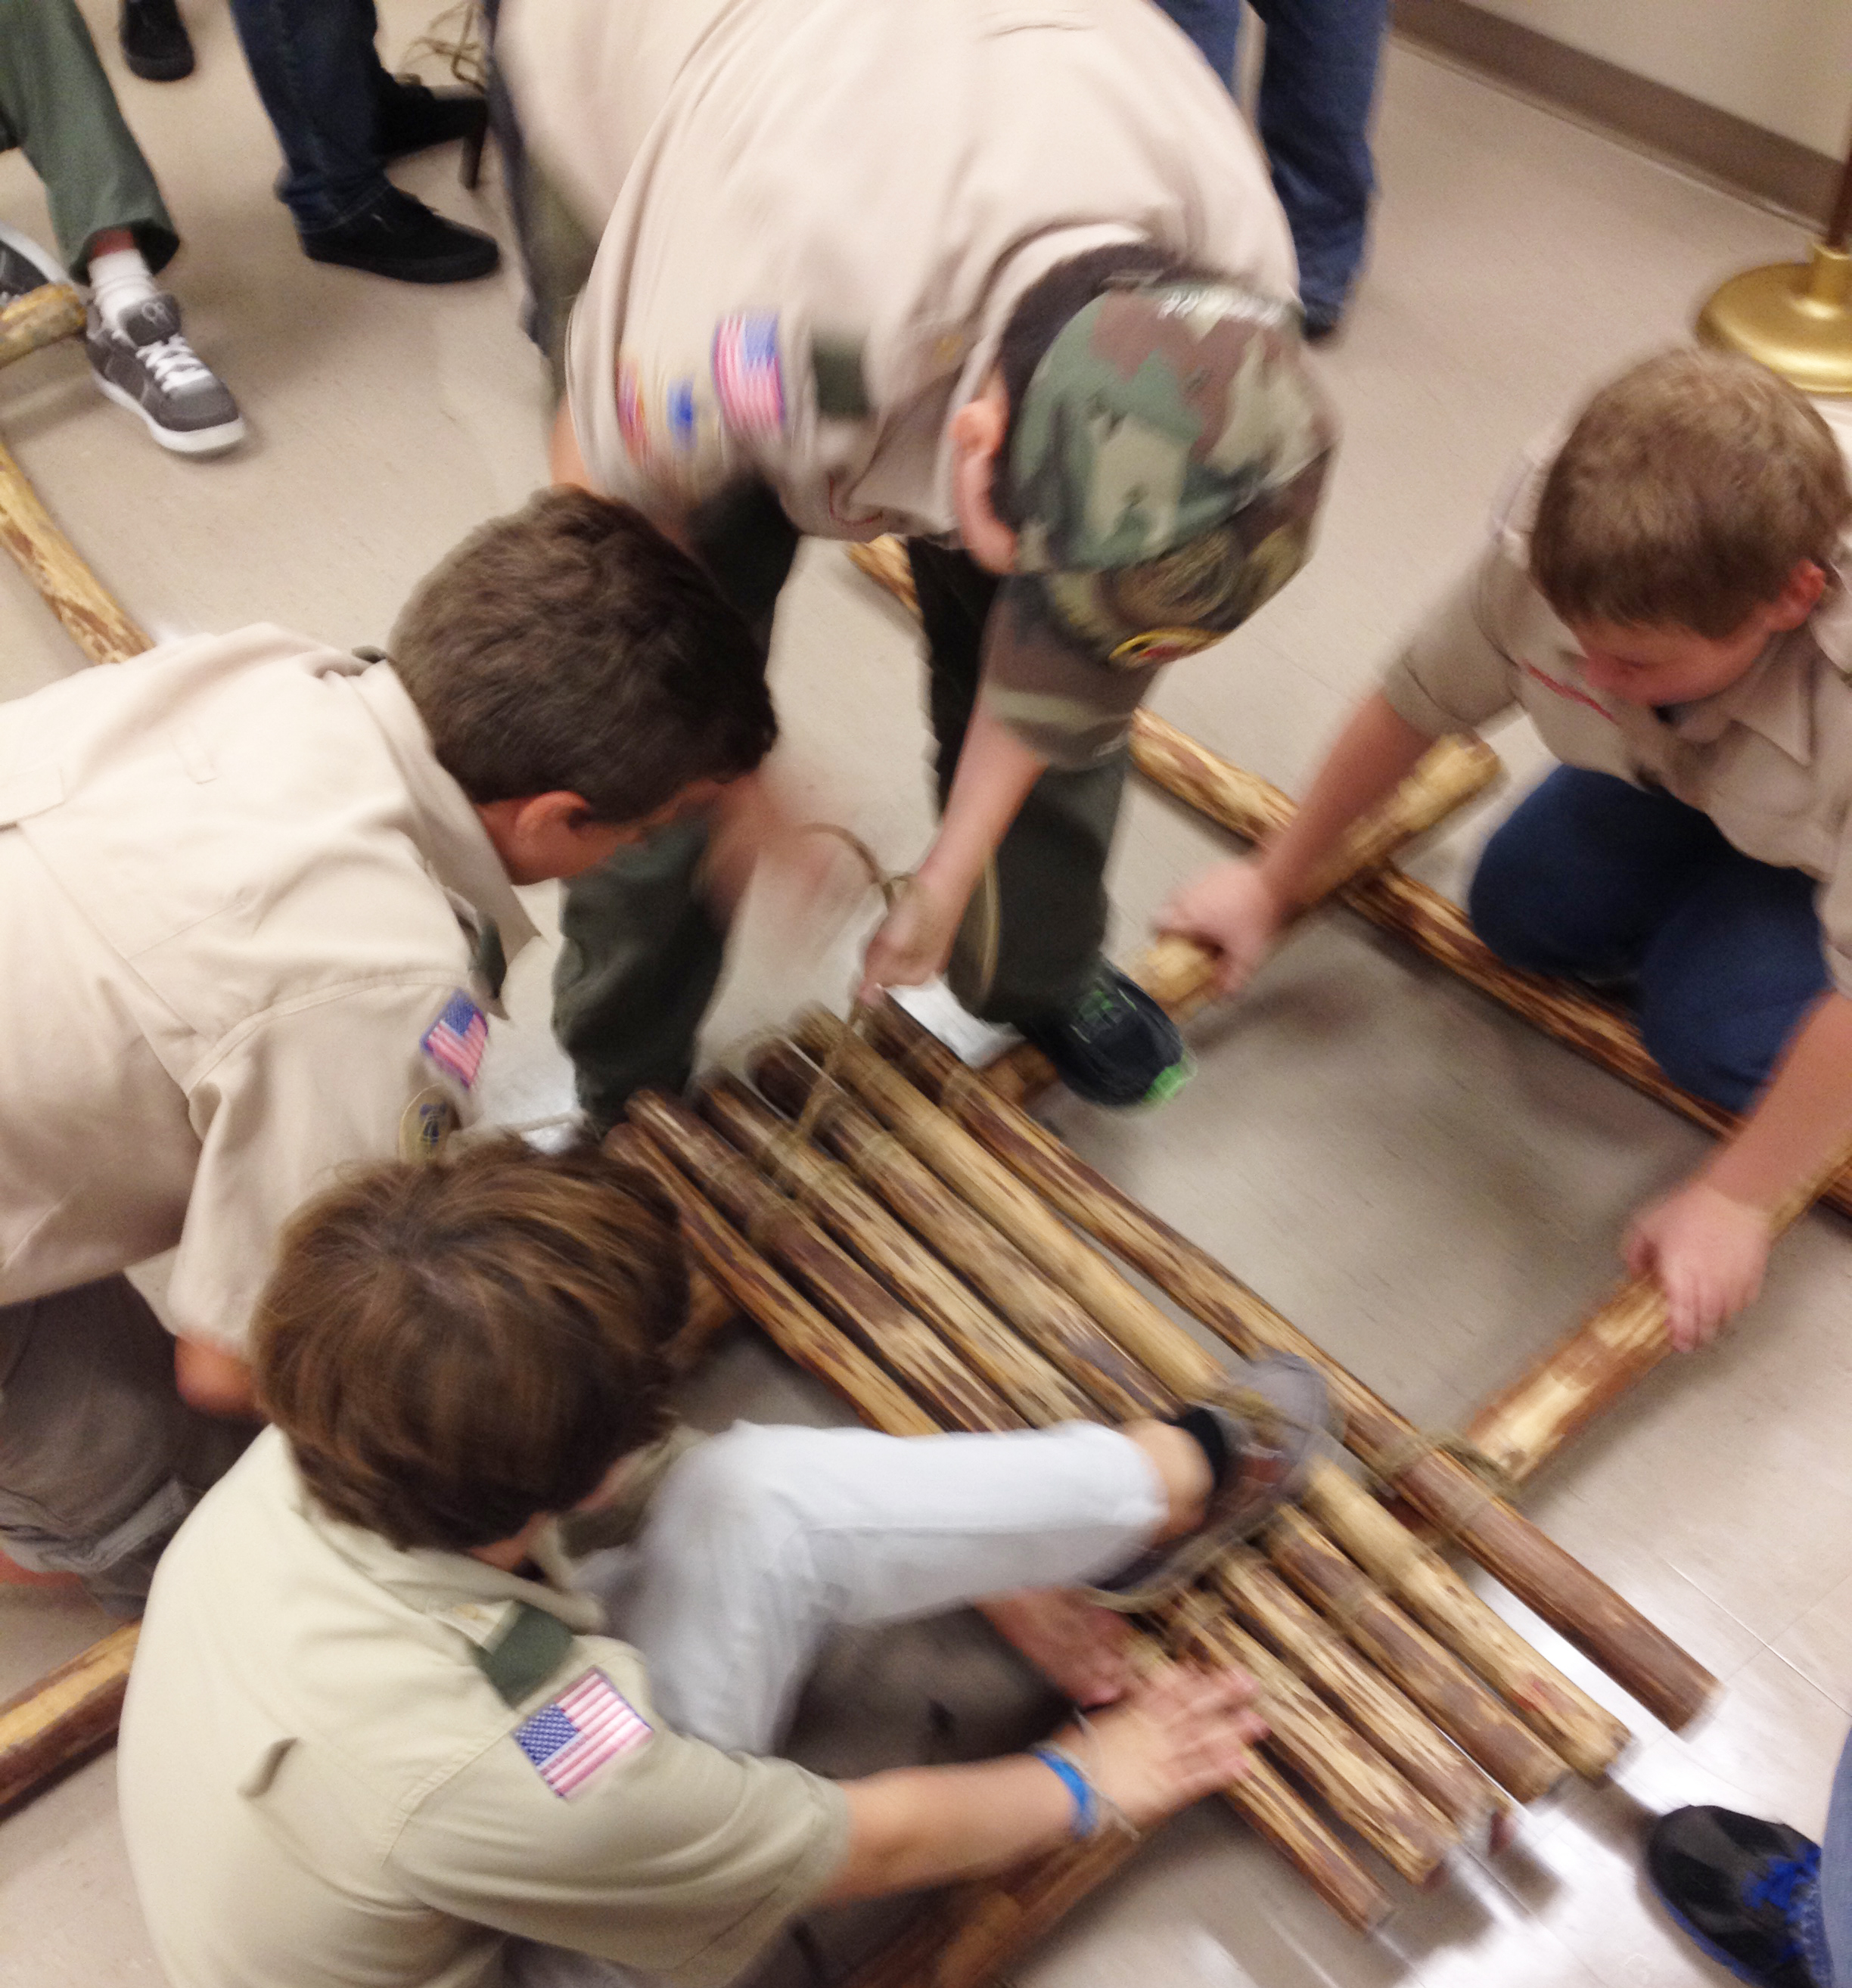
Procedure Patrols discuss their plan of attack. It’s decided who is to tie what lashings, who is to assist, who will ride and who will carry (or drag as conditions dictate).
A-Frames are Formed
On signal, patrols lash together an A-frame using a shear lashing at the tips of the 8-foot spars and square lashings at the butt ends for the 6-foot ledger. (If desired, three square lashings can be tied.) When the chariot is built, it is raced around a preset course or to a turn around line and back.
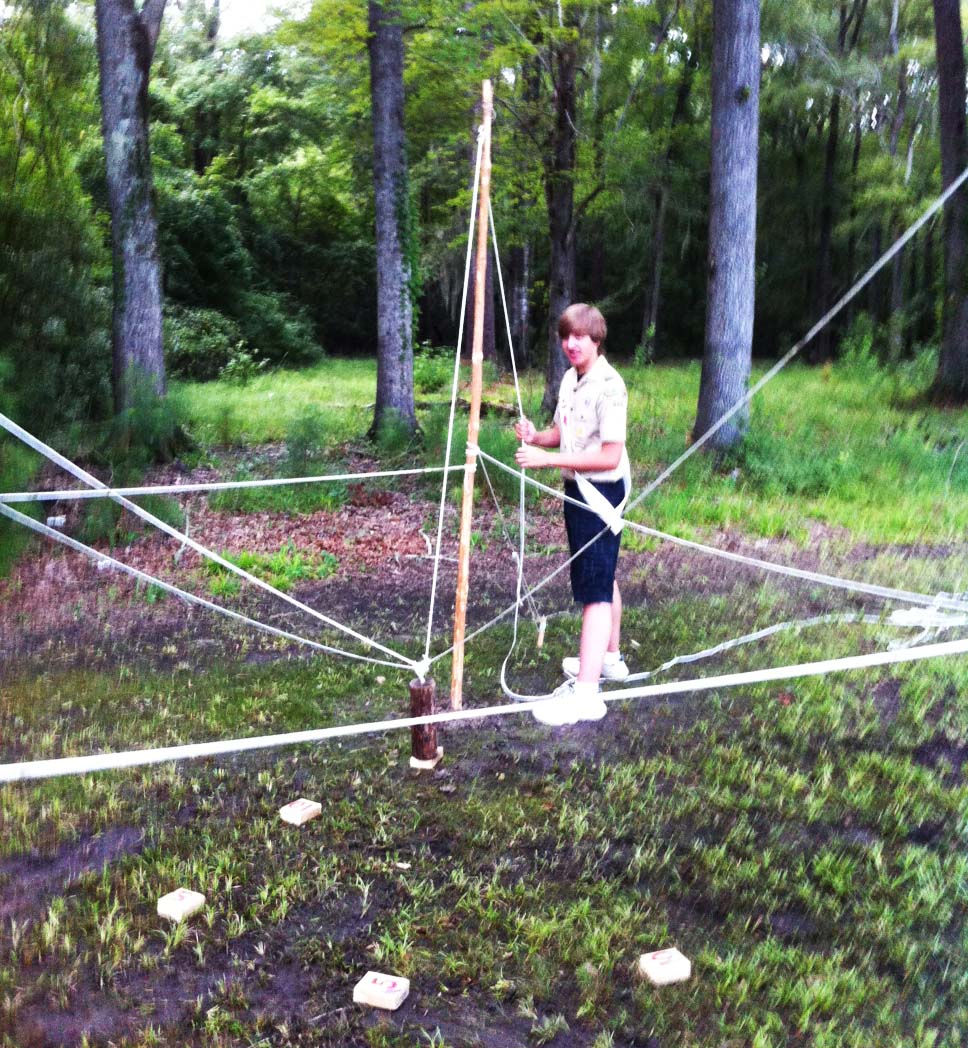
The Atomic Pile provides an excellent opportunity for team building while also effectively honing individual leadership skills. Additionally, it can provide an opportunity to test what can be termed “group leadership,” which will manifest to a greater or lesser degree the ability of a group to lead itself when there is no one assigned the leadership role.
The following Atomic Pile structure is only one simple version, designed for short-term use. It works very well during a troop meeting. When featured for extended use, like at a camporee or public gathering, a more solidly-built construction is in order.
The log is steadied on top of a corner square.
Suggested Materials
four 8 to 10-foot x 2-inch poles for corner uprights
twelve 4-inch diameter wooden discs -or- 4-inch squares of lumber, four of them painted with the numeral “5,” four with “10,” and four with “20”
one 4-inch diameter log, 15 inches long with a large eye hook on one side and a flat, even surface on the other
four small single pulleys
four 40-foot lengths of 1/4-inch braided nylon cord for the pulleys
four 25-foot lengths of 1/4-inch braided nylon cord for the boundary lines and guylines
four 3-foot lengths of 1/8-inch nylon cord to attach pulleys to the corner uprights
four 30-inch pioneering stakes to stabilize the corner uprights
eight 10-15-foot x 1/4-inch manila lashing ropes for connecting the pioneering stakes to the uprights
four smaller stakes for the guylines, to help steady the corner uprights
Atomic Drop Components
BUILDING THE STRUCTURE
Putting up an Atomic Pile activity is well within the capability of most patrols, and by dividing the tasks, can be completed in under 30 minutes. However, building the Atomic Pile is not as key to team building and leadership development as is actually using the structure.
How will the corner uprights stay erect? It will be impractical to keep the corner uprights in a rigid vertical position with three guylines like a flagpole. So, you’ve got three choices to hold them up:
Use a post hole digger to sink the uprights into the ground deep enough to firmly support them.
Drive in a pioneering stake and then lash the upright to the stake to hold it up.
Do both 1 and 2 (often recommended).
Raise the corner uprights. In the flat place the Atomic Pile will be situated, lay the 10-foot poles out in a 10′ x 10′ square. Just outside the 90° angle formed by the poles, either dig a hole deep enough to support the first upright, or firmly drive in a pioneering stake straight into the ground.
Boundary Cords / GuyLines
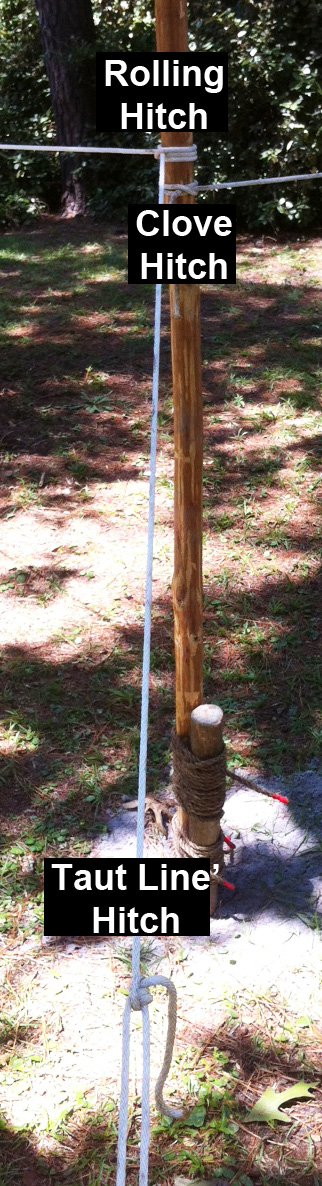
Before standing up the pole, using a 3-foot cord, attach a pulley about an inch from the tip with a prusik. Wrap the cord as many times as needed so the pulley hangs down a couple of inches. Using a 40-foot cord, reeve one end through the pulley and then tie that end to the eye hook of the 4-inch-diameter log with a roundturn with two half hitches. Place the log in the center of the square.
When you’re ready, place the butt end of the pole into the hole and tamp it down firmly, or lash the butt end tightly to the pioneering stake with two round lashings. Of course, depending on how rigid the pole is standing, as needed, do both.
Repeat the process for the three other corner uprights.
Tie on the boundary lines. About 4 feet up from the ground, with a clove hitch, tie one end of a 25-foot cord to a corner upright. Walk the cord to the next pole in the square and with a rolling hitch, tie it on so the cord is parallel to the ground, keeping the line taut. The running end of the cord should extend out about 15 feet from where the rolling hitch was tied. This will serve as a guyline for that corner pole.
Repeat the process with the other three 25-foot cords, starting with a clove hitch tied right next to the rolling hitch.
Set up for a Troop Meeting and Played with during Pre-opening Gathering Period
Secure the guylines. Firmly hammer in a smaller stake 45° out from each corner upright, about 8 feet away. Attach the length of cord extending from the rolling hitch to the stake with a taut-line hitch. Pull it tight. This will add a little extra support.
The only thing left to do is position the 4 inch discs or blocks inside the 10′ x 10′ square. The four 20s can be placed near the corners, the 5s can be placed near the center, and the 10s between the center and the corners.
Scouts face away from the “Atomic Pile” and rely on the leader’s directives.
Challenges. An Atomic Pile presents a variety of alternatives in the way of activities, and even spectators are afforded their own form of entertainment observing the progress and prowess of those at the pulley ropes. This is especially pronounced when patrol teams compete against one another.
Within a preset time limit, using a heads on approach, groups of four can be challenged to balance the log for five seconds on as many discs (or blocks) as they can. This simple challenge can be self-led, that is, without a fifth Scout issuing commands, or can be conducted with an assigned leader who does not handle a pulley rope.
Instead of the quantity of discs, scores can be achieved in accordance with the point value painted on each disc.
Scouts man each pulley rope, but instead of facing the square, each must turn their back to the discs. Naturally, in order to maneuver the log from this position, they must rely on an assigned leader to direct their actions.
Incorporating the Atomic Pile into the meeting.
The Atomic Pile can be utilized by groups of Scouts during the gathering period preceding the opening ceremony.
During the meeting, individual patrols can be assigned a period where they engage in the activity by themselves, either to hone their leadership skills or practice for an interpatrol competition.
As an interpatrol activity, patrols can enter their teams to compete against one another in any of the challenges listed above.
Several campcraft skills come into play in order to successfully complete this Simple Flagpole challenge. Each patrol flies their patrol flag from a 14′ flagpole they construct using the following materials:
four Scout Staves (or 3 Scout Staves if their patrol flag is already tied to a 5′ pole)
What we’re doing here is challenging each patrol to build a device that will set off and “catch” a cocked rat trap (the snapper) placed 15 feet away.
The lashings have to be tight and well-spaced.
This simple interpatrol challenge is fine for team building and simultaneously a whole lotta fun! The only lashings required are round lashings, but applying a sensible approach to spacing them effectively is also necessary. As with all pioneering projects, in order to pull them off the whole crew’s got to pull together. So it is with the simple process of racing to join the Scout staves together, and then setting about angling the long “fishing pole” so the sinkers will hover just right over the cocked rat trap.
Activities That are FUN!
Procedure.Using two tight Round Lashings to join each of the staves together, each patrol forms a long “fishing pole,” and attaches a cord with a weight tied on to the end. Using this device to pick up their snapper, there are two objectives here: one is to catch the snapper as quickly as possible, the other is to work together and successfully complete the task as smoothly as possible. Basically, three rules apply: no patrol member is permitted to cross a line between their work area and the cocked rat traps 15 feet away, the only thing allowed to touch the snapper is the weight at the end of their “fishing pole,” and all materials must be used.
Angling to Catch the Snapper
four 5-foot Scout staves
six 6-foot lashing ropes
one 3-foot light cord
a weight (fishing sinker or some heavy metal washers)
rat trap(s)
Left: Setting out the Rat Traps / Right: Catching the Snapper
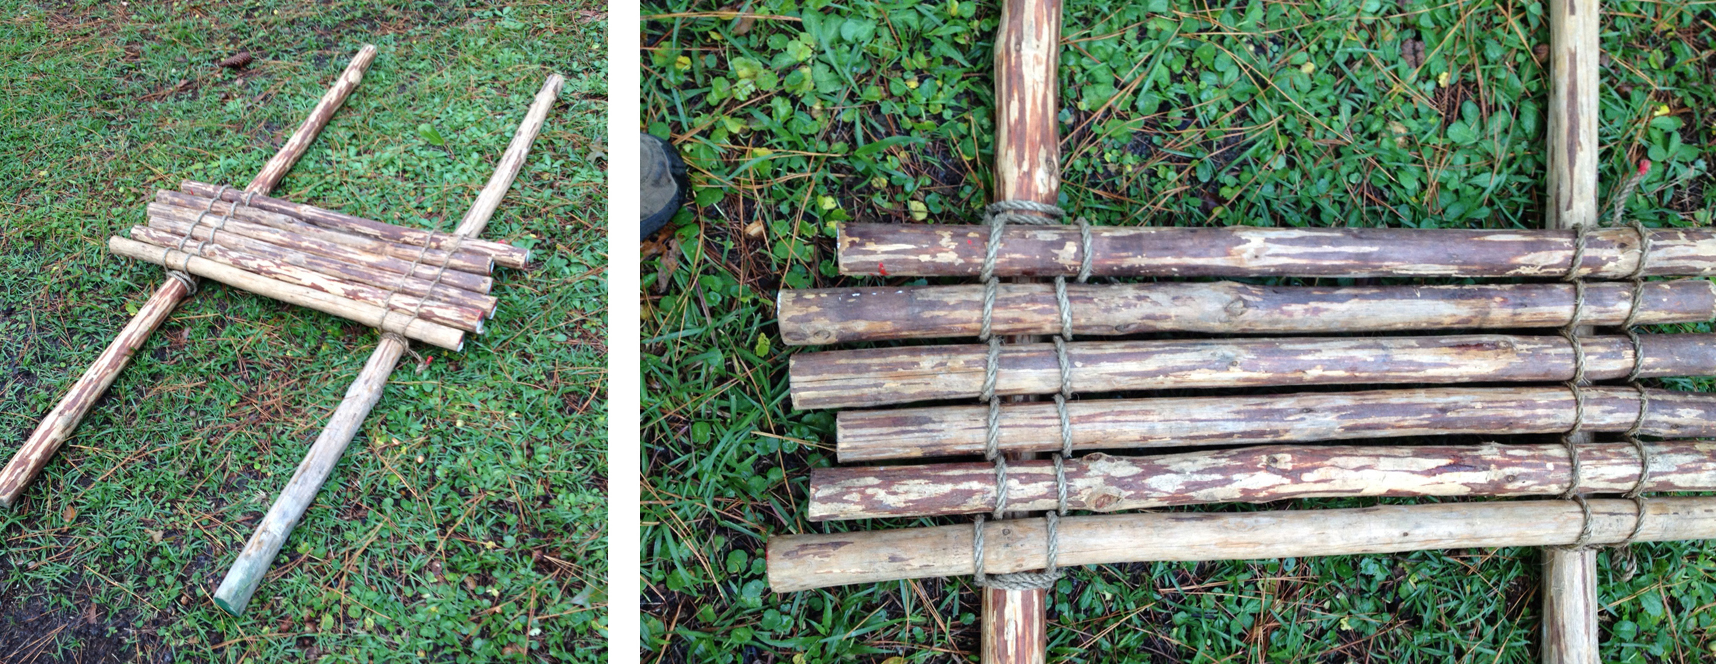
The square lashing is the basic type of lashing for most pioneering projects. The more a Scout ties them, the more they become like second nature. That means, when the tying of an efficient and tight square lashing is “no sweat,” building a pioneering structure will be easier and more successful. This, of course, makes the experience more fun.
So, to assure the Scouts are ready and able to tackle projects that are challenging, fun, and rewarding, they need to feel confident and happy they can easily tie tight square lashings.
Touching the ceiling!
This challenge is very simple, but, it’s fun, and requires each patrol to tie eight tight square lashings. It’s great for new Scouts and a useful team-building activity and practice session “disguised” as a fun, fast-paced interpatrol competition.
Materials for Each Patrol:
two 8-foot x 4-inch spars
four 3-foot x 2-inch ladder rungs
eight 15-foot x 1/4-inch lashing ropes
Method: with the above materials, each patrol will lash together a ladder with four rungs, spacing the rungs FROM THE BOTTOM ABOUT ONE FOOT APART, using eight square lashings. When sturdy, the whole patrol will stand the ladder up and take turns climbing to the top.
The real challenge built into this activity comes into play after the lashing is finished. The patrol is simply building a very well-lashed A-frame. As with all pioneering endeavors, teamwork is essential. With this interpatrol challenge, it’s absolutely necessary! Cossing the Alligator Pit affords a superlative team building opportunity. Read about and view one patrol’s very impressive accomplishment!
Alligator Pit
Materials for each patrol:
two 8-foot x 4-inch spars to serve as A-frame shear legs
one 6-foot x 3-inch spar to serve as a ledger at the base (crossbar)
three 15-foot x 1/4-inch lashing ropes
six 20-foot x 1/4-inch lashing ropes (for guylines)
Method: The “Alligator Pits” are marked on the ground, one for each patrol, 15′ x 15′ square. Patrols line up on one side of their pits. On signal the patrols lash together an A-Frame “walker” using either three square lashings or two square lashings with a shear lashing at the top. At the top they attach two 20-foot lashing ropes, and attach two more ropes at each corner of the crossbar, using roundturns with two half hitches. These are the guylines. The patrol then stands the “walker” upright, and one member climbs on the crossbar. One Scout mans each guyline to help steady and to help propel the Scout on the crossbar as he tries to “walk” the A-Frame across the pit. Only the A-frame “walker” is allowed inside the pit. Note: This activity should only be held indoors if the floor is carpeted. Generally, tile or wood floors will be too slippery and hence minimize the likelihood of success.
Great Team Working Challenge! (Each Scout handling a guyline needs to be vigilant!)
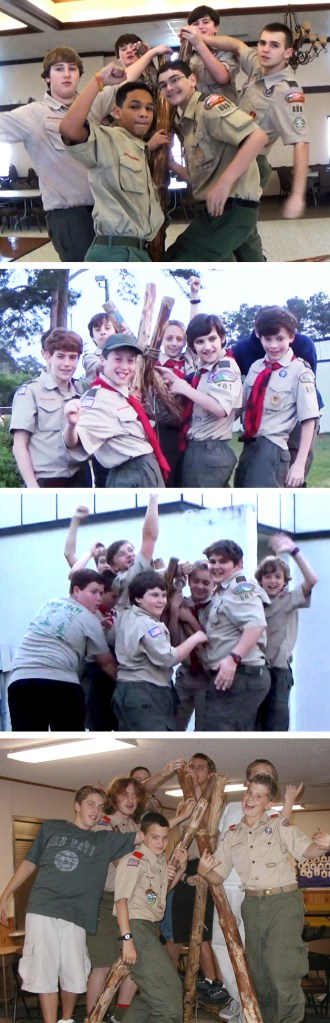
Some years ago a newly-formed and very young troop, barely a year old, attended a Council-wide Camporee. One of the patrol competitions was an Everyone on the Tripod race. They entered three patrols. When the smoke cleared, and the judging was completed, out of over fifty patrols present at the camporee, they placed first, second and third. Why? Well, one reason was they were familiar with the activity having done it at a couple of troop meetings as an interpatrol competition. But, perhaps the main keys to their new-found success was they had an active pioneering program in place, and had been taught the Mark II Square Lashing and the tripod lashing found in an old edition of the BSA Fieldbook (Tripod Lashing with Plain Turns).
This is a WONDERFUL interpatrol challenge!
Lashing the Tripod Legs Together
Materials required for each patrol:
three 8-foot x 3 to 4-inch tripod leg spars
three 6-foot x 3-inch tripod support spars
six 15-foot x 1/4-inch lashing ropes
one 20-foot x 1/4-inch lashing rope
Here’s the Procedure:
On signal, patrol members lash the three 8-foot spars into a tripod, using the 20-foot rope.
Lashing on the Support Spars
When finished, they set up the tripod and using six square lashings, lash a 6-foot spar between each of the legs.
When all lashings are completed and the tripod is strong and secure, all the patrol members stand on the 6-foot spars, making sure their weight is evenly distributed.
Of course, this challenge lends itself equally, if not more so, to being presented outdoors.


