

Register Here: https://www.philmontscoutranch.org/ptc/ptc-conferences/

Scouts are required to demonstrate a variety of basic outdoor skills as part of their advancement through the early ranks. How does putting these skills into action, during troop meetings and outings, contribute to a richer and more rewarding Scouting program?
I. WHAT ARE SOME WORTHWHILE EXPERIENCES THAT ARE OUTGROWTHS OF PUTTING OUTDOOR SKILLS INTO ACTION?
Planning a Course of Action – In order to experience success, before they put their skills into action, Scouts need to get their act together. Planning is an essential step, so they can be prepared to accomplish whatever they are setting out to do.
Cooperating with One Another and Practicing Teamwork – This is how things most effectively get done, and this is how a group succeeds. When small groups of Scouts are faced with challenges to use their acquired outdoor skills, everyone has an opportunity to get into the act and contribute to the group’s success.
Becoming Engaged, Focused, and Involved– The attention of the Scouts is maintained, when they get to use what they’ve learned to complete a task that is challenging and fun.
Pride in Satisfying an Objective and Meeting a Challenge – Because they can use their resources, and rely upon their skills to satisfy the challenges they face, Scouts get to feel good about themselves and their abilities.
Being Successful – Nothing succeeds like success. Of course, failures are acceptable and Scouts can learn from their oversights and mistakes. But, when they are enabled to put the skills they’ve learned into action, and apply the principles of sharing leadership, sharing responsibilities, and working together, success is within their reach.
II. WHAT IMPORTANT ROLES DO TRADITIONAL OUTDOOR SKILLS PLAY IN TODAY’S SCOUTING PROGRAM?
To Attract Youth to Our Program – The lure of learning and using these kinds of outdoor skills appeals to many young people.
To Enhance the Enjoyment of Camping – These kinds of outdoor skills can continually come into play, in conjunction with our wide range of available outdoor adventures.
To Contribute a Unique Brand of Fun to Our Program – The NOVEL activities that feature these kinds of outdoor skills are eminently satisfying.
To Provide our Members with a Useful Set of Tools that can be Utilized Over their Lifetimes – There can be opportunities to use these skills repeatedly, during work and recreation.
To Open the Door to the Development of Character and Leadership – Putting outdoor skills into action with their patrol and troop contributes to a Scout’s development of good character and leadership—two central aims of the Boy Scouts of America.
III. WHAT ARE SOME OTHER VALUABLE INTANGIBLES INHERENT IN PUTTING OUTDOOR SKILLS INTO ACTION?
RESPONSIBILITY – By using their outdoor skills to contribute to the welfare of the group, Scouts learn the essential meaning of good citizenship. Sharing responsibilities is the hallmark of the patrol method.
RESOURCEFULNESS – Faced with the necessity of using whatever resources are on hand, by relying on their outdoor skills Scouts learn what it means to become resourceful.
ORGANIZATION – Organizational skills are honed as Scouts are confronted with the need to keep things accessible and neat as they use their skills to most successfully meet challenges.
SELF RELIANCE – Using their skills, Scouts learn they can rely upon themselves to overcome obstacles.
SELF ASSURANCE – By putting their skills into action, Scouts experience a growing assurance they can get things done.
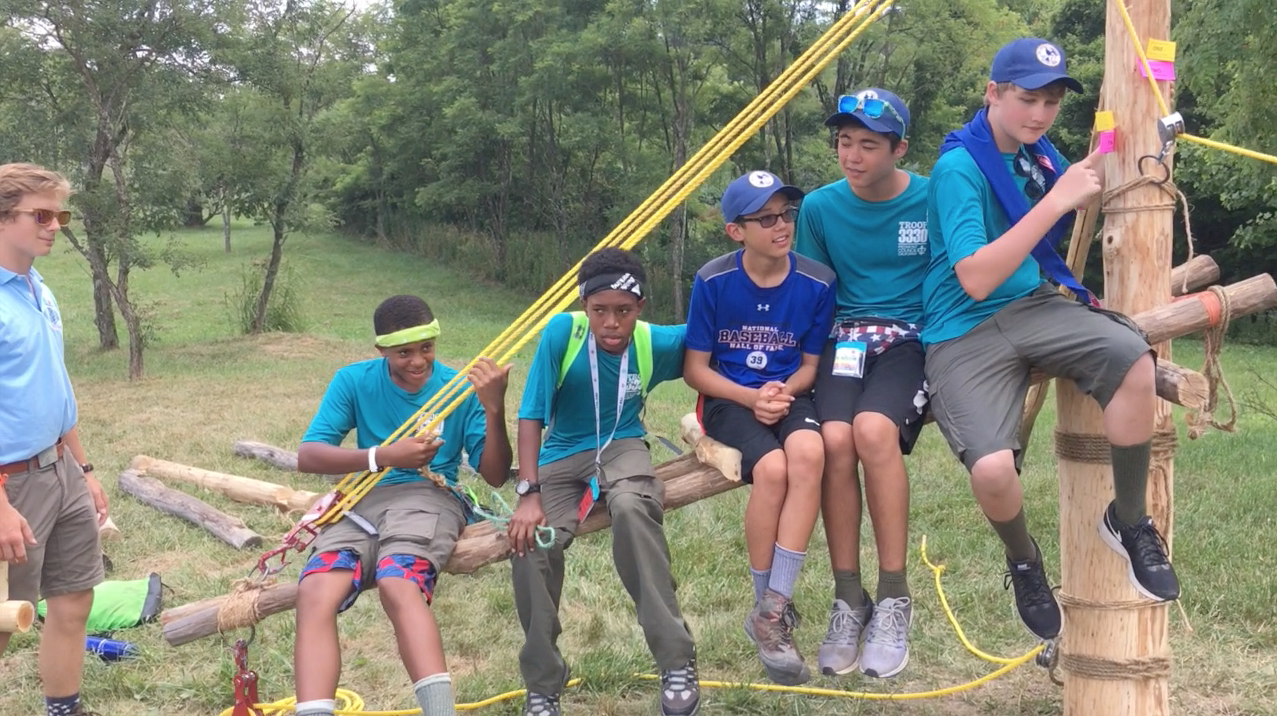
NOTE: After a skill is presented using the EDGE Method, Scouts should ideally participate in a well-planned and well-presented CHALLENGE THAT IS FUN and:
—> reinforces the skill
—> illustrates how the skill is used
—> provides an opportunity to rely upon the skill to complete the task at hand.
As an illustration to depict the description in the Outdoor Skills section of National Camping School, the following video portrays an example of a Scoutcraft Area in a long-term residential Scout camp:
Suggested Materials
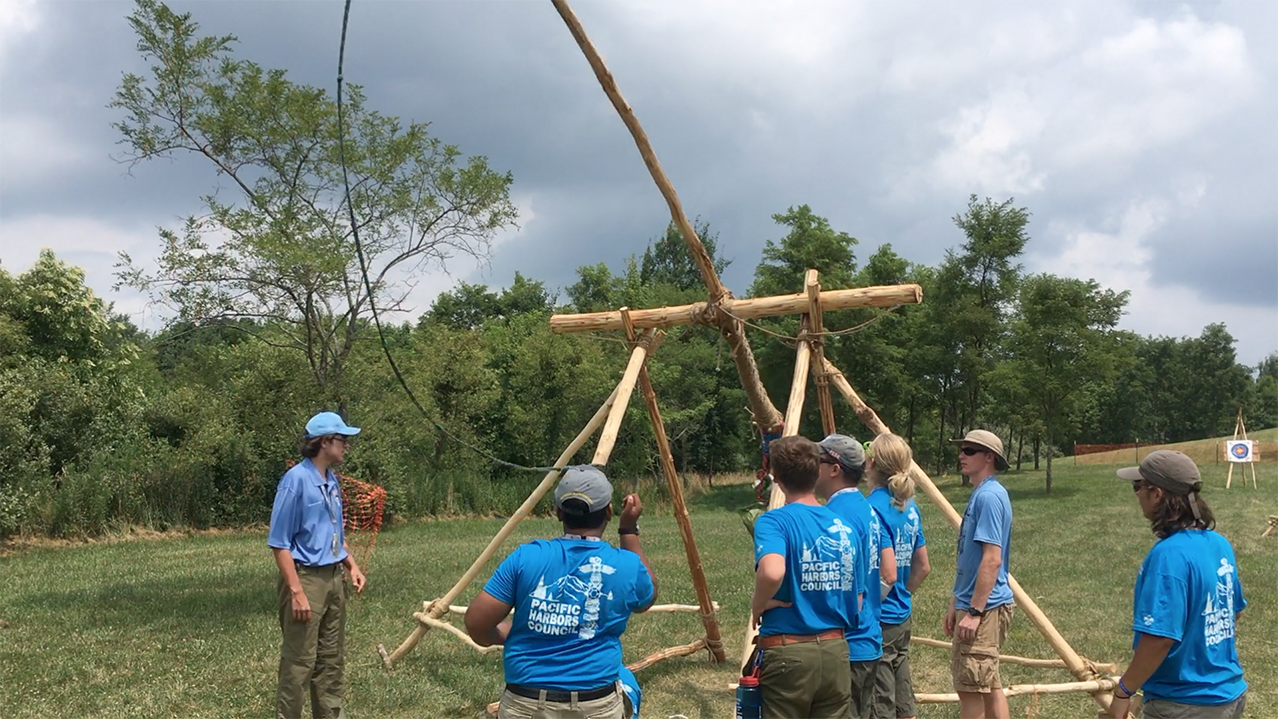
Set the parameters. Lay the four lateral spars on the ground in a square where you want to position the Atomic Pile. Overlap the ends about 4″ so there will be room to lash them to the corner uprights. Drive a small stake into the ground on the inside of where the ends intersect. This is where the holes for the corner spars need to be dug.
Prepare the corner spars. Using a post hole digger, dig the holes about two feet into the ground at the spots marked by the four small stakes. Make sure the holes are the same depth so the tips of the spars come up to the same height. Before actually placing the corner uprights into their holes, attach the pulley to each with the 40′ cord reeved through. Tie the inside end of each cord to eye hook of the log using a Roundturn With Two Half Hitches.
Attach the “boundary poles.” After placing each upright into its hole, with the pulleys facing the center of the square, and firmly tamping them in for solid support, tightly lash on the four lateral support spars about belly high.

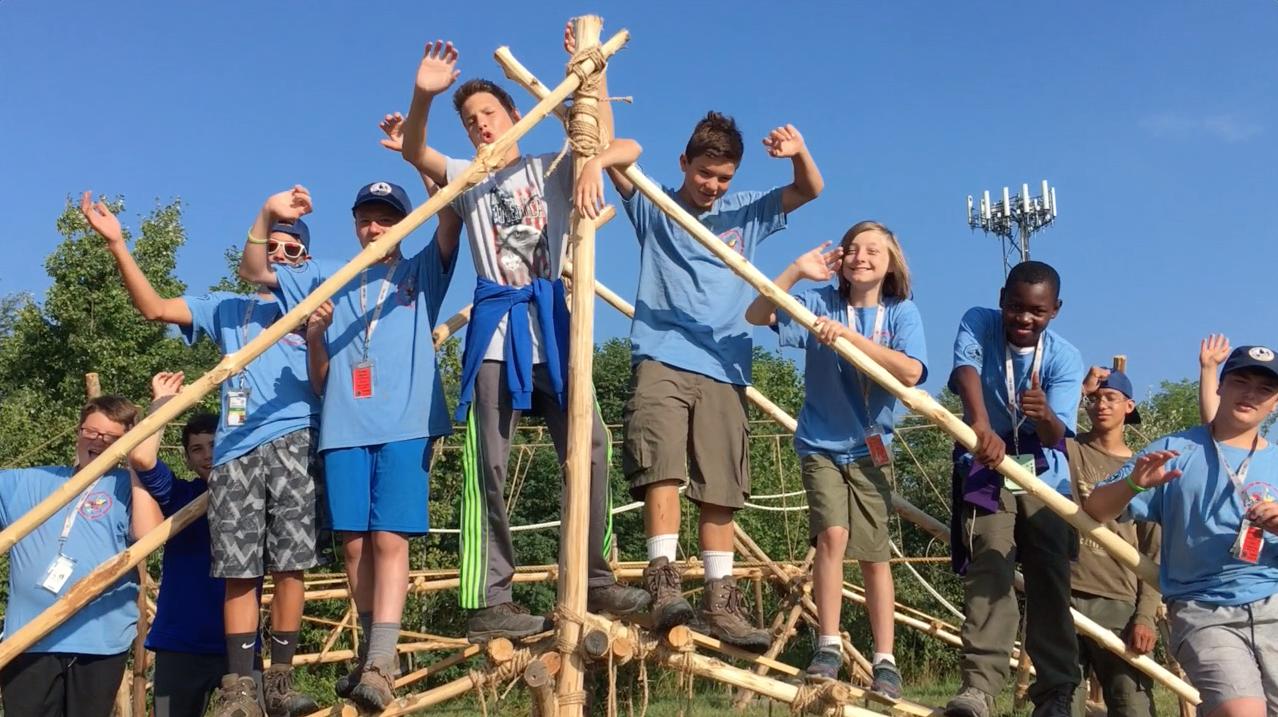
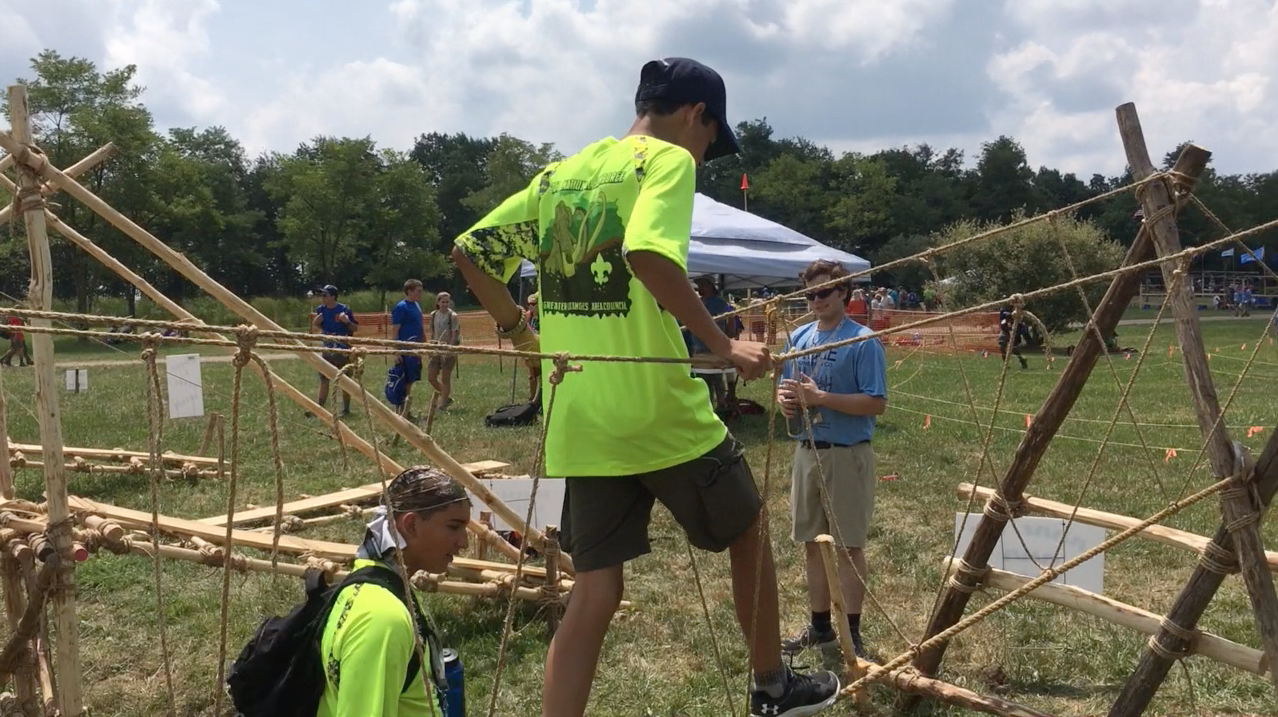
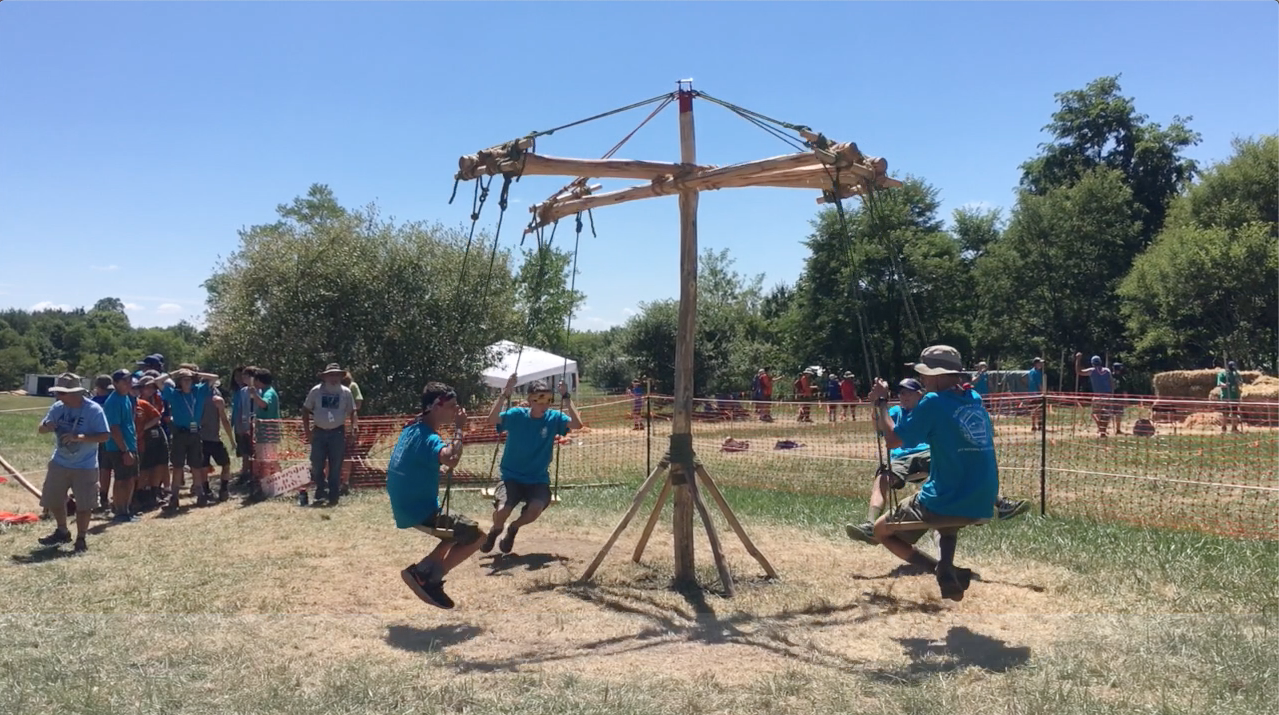
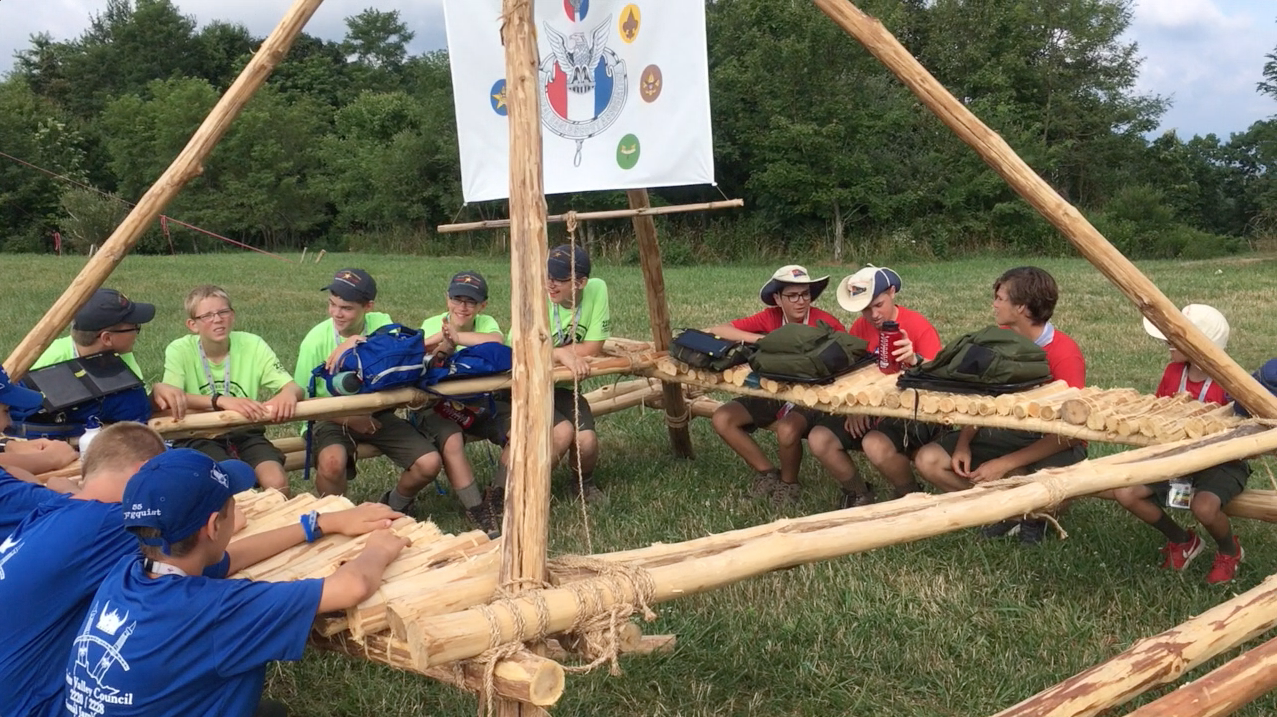
A sequential approach to program planning is one where gaining specific skills, and then putting them into action, pave the way towards a larger experience that is memorable and rewarding. This larger experience is ordinarily featured during a “main event” like an outing or special trip.
During the meetings leading up to the special event, the skills and their related activities are presented in a stepwise progression and can be likened to building blocks. The ultimate goal of this sequential approach is to use these building blocks to enable the Scouts to enjoy and appreciate the larger experience. This larger experience is a culmination of the preceding meetings with their periods of skills instruction and activities. In order to contribute an optimum level of fun to the meetings, the activities connected to each building block should not only reinforce the skills, but also be challenging and fun!
Here’s an illustration: For the initial meeting in this sequence, the square lashing is presented during a period of skills instruction. Following this, the Scout skill challenge is a Ladder Building activity. For the next meeting during a period of skills instruction, the tripod lashing is presented. The Scout skill challenge following this is Everyone on the Tripod, which incorporates both the tripod and square lashings. The third meeting in this sequence includes a period of skills instruction for the floor lashing. To put this skill into action in a fun way illustrating how it can be used, troop leaders orchestrate a Lift Seat Procession. The troop now has all the skills required to construct a Double Tripod Chippewa Kitchen, the building of which can be scheduled for the coming outing. For a fourth meeting, leading up to the outing, during a period of group instruction, the Chippewa Kitchen video can be projected, and during patrol meetings, various recipes can be reviewed. During their outing, the Scouts will necessarily have to rely upon the skills they learned to construct their Chippewa Kitchen, and then enjoy what they built as they cook up and devour their outdoor feasts.
To recap the sequential approach to programming: after presenting information, a skill, or a technique, (building blocks), whatever’s been presented will be brought to life in a fun and/or challenging way. Eventually, each building block will be combined with others, contributing to that larger experience that is especially memorable and rewarding.
Unlike most programs, where it seems students often learn something just to get tested on it, Scouting can provide opportunities to learn something and then have fun with it. What’s even better, is when what’s learned is combined with other learnings, to experience something bigger—something outstanding. This kind of sequential programming approach is an effective way to deliver the promise of Scouting!
The camp staff placed a supply of materials in an open area by the lake assigned as the designated raft building place. Groups of Scouts could use any of the materials there to create whatever kind of raft they chose. On hand were lengths of precut bamboo, plastic 55 gallon drums, and lengths of old manila rope. There was no set raft building schedule, so Scouts could devote as much of their free time as they wanted. The only definition regarding time factor was that of the race itself, scheduled for Friday at 3:00 p.m.
This raft building venture revealed a consideration that was not so obvious for many who participated, either in an advisory capacity or as a builder — a little something called “center off gravity”. As soon as many of the rafts were launched, this not so obvious consideration quickly reared its head, to the shock and surprise of the riders and to the delight of many observers. As soon as the race began, some of the rafts that looked like they’d do just fine performed a 180º flip over. By lashing on their drums directly under the bamboo, without taking into consideration the need to provide some form of counter balance, many of the Scouts had created a center of gravity that was too high, and this resulted in an unexpected and immediate dunking. All in all, it was a great race! And, after the race, I happened to overhear a wet group of Scouts remark, “That was fun. We gotta do that again!” Experience is the best teacher.
CLICK ON EACH PHOTO FOR A LARGER VIEW:


 Scouting founder Robert Baden-Powell believed every Scout should know how to build bridges. From designing the structure to gathering materials and putting it all together, bridge construction combines technology, teamwork and enthusiasm to complete a span that is memorable and useful.
A bridge on a hiking trail can be as simple as a log across a narrow gap. A more serious one relies on sturdier materials like rope and poles. A rope bridge Baden-Powell described in his 1908 manual, Scouting for Boys, is what today’s Scouts would call a monkey bridge.
This is a classic pioneering project, and a variety of styles and instructions have been shared many times, from a 1965 Boys’ Life article penned by Scouting leader and author William “Green Bar Bill” Hillcourt to various editions of the Pioneering merit badge pamphlet.
If Scouts don’t have a stream or small gully to cross, they can build the bridge in a meadow or backyard. Follow safety rules, ensuring the foot rope is no higher than 6 feet off the ground and no longer than 25 feet between A-frames. Using a 50-foot rope, the maximum span between A-frames should be 20 feet, with the extra length being used for anchoring the bridge.
Before building any pioneering structure, it’s necessary to first acquire the wherewithal to experience success. The skills, along with the lashing ropes and poles required to build a monkey bridge using double A-frames for better stability, can be used time and again, for a variety of pioneering projects and troop meeting activities. Here’s how to build a monkey bridge.

1. Begin by building four identical A-frames with the 8-foot and 6-foot spars. Make sure the A-frames are all uniform in size when lashed together. Lash them together with three tight square lashings. You could also use shear lashings at the top of the A-frames.

2. Once you have four identical A-frames, it’s time to make two pairs of double A-frames. Stand up two A-frames so they overlap each other one-half their length (about 3 feet). Join the legs together where they intersect with a tight square lashing. Finally, lash the two 6-foot bottom ledgers together where they overlap with three tight round lashings. Do the same for the other double A-frame.

3. Drive the pioneering stakes into the ground first with three stakes together, then two, and then one. Use loops of binder twine and a small stick in between each set to form a tourniquet. Both 3-2-1 anchors should be installed about 10 feet from where the A-frames will be erected. Place a rope grommet around the front stakes, before applying the tourniquet joining the three front stakes to the middle two.
4. Position the double A-frames no more than 20 feet apart from each other. Lay the foot and hand ropes alongside the A-frames. Attach the stringer ropes to a hand rope with a clove hitch at 3- to 4-foot intervals along the hand rope. Make roundturns around the foot rope and tie the running ends of the stringer ropes to the other hand rope with a clove hitch.
5. Make two saddles by folding pieces of burlap, placing one above the square lashings in the middle of the double A-frames where they intersect. This is where the foot rope will rest.
6. With the double A-frames held in place on each side, place the foot rope over the saddles, and tie the hand ropes to the top of the A-frames with clove hitches on a bight.
7. About halfway between the anchor and the A-frames, tie a butterfly knot in the foot rope to form a fixed loop for a rope tackle (trucker’s hitch). With Scouts still holding the double A-frames in position, use the rope tackles to put strain on the foot rope. Next, pull the hand ropes tight and attach them to the anchors using rope tackle or roundturns with two half-hitches.
8. Once all the ropes are tightened, check the knots and lashings before crossing the bridge. Allow only one person on the bridge at a time.


Scouts can celebrate their bridge’s completion by crossing it and reflecting on how the project came together. What went well? What would they do differently next time? What roles did teamwork and leader-ship play in the project?
After it has served its purpose, the bridge can be dismantled: The ropes can be coiled and stored with the poles in a dry place, ready to bring out for the next pioneering project.
Helping Scouts realize they have the power to plan and construct big projects is a practical way to bridge the gap between the promise of Scouting adventure and fulfilling that promise in the field.
Robert Birkby is author of three editions of The Boy Scout Handbook, two editions of the BSA’s Fieldbook and the newest edition of the Conservation Handbook. Find him at robertbirkby.com
Special thanks to Larry Green

Outdoor skills aren’t just for the monthly campout. There are plenty of ways your Scouts can hone their outdoor skills on a regular basis, like during unit meetings.
Here is this week’s tip that the BSA’s national camping subcommittee shared with us. Special thanks to Larry Green for the tips and text below. For previous camp hacks and tips from the subcommittee, click here.
Once Scouts can demonstrate an acquired skill, they should be given opportunities to do something fun with it that provides a challenge that illustrates how the skill is used, and an opportunity requiring them to rely upon the skill in order to complete the task.
When properly planned, well-prepared, and effectively presented, these kinds of engaging activities contribute greatly to making a Scout meeting fun with positive outcomes.
Putting skills into action keeps Scouts involved, requires them to use teamwork, and provides the grounds for experiencing success. Bringing skills to life during a troop meeting in a manner that nearly simulates the way they’re used in the field, is always a good way to reinforce what Scouts learn, while honing their skills to keep them sharp.
Here are some fun activities and games your Scouts can do while incorporating skills they’ve learned:
For more team-building activities and skills challenges, click here.

Did you know a clove hitch is essentially two simple knots? When your Scout is tying lashings, all they need to know to create a clove hitch is how to tie a half-hitch.
For the next few weeks, we’ll be sharing some camp hacks that the BSA’s national camping subcommittee has shared with us. This week, we’re showing you how to tie a clove hitch, which is used to begin and end many lashings. Special thanks to Larry Green for the tips and text below.
John Thurman, the Camp Chief at Gilwell Park in England for more than 25 years, wrote, “The first and everlasting thing to remember about the clove hitch is that it is composed of two half-hitches.”


When a clove hitch is formed in this manner, snugging it right against the wraps to finish a lashing is easy.
Watch the video of this technique below.
As presented in Bryan on Scouting:

Tying a square knot might be confusing for Scouts. “Right-over-left” or was it “left-over-right?”
For the next few weeks, we’ll be sharing some camp hacks that the BSA’s national camping subcommittee has shared with us. This week’s tip involves a technique to tying a square knot correctly every time. Special thanks to Larry Green for the tips and text below.
The square knot, also known as the reef knot, is first and foremost a binding knot. Its primary function is to secure a line tightly up against an object as when tying a bandage, a package or the flaps of a wall tent at camp.
When it’s time to tie a square knot, there’s a surefire way to always tie it right, and all you need to do is use your eyes.


Tying a square knot from this visual perspective comes in handy, because often Scouts will lose track of whether they went over-under or under-over, or right-over-left or left-over-right. Once they get the knack of seeing how each end stays in its own “zone,” this approach is fool-proof.
Watch the video of this technique below.
Preventing the ends of rope from fraying is a process referred to as “whipping.” Learning how to whip the ends of a rope is one of the early requirements on the Scouts BSA advancement trail.
Indeed there are many approaches to whipping a rope, but the one that’s used for the hundreds of lashing ropes in the pioneering area at national jamborees, as well as the 2019 World Jamboree, is known as the West Country Whipping. What’s so special about this whipping? The answer is simple. It’s easy to teach and easy to tie, and most importantly, it’s easy to make tight! Hence, Scouts learn it more quickly and like it much better.

1. Start by tying a half knot, the way you would start a square knot, near the rope’s end.
2. Continue by carrying the two ends of the whipping cord around the back of the rope, away from you, and tie another half knot identical to the first.
3. Keep repeating the half knots, front and back, pulling each one tight.

4. Form each half knot the same way, either right over left, or left over right, so they interlock neatly together, and snug against the previous half knot.
5. Continue the process until the whipping is as wide as the rope’s diameter.
6. Finish off with a tight square knot.
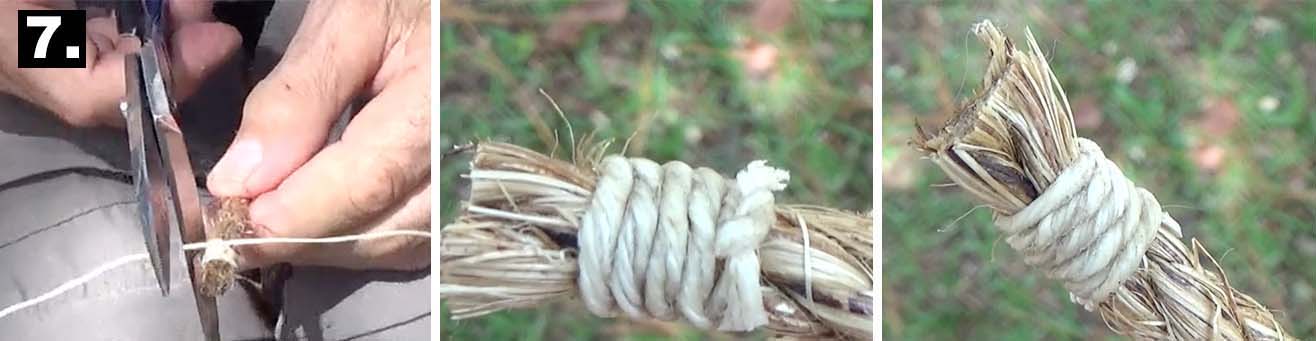
7. Finally, the excess cord is trimmed. VIEW THE HOW-TO VIDEO
 With this smack-your-forehead, it’s-so-obvious, single-flag configuration, there’s no measuring the exact distance between where the clips will be applied to accommodate flags with varying spaces between their grommets. It’s a simplistic approach that works well in light conditions for shorter periods of time.
Make sure the halyard line will be the right length, and tie a small carabiner onto each end. Before raising the pole, tie on a third carabiner to the top and clip the middle of the halyard through it. The clips on each end of the halyard attach to each of the two grommets of the flag forming one continuous loop with the flag itself joining each end of the halyard.

There’s one, important point to remember! The halyard by itself does not form a continuous loop unless the clips are linked together. This means, when the flag is not attached, if one end of the line happens to get pulled upward past arms reach, there’s very little likelihood it can be retrieved without lowering the whole pole. So, after the pole is raised, whenever the flag is not attached, always remember and be careful to join the two clips together!


