CLICK ON EACH PHOTO FOR A LARGER VIEW:


CLICK ON EACH PHOTO FOR A LARGER VIEW:
This design was adapted from what John Sweet refers to as The Skylite in his booklet Pioneering in Town and Country. The main difference is the improvised framework for the two narrow quadpods is neither anchored or reliant on weighted supports, but instead is wide enough to allow the whole structure to be free-standing all by itself. With today’s lightweight LED lanterns, it’s easy to rig a halyard to raise and lower the lantern so it can be easily turned on and off. The novelty of floating the quadpods off the ground, like the Skylon “Floating” Flagpole adds and element of coolness to the structure as well as a little additional height for the beacon.


Outdoor skills aren’t just for the monthly campout. There are plenty of ways your Scouts can hone their outdoor skills on a regular basis, like during unit meetings.
Here is this week’s tip that the BSA’s national camping subcommittee shared with us. Special thanks to Larry Green for the tips and text below. For previous camp hacks and tips from the subcommittee, click here.
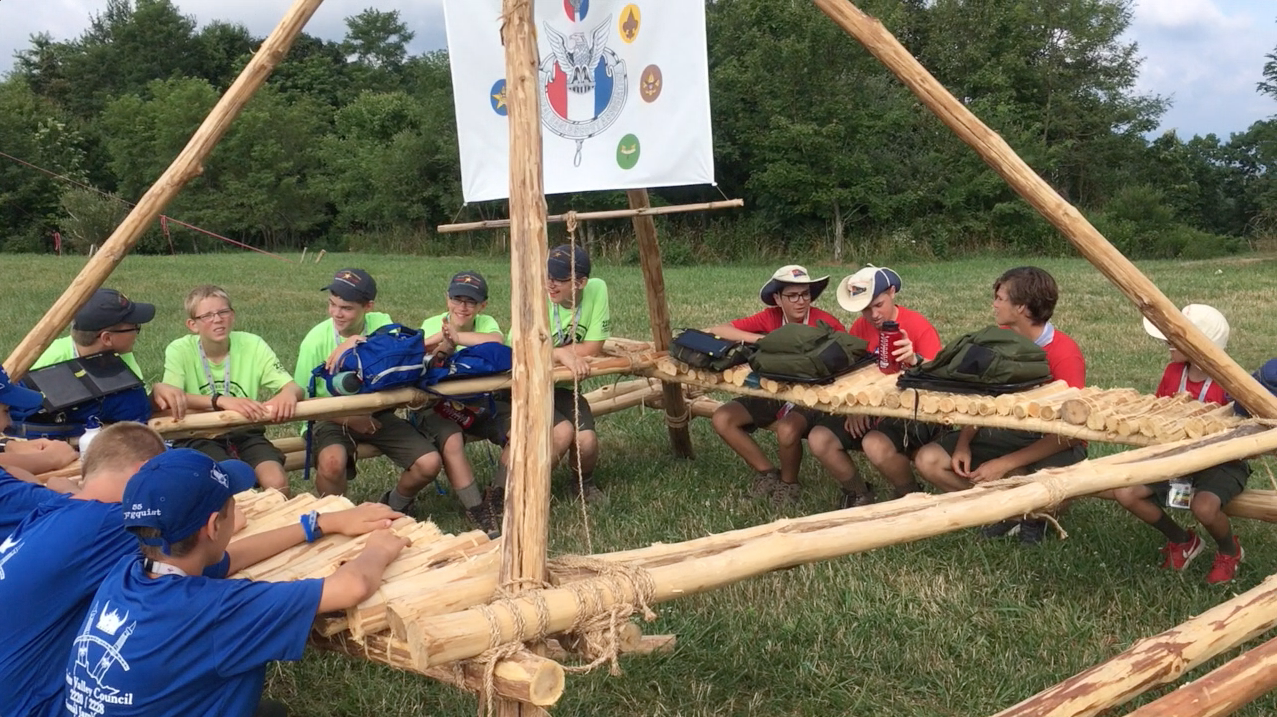
Once Scouts can demonstrate an acquired skill, they should be given opportunities to do something fun with it that provides a challenge that illustrates how the skill is used, and an opportunity requiring them to rely upon the skill in order to complete the task.
When properly planned, well-prepared, and effectively presented, these kinds of engaging activities contribute greatly to making a Scout meeting fun with positive outcomes.
Putting skills into action keeps Scouts involved, requires them to use teamwork, and provides the grounds for experiencing success. Bringing skills to life during a troop meeting in a manner that nearly simulates the way they’re used in the field, is always a good way to reinforce what Scouts learn, while honing their skills to keep them sharp.
Here are some fun activities and games your Scouts can do while incorporating skills they’ve learned:
For more team-building activities and skills challenges, click here.
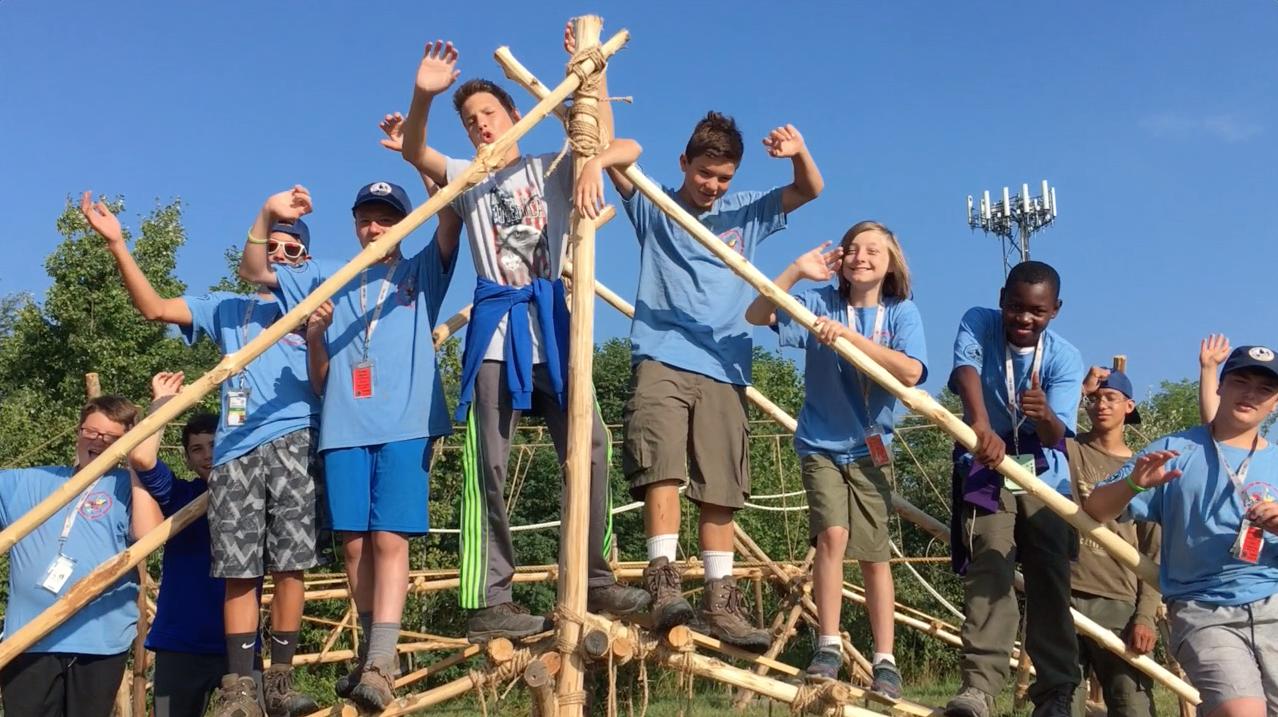
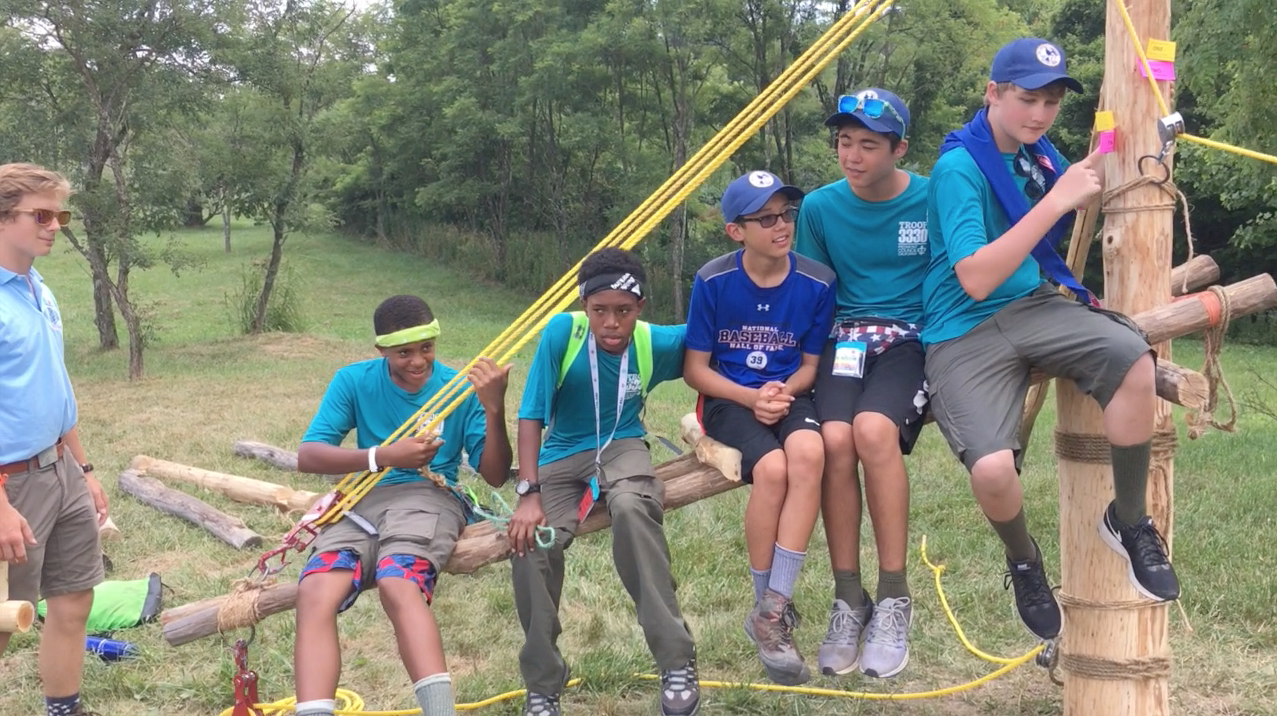
 Scouting founder Robert Baden-Powell believed every Scout should know how to build bridges. From designing the structure to gathering materials and putting it all together, bridge construction combines technology, teamwork and enthusiasm to complete a span that is memorable and useful.
A bridge on a hiking trail can be as simple as a log across a narrow gap. A more serious one relies on sturdier materials like rope and poles. A rope bridge Baden-Powell described in his 1908 manual, Scouting for Boys, is what today’s Scouts would call a monkey bridge.
This is a classic pioneering project, and a variety of styles and instructions have been shared many times, from a 1965 Boys’ Life article penned by Scouting leader and author William “Green Bar Bill” Hillcourt to various editions of the Pioneering merit badge pamphlet.
If Scouts don’t have a stream or small gully to cross, they can build the bridge in a meadow or backyard. Follow safety rules, ensuring the foot rope is no higher than 6 feet off the ground and no longer than 25 feet between A-frames. Using a 50-foot rope, the maximum span between A-frames should be 20 feet, with the extra length being used for anchoring the bridge.
Before building any pioneering structure, it’s necessary to first acquire the wherewithal to experience success. The skills, along with the lashing ropes and poles required to build a monkey bridge using double A-frames for better stability, can be used time and again, for a variety of pioneering projects and troop meeting activities. Here’s how to build a monkey bridge.

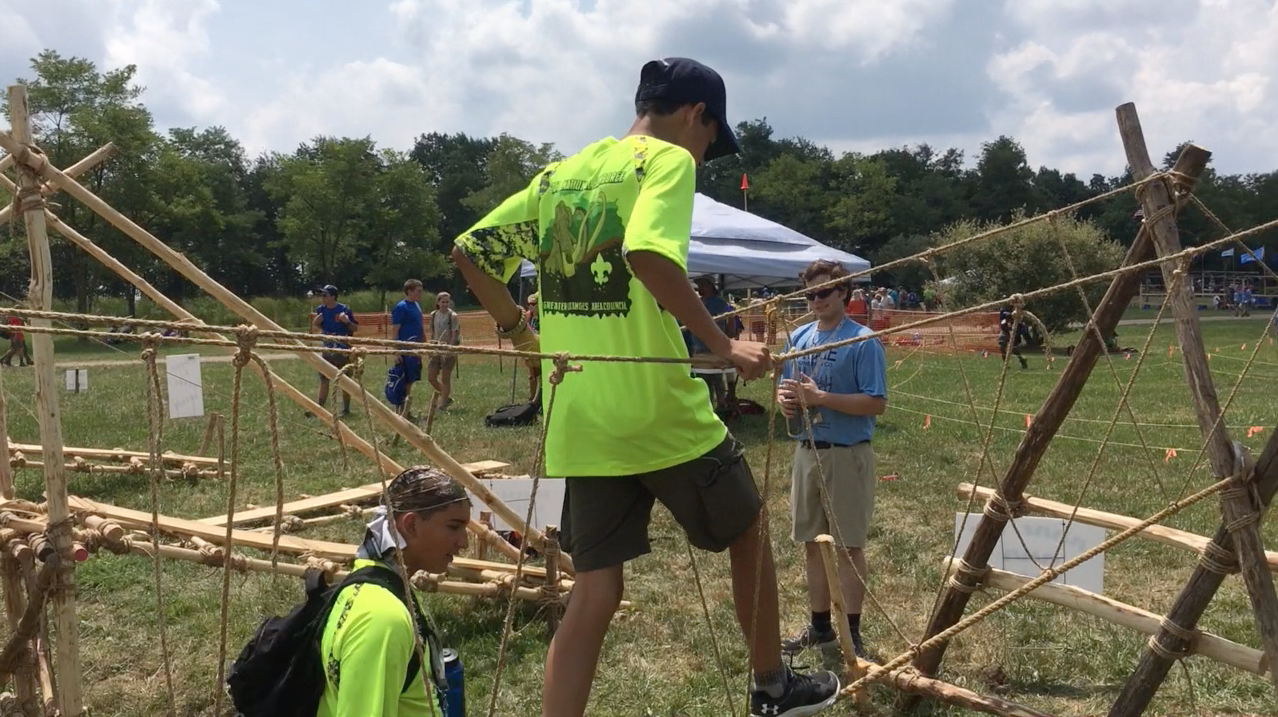
1. Begin by building four identical A-frames with the 8-foot and 6-foot spars. Make sure the A-frames are all uniform in size when lashed together. Lash them together with three tight square lashings. You could also use shear lashings at the top of the A-frames.

2. Once you have four identical A-frames, it’s time to make two pairs of double A-frames. Stand up two A-frames so they overlap each other one-half their length (about 3 feet). Join the legs together where they intersect with a tight square lashing. Finally, lash the two 6-foot bottom ledgers together where they overlap with three tight round lashings. Do the same for the other double A-frame.

3. Drive the pioneering stakes into the ground first with three stakes together, then two, and then one. Use loops of binder twine and a small stick in between each set to form a tourniquet. Both 3-2-1 anchors should be installed about 10 feet from where the A-frames will be erected. Place a rope grommet around the front stakes, before applying the tourniquet joining the three front stakes to the middle two.
4. Position the double A-frames no more than 20 feet apart from each other. Lay the foot and hand ropes alongside the A-frames. Attach the stringer ropes to a hand rope with a clove hitch at 3- to 4-foot intervals along the hand rope. Make roundturns around the foot rope and tie the running ends of the stringer ropes to the other hand rope with a clove hitch.
5. Make two saddles by folding pieces of burlap, placing one above the square lashings in the middle of the double A-frames where they intersect. This is where the foot rope will rest.
6. With the double A-frames held in place on each side, place the foot rope over the saddles, and tie the hand ropes to the top of the A-frames with clove hitches on a bight.
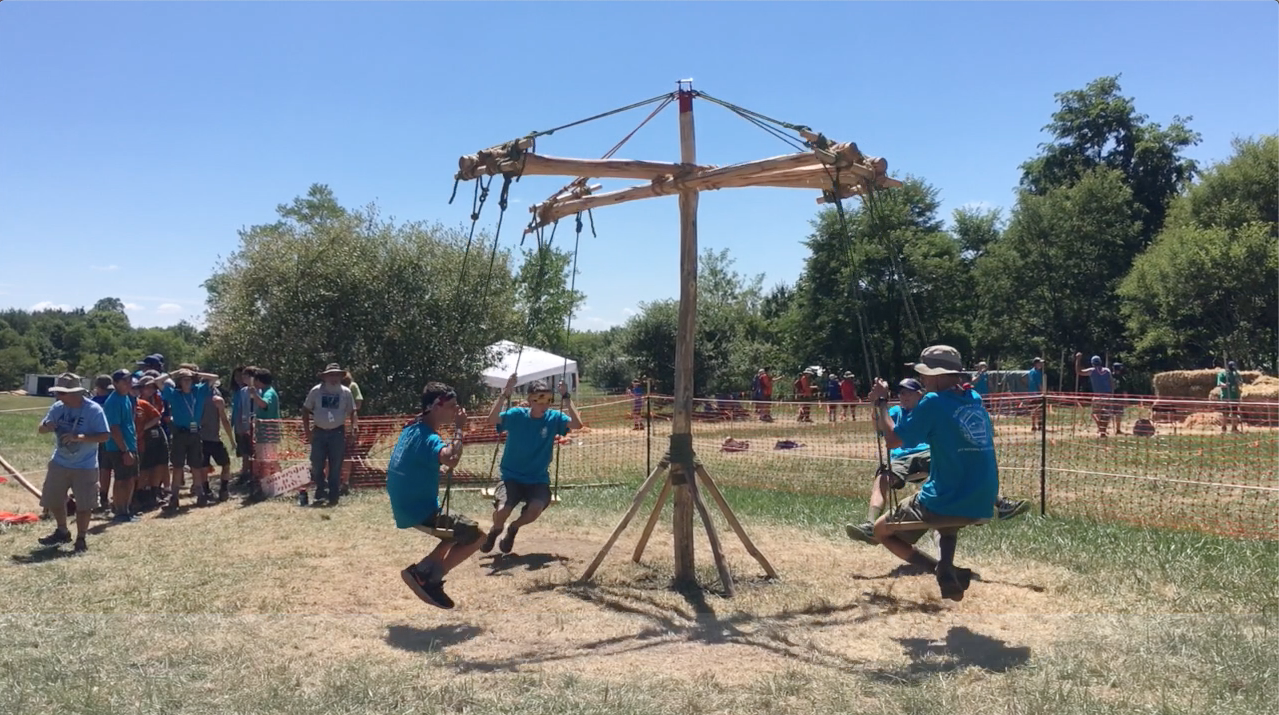
7. About halfway between the anchor and the A-frames, tie a butterfly knot in the foot rope to form a fixed loop for a rope tackle (trucker’s hitch). With Scouts still holding the double A-frames in position, use the rope tackles to put strain on the foot rope. Next, pull the hand ropes tight and attach them to the anchors using rope tackle or roundturns with two half-hitches.
8. Once all the ropes are tightened, check the knots and lashings before crossing the bridge. Allow only one person on the bridge at a time.


Scouts can celebrate their bridge’s completion by crossing it and reflecting on how the project came together. What went well? What would they do differently next time? What roles did teamwork and leader-ship play in the project?
After it has served its purpose, the bridge can be dismantled: The ropes can be coiled and stored with the poles in a dry place, ready to bring out for the next pioneering project.
Helping Scouts realize they have the power to plan and construct big projects is a practical way to bridge the gap between the promise of Scouting adventure and fulfilling that promise in the field.
Robert Birkby is author of three editions of The Boy Scout Handbook, two editions of the BSA’s Fieldbook and the newest edition of the Conservation Handbook. Find him at robertbirkby.com
Special thanks to Larry Green
Outdoor skills aren’t just for the monthly campout. There are plenty of ways your Scouts can hone their outdoor skills on a regular basis, like during unit meetings.
Here is this week’s tip that the BSA’s national camping subcommittee shared with us. Special thanks to Larry Green for the tips and text below. For previous camp hacks and tips from the subcommittee, click here.
Once Scouts can demonstrate an acquired skill, they should be given opportunities to do something fun with it that provides a challenge that illustrates how the skill is used, and an opportunity requiring them to rely upon the skill in order to complete the task.
When properly planned, well-prepared, and effectively presented, these kinds of engaging activities contribute greatly to making a Scout meeting fun with positive outcomes.
Putting skills into action keeps Scouts involved, requires them to use teamwork, and provides the grounds for experiencing success. Bringing skills to life during a troop meeting in a manner that nearly simulates the way they’re used in the field, is always a good way to reinforce what Scouts learn, while honing their skills to keep them sharp.
Here are some fun activities and games your Scouts can do while incorporating skills they’ve learned:
For more team-building activities and skills challenges, click here.

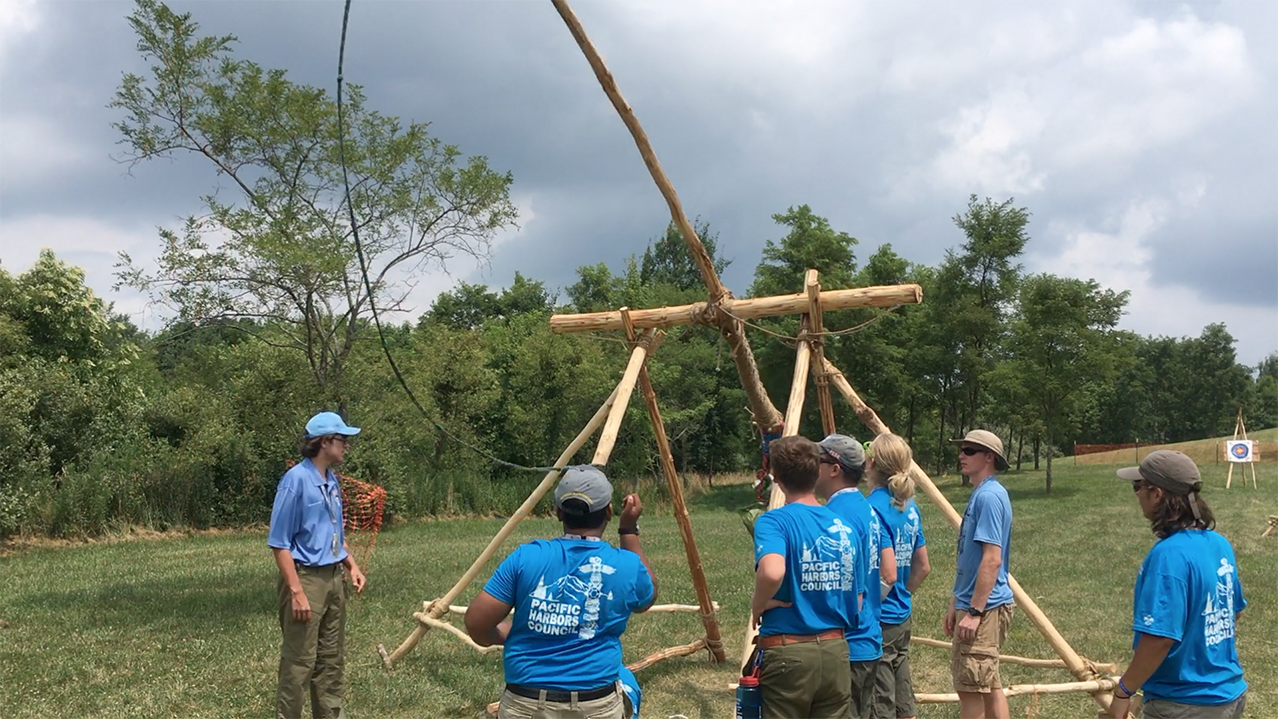
A dining fly is one of the first structures you should put up at camp. But what if you’re in an area away from trees, how do you secure one?
For the next couple of weeks, we’ll be sharing some camp hacks that the BSA’s national camping subcommittee has shared with us. This week’s tip involves how to set up a dining fly. Special thanks to Larry Green for the tips and text below.
In the Camping merit badge pamphlet, under the “Managing Your Campsite” section, it reads, “Set up a dining fly first. That will provide shelter for food and you in case of rain, and will give a sense of where you will center most of your camp activities.”
It’s a regular practice that the dining fly is the first thing to go up and the last thing to come down. Here’s one simple way for a patrol to set up their fly when there are no trees for the ridge line.


Watch these videos for techniques and tips below.

Did you know a clove hitch is essentially two simple knots? When your Scout is tying lashings, all they need to know to create a clove hitch is how to tie a half-hitch.
For the next few weeks, we’ll be sharing some camp hacks that the BSA’s national camping subcommittee has shared with us. This week, we’re showing you how to tie a clove hitch, which is used to begin and end many lashings. Special thanks to Larry Green for the tips and text below.
John Thurman, the Camp Chief at Gilwell Park in England for more than 25 years, wrote, “The first and everlasting thing to remember about the clove hitch is that it is composed of two half-hitches.”


When a clove hitch is formed in this manner, snugging it right against the wraps to finish a lashing is easy.
Watch the video of this technique below.
As presented in Bryan on Scouting:

Tying a square knot might be confusing for Scouts. “Right-over-left” or was it “left-over-right?”
For the next few weeks, we’ll be sharing some camp hacks that the BSA’s national camping subcommittee has shared with us. This week’s tip involves a technique to tying a square knot correctly every time. Special thanks to Larry Green for the tips and text below.
The square knot, also known as the reef knot, is first and foremost a binding knot. Its primary function is to secure a line tightly up against an object as when tying a bandage, a package or the flaps of a wall tent at camp.
When it’s time to tie a square knot, there’s a surefire way to always tie it right, and all you need to do is use your eyes.


Tying a square knot from this visual perspective comes in handy, because often Scouts will lose track of whether they went over-under or under-over, or right-over-left or left-over-right. Once they get the knack of seeing how each end stays in its own “zone,” this approach is fool-proof.
Watch the video of this technique below.
As presented in Bryan on Scouting:

Whipping a rope can be a little tricky. If your Scout is struggling with the traditional method, you can teach them another way, called “West Country whipping.”
For the next few weeks, we’ll be sharing some camp hacks that the BSA’s national camping subcommittee has shared with us. This week’s tip involves an easier way to whip a rope. Special thanks to Larry Green for the tips and text below.
Preventing the ends of rope from fraying is a process referred to as “whipping.” Learning how to whip the ends of a rope is one of the early requirements on the Scouts BSA advancement trail.
Indeed, there are many approaches to whipping a rope, but the one that’s used for the hundreds of lashing ropes in the pioneering area at national jamborees, as well as the 2019 World Scout Jamboree, is known as the West Country Whipping. What’s so special about this whipping? The answer is simple. It’s easy to teach and easy to tie, and most importantly, it’s easy to make tight. Hence, Scouts learn it more quickly and like it much better.

 Watch the video of this technique below.
Preventing the ends of rope from fraying is a process referred to as “whipping.” Learning how to whip the ends of a rope is one of the early requirements on the Scouts BSA advancement trail.
Indeed there are many approaches to whipping a rope, but the one that’s used for the hundreds of lashing ropes in the pioneering area at national jamborees, as well as the 2019 World Jamboree, is known as the West Country Whipping. What’s so special about this whipping? The answer is simple. It’s easy to teach and easy to tie, and most importantly, it’s easy to make tight! Hence, Scouts learn it more quickly and like it much better.

1. Start by tying a half knot, the way you would start a square knot, near the rope’s end.
2. Continue by carrying the two ends of the whipping cord around the back of the rope, away from you, and tie another half knot identical to the first.
3. Keep repeating the half knots, front and back, pulling each one tight.

4. Form each half knot the same way, either right over left, or left over right, so they interlock neatly together, and snug against the previous half knot.
5. Continue the process until the whipping is as wide as the rope’s diameter.
6. Finish off with a tight square knot.
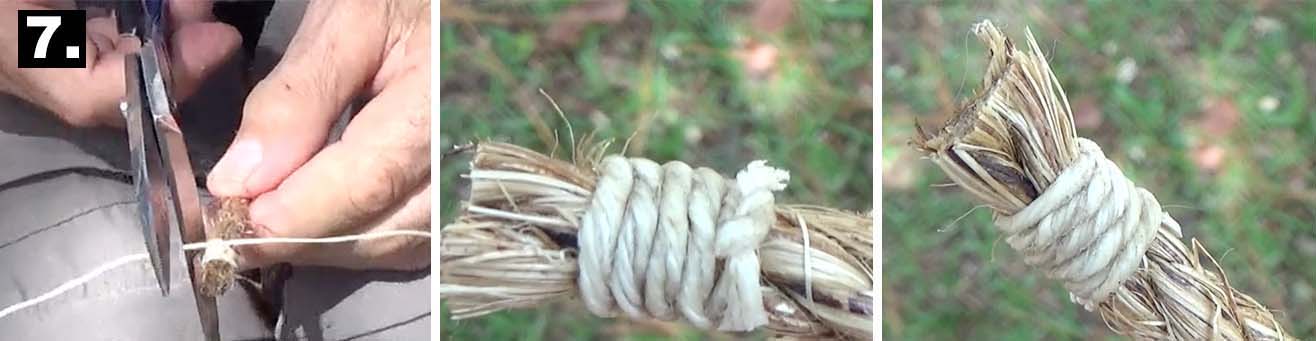
7. Finally, the excess cord is trimmed. VIEW THE HOW-TO VIDEO
 With this smack-your-forehead, it’s-so-obvious, single-flag configuration, there’s no measuring the exact distance between where the clips will be applied to accommodate flags with varying spaces between their grommets. It’s a simplistic approach that works well in light conditions for shorter periods of time.
Make sure the halyard line will be the right length, and tie a small carabiner onto each end. Before raising the pole, tie on a third carabiner to the top and clip the middle of the halyard through it. The clips on each end of the halyard attach to each of the two grommets of the flag forming one continuous loop with the flag itself joining each end of the halyard.

There’s one, important point to remember! The halyard by itself does not form a continuous loop unless the clips are linked together. This means, when the flag is not attached, if one end of the line happens to get pulled upward past arms reach, there’s very little likelihood it can be retrieved without lowering the whole pole. So, after the pole is raised, whenever the flag is not attached, always remember and be careful to join the two clips together!


Of course you’ve gotta love this (and all) Norman Rockwell paintings, but this one is always timely, and perhaps now more than ever. The kind of Scouting adventure that younger Scouts can look forward to needs to be evidenced by the troops they observe. And then of course, that “Promise of Scouting” NEEDS to be delivered!
Membership in what used to be called the Boy Scouting division is down, and has been diminishing for many years. With the advent of girls joining what is now referred to as Scouts BSA, there’s still a VERY IMPORTANT principle that should never be (and should never have been) neglected. That is: troops should actively engage in, and on a regular basis demonstrate in the public eye, timeless, traditional outdoor skills.
Just like for the Cub Scout depicted in the painting, it’s these traditional outdoor adventures that embody the promise of Scouting, and experiencing them require the acquisition of the basic, and always relevant skills. Obviously, when the youngster in the painting is old enough to join those older guys, he’s going to have numerous experiences that give rise to rich Scouting memories. And, he won’t drop out. Why would he? Look at the size of those actively involved individuals clad in khaki! And, look how they’re actively involved in an experience laced with challenges and fun!
The Diamond Hitch was many times more prevalent a couple of decades past, and was featured throughout a range of Scout publications. It’s not actually associated with Scout Pioneering, but it’s still an example of nifty rope work. Though there’s not nearly as many packboards in use today, the Diamond Hitch still can serve as the most practical approach to securing a bundle to an object, even in today’s modern world of bungee cords and the like. The following diagram and description was scanned from the ’76 printing of the 1967 Fieldbook.