Link to: Pioneering and Team Building
CLICK ON PHOTOS FOR LARGER IMAGE


Link to: Pioneering and Team Building
CLICK ON PHOTOS FOR LARGER IMAGE

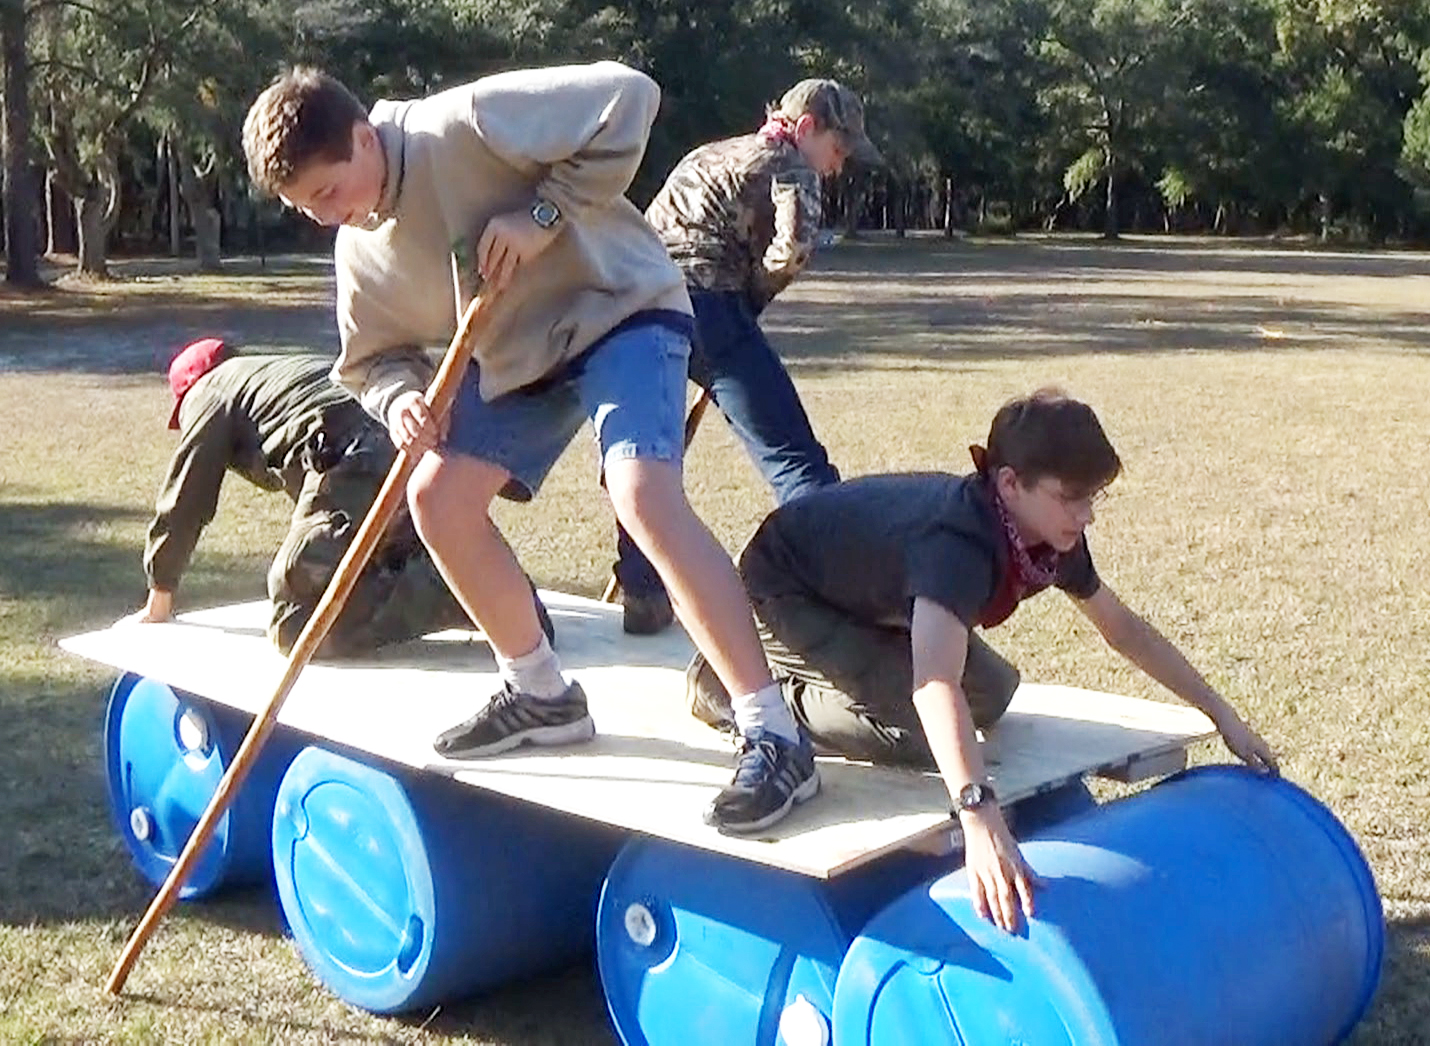
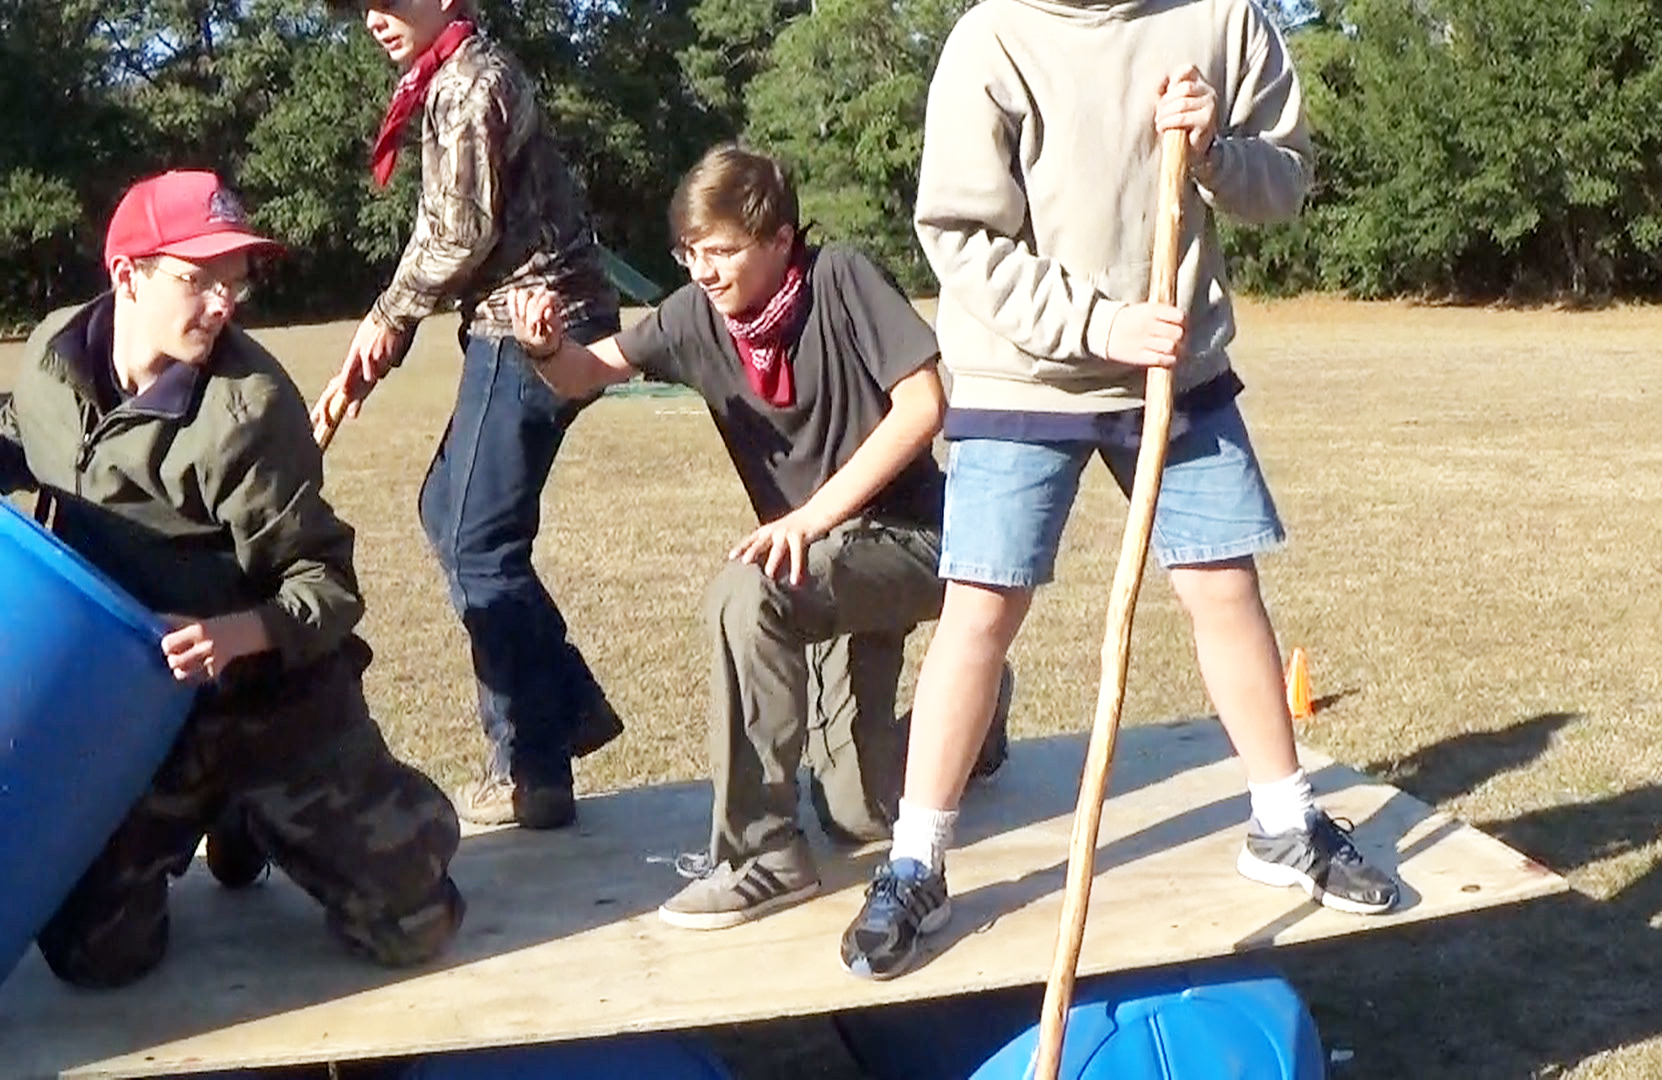
Team Building Opportunity. The challenge referred to as Crossing the Alligator Pit is an activity that requires 100% cooperation and teamwork. The Scout on the A-Frame “walker” is totally reliant on his fellow Scouts to keep him aloft and facilitate his forward progress. The whole time that he’s bringing into play his balance along with his leg, shoulder and arm muscles, it’s the members of his patrol that not only greatly increase the effect of his movements, but also keep him from spilling over.
Crossing the Alligator Pit can initially be tackled using what we can term “group leadership,” where several members of the patrol all contribute their opinions on how to best get the “walker” moving and not falling over. As the successful crew experiences the necessity of coordinating the handling of the guylines with the movements of the Scout on the “walker,” invariably one Scout will need to assume the role of calling the shots and keeping everyone on their toes.

Scout Spirit! This was best exampled during a District Camporee devoted to Junior Leader Training. Scouts from Troop 822 out of Mount Vernon, SC poured themselves into the activity and not only mastered the challenge, but provided spectators with some fun and excitement as well. They approached the task of building their A-Frame with enthusiasm. Finishing in good form, they wasted no time in standing up the structure and holding it in position with their guylines. As soon as their rider climbed on board, it became obvious: it was the top two lines that required the most unfaltering attention to keep the A-Frame vertical. The Scout on the A-Frame was exuberant as he discovered how to swing the walker forward one leg at a time. The patrol then totally got the hang of how to use the bottom guylines to add that real oomph to the “walker” propelling it forward. As they smoothly traversed the fifteen feet of the “alligator pit,” their leader reminded us of a coxswain, rhythmically yelling out, “Pull!” to the crew manning the oars in a boat race. “One, two, THREE!…one two, THREE!…one two, THREE!” On each “THREE!” the rider swung one leg of the “walker” forward, as the Scout manning that leg’s forward guyline simultaneously heaved on his rope, while the others remained alert to help guide and steady the A-Frame. Their “walker” actually walked in rhythm and it was quite a spectacle!

They kept on going! Crossing the Alligator Pit is more challenging than the majority of other interpatrol competitions, demanding a full measure of concentration and cooperation. With a well-lashed A-Frame and a rider who gets the knack of balancing his weight and swinging the legs of the “walker,” a patrol that can keep their structure upright will eventually be able to successfully cover the fifteen foot distance. Fifteen feet is fifteen feet and decently doable, especially on flat terrain. A hundred and fifty feet up a hill is a horse of a different color, and that’s what this patrol from Troop 822 challenged themselves to do. They kept going across the field up a hill towards the dining hall, and they didn’t stop until they reached the top! When they finally stopped, it was already getting dark outside. Their persistence, and teamwork was nothing short of amazing! These Scouts went far, and it makes sense that with all their determination, they’ll continue to go far in whatever direction they set out for themselves.


This is the sixth post in a series that will eventually comprise an activity-based, unit pioneering program curriculum.
SUPPORTING VIDEO: How to Tie a Tripod Lashing
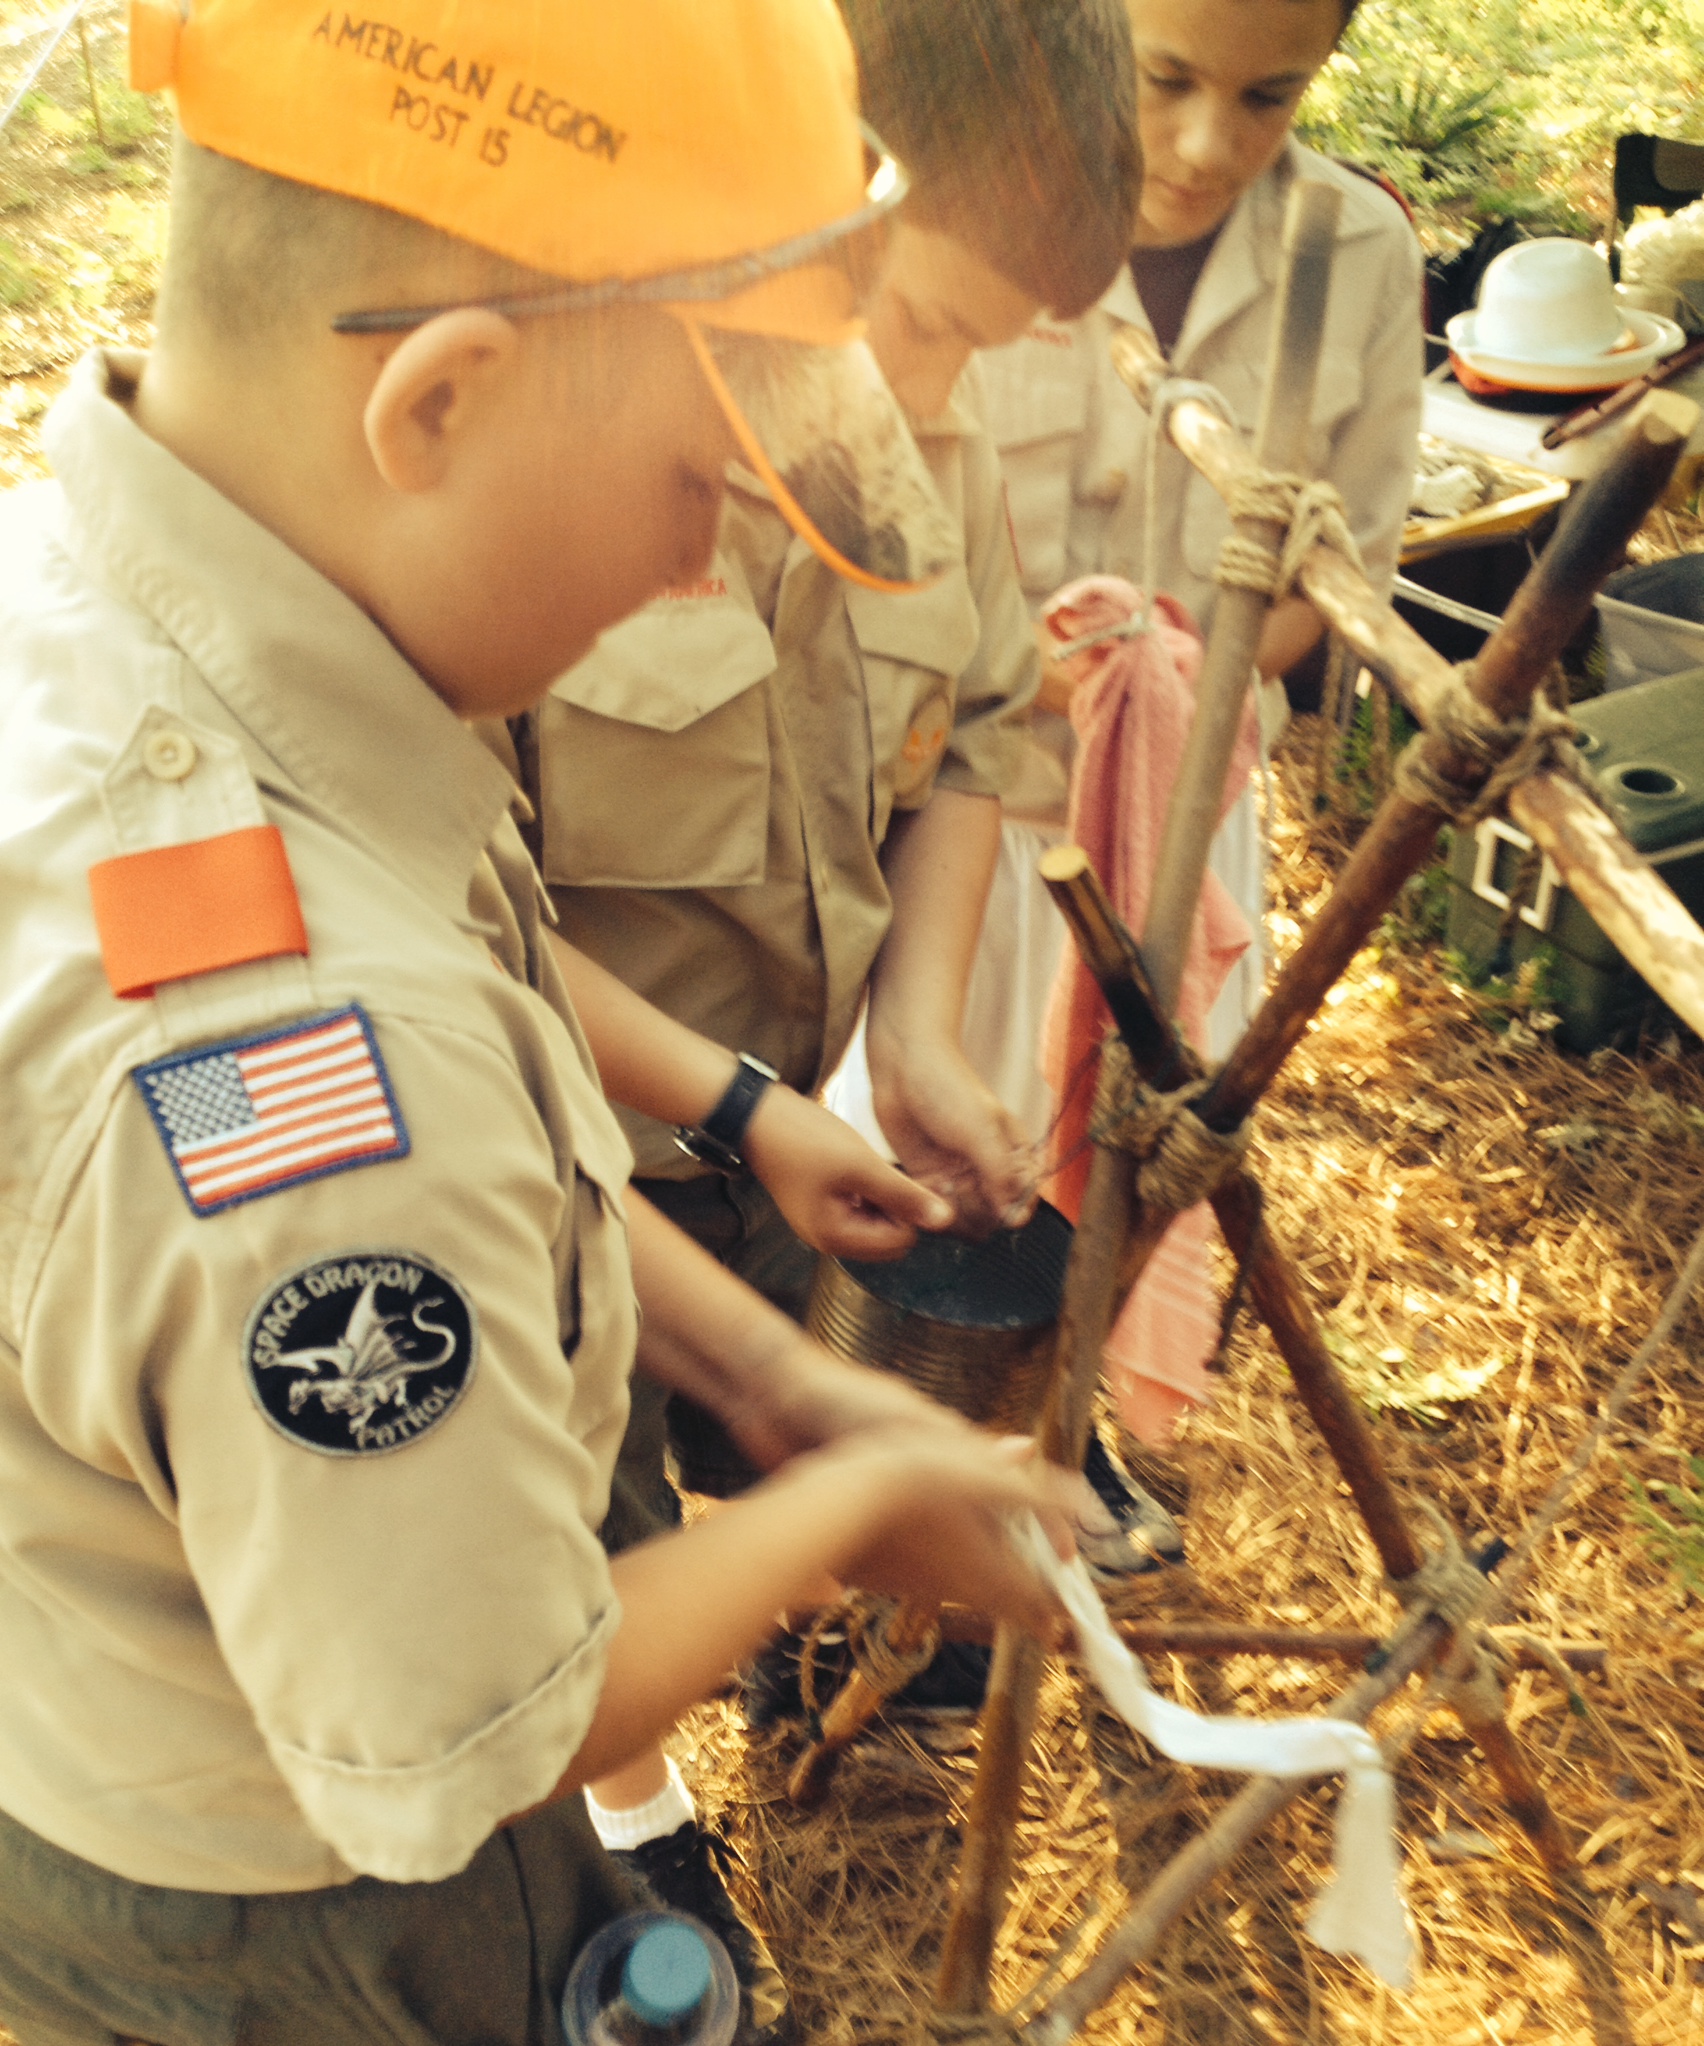
VI. The tripod is the most simple and most easy to erect self-standing pioneering structure. It frequently comes into play in the construction of simple campsite improvements as in providing a stand to hang a lantern or water bag, and in our favorite First Class Camp Gadget: the Wash Station. In larger projects, two tripods can support a crossbar as in a swing set, or support two parallel lateral spars for a platform as in the Double Tripod Chippewa Kitchen.
The Tripod Lashing with Plain Turns is a simple and quick way to lash together three spars into a tripod. For many projects, the wraps can be made with simple plain turns in lieu of racking turns, (as in what’s often referred to as the Figure of Eight Lashing). Here’s an illustration from the 1967 printing of the Boy Scout Field Book.


OBJECTIVES
A. Scouts will demonstrate they can tie a tripod lashing by:
B. Scouts will demonstrate they can erect their tripod by:
C. Scouts will stabilize their tripod by:
MATERIALS
PROCEDURE A
1) The instructor demonstrates how to tie a tripod lashing narrating each step as he proceeds.
2) With the assistance of the instructor(s), using three Scout Staves and a 12-1/2-foot lashing rope, each Scout lashes the staves together as per the demonstration.
PROCEDURE B
1) Once their lashing is adequately completed, each Scout crosses the two outside legs underneath the middle leg to stand up his tripod.

2) Once their tripod is erect, each Scout connects the tripod legs with three 3-foot sticks with square lashings, using six 6-foot lashing ropes.
3) When their legs of their tripod are stabilized with with the three cross braces, each Scout suspends a pot or No. 10 can filled half way up with water, by hanging it on the tripod with a 3-foot cord attached to the bail.
* A Note About Frapping: When finishing the wraps, if the running end is carried between the end and middle pole without completing a full wrap around all three poles, the rope will be carried over the middle pole to start the second set of fraps (as pictured above).
If a full wrap is completed around all three poles, after the frapping turns are made, the rope will be carried under the middle pole to start the second set of fraps. In either case, the first and second set of frapping turns proceed in opposite directions! (This note applies to Tripod Lashings with both plain turns and racking turns.)
INTERPATROL COMPETITION: Everyone on the Tripod
