FAVORITE PIONEERING KNOTS: DOUBLE SHEET BEND

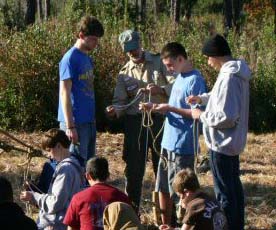
Put most simply, the sheet bend is a very useful knot. It’s a very basic joining knot for tying two ropes together, and when a lot of pull is applied, it’s easier to undo than a square knot (Reef Knot). It is most always referred to as one of the most essential knots to learn, and is required to learn before a Scout can become First Class.

The sheet bend’s outstanding claim to fame is how well it holds when tying to ropes together of different sizes. For that matter, as its name implies, it was used to connect a corner of a sail to a rope by attaching the line (“sheet”) to a bight formed in the sail.

The Double Sheet Bend is most effective when used to tie a small pliable rope to a large stiff rope or to a slippery rope.

NOTE: The bottom three images in the photo montage below show the knot being tied by taking a roundturn around the back of the bight before passing the running end underneath itself. In Ashley’s Book of Knots, the correct way to tie a Double Sheet Bend is to pass the running end underneath itself twice.
Double Sheet Bend

Favorite Pioneering Knots: Scaffold Hitch

Scaffold Hitch rigged with a Bowline

The scaffold hitch is a superb knot, and in pioneering easily serves a dual purpose.

Primary Role: This is a seriously good knot to use in the construction of a pioneering project bosun’s chair (boatswain’s chair) for a small, straight aerial runway adaptation or a project where a seat is needed to suspend a Scout from a rope swing. As John Sweet points out in Scout Pioneering, it’s a good idea to cut notches about 4 inches from the ends of the board to give the rope something to bite into.

Link to: Larger Image
Bundles of 4′ Spars

Second Role: Many different knots can be used for fastening bundles of sticks or poles together, but when it comes to bundling up of 3 to 4-inch ladder rungs, platform spars, and walkway cross spars, the scaffold hitch provides superior clinching power, which is what is needed to keep the bundles tight. (Unless your using screen spline, it’s unparalleled for bundling Scout staves!)

Working your way towards the end of the board, make three wraps around the board. Take hold of the 1st wrap and lay it over the 2nd, then take hold of the 2nd wrap and carry it over both the 1st and 2nd wraps and over and under the board.. Pull both ends of the rope tight and position the rope ends so the board will be held in place.
Tying the Scaffold Hitch: PRIMARY ROLE
With the middle of the rope, working your way towards the end of the bundle, wrap the rope three times around the bundle. / Take hold of the 1st wrap and lay it over the 2nd. / Take hold of the 2nd wrap and carry it over both the 1st and 2nd wraps and around the bundle. / (Pull both ends of the rope tight and wrap the remaining length of both ends around the bundle. / Secure with a square knot.)
Using the Scaffold Hitch to Bundle Poles.

Favorite Pioneering Knots: Water Knot

VIEW VIDEO: How to Tie a Water Knot

Water Knot
Water Knot

Link to: Older Pamphlet InfoThe following text is by Adolph E. Peschke as presented in the 1998 printing of the 1993 edition of the Pioneering Merit Badge Pamphlet:

Water Knot

What could be simpler than tying two Overhand knots to form a water knot? Its use goes back to commercial fisherman who needed to tie the ends of two wet fishing lines together.

In recent years, mountain climbers have found this knot very useful. They use a man-made fiber rope that is somewhat slick and is difficult to be spliced in the field. To tie two ropes together, climbers use the water knot because it’s a simple knot with little bulk and above all, it’s a knot that will not fail.

Mountain climbers also use the water knot to tie a rope seat and to tie the ends of short lengths of rope together to form a grommet (loop) that’s used in many climbing applications. This knot also works well with nylon webbing used in mountain climbing. Basically, the water knot is handy for tying together any types of ropes of the same diameter. In pioneering, whenever you’re using ropes made of man-made fibers that are braided and slick and don’t hold knots well, think of the water knot.

Pioneering Uses

  • To tie together the ends of two wet or slippery ropes.
  • To make a grommet (loop) using all types of rope (braided or twisted). Keep in mind that once strain is put on the knot, it will be hard to untie.
  • To tie together the ends of halyards.
  • To tie the ends of flat nylon webbing to make a grommet (loop) or sling.
Begin the water knot by tying a loose overhand knot in the end of one rope. Then bring the end of the other rope over and under the first overhand knot, following the same path but in reverse.
Water Knot

(Another name for the Water Knot is the Ring Knot.)

Favorite Pioneering Knots: Pipe Hitch

The pipe hitch has a variety of uses, but it really comes in handy to help pull out those pioneering stakes that were driven in deeply to maximize the holding power of the anchors. Using the pipe hitch for this purpose can eliminate a good deal of straining, banging, and possible damage when it comes time to take down the structures and disassemble the anchors.

Ready to wrap the  running end of the loop around the stake. Start wrapping from top  to bottom. Make at least four turns around the stake. Pass the runnning end up through the end of the loop. Pull the stake out from the opposite direction, at the angle that it was driven in.
Using the Pipe Hitch to Pull Out Pioneering Stakes (Click on the image for a larger view.)

You can make a couple of rope grommets out of 12-foot lengths of heavy line that can be set aside and reserved for use with a Pipe Hitch, for easier pioneer-stake-extraction.

Note: When stakes are driven in deeply, and especially when the ground is hard, the above technique will be very helpful, but also in conjunction with a process of first loosening the stakes by knocking them on the sides with a mallet.

Link to: Older Pamphlet InfoThe following text is by Adolph E. Peschke as presented in the 1998 printing of the 1993 edition of the Pioneering Merit Badge Pamphlet:

Using a rope to pull a pipe or spar can be difficult because you need all the gripping friction you can get to keep the knot from slipping off as you make the pull. One of the best knots for this type of task is a pipe hitch.

Most of the time, the pipe hitch can be tied with four or six turns. If this doesn’t hold, you can always lay on more turns to get the friction you need. Be sure to pull the turns snug as you make them so that you can get the full effect of their friction.

Keep in mind that when you use this knot for a hard pull or for a heavy weight, it should be tied with larger-diameter rope.

Pioneering Uses.

  • When considerable grip is needed for a lateral pull on a pipe or spar, or to pull a stake or post out of the ground
  • To hook a light tackle to use in lifting (see figure 27)
Form a bight in the rope and wrap it around the spar. Use at least four wraps, more for more gripping power. Finish the knot by pulling the standing end of the rope through the bight. If a spliced grommet (fixed loop) is used, wrap it around the spar and finish as shown. Then you can hook tackle in the bite of the grommet.
Pipe Hitch Diagram (One can actually perceive what’s referred to as the “standing end” to be the “running end.”)

Favorite Pioneering Knots: Prusik

Link to: Older Pamphlet Info

A Prusik is tied by first making a rope grommet (fixed loop).After attaching the grommet around the spar forming a common lark’s head. Next, inside the middle of the lark’s head, wrap the loop around the spar at least two complete times. When finished, position the Prusikand pull the loop tight
Attaching a light pulley for a rope halyard on a flagpole.

The following text is by Adolph E. Peschke as presented in the 1998 printing of the 1993 edition of the Pioneering Merit Badge Pamphlet:

PRUSIK

This knot has the reputation of having a firm, sure grip once it is put under pressure. The multiple opposing turns provide friction and put a bend in the standing part of the rope, which becomes more difficult to pass through the turns as a lateral pull is applied. The prusik is widely used by mountain climbers as they attach a loop (grommet) made from a smaller rope to a larger rope to form a hand or foothold. It can also be used to form hand and shoulder loops for a lateral pull on another rope or to drag a log or spar. Pioneering Uses

  • To hook a light tackle on a vertical or horizontal spar.
  • To make hand and foot loops for climbing another rope or vertical spar.
  • To make hand and shoulder loops as an aid to hauling a large log. It can easily be moved along as the positions require.
  • To provide the grip and a loop to tie another line with a sheet bend.
  • To provide a safety brake against back-slipping on a load-lifting line. (Do not use when lifting a person.)
Prusik Tying Sequence

Favorite Pioneering Knots: Carrick Bend

VIEW VIDEO: How to Tie a Carrick Bend

The following text is by Adolph E. Peschke as presented in the 1998 printing of the 1993 edition of the Pioneering Merit Badge Pamphlet: “When you have to tie the ends of two large ropes (1/2”-diameter or larger) together, there is no better knot to use than the carrick bend. While many other knots reduce the strength of the rope considerably, a carrick bend reduces its strength only slightly. You’ll find that once a carrick bend is put under a big strain, it’s not all that hard to untie. The knot will tighten under the strain of the ropes, but won’t slip and works well with wet or slippery ropes.

Link to: Larger Image
The Carrick Bend Pulled Tight (collapsed)

The carrick bend looks very symmetrical when it’s first tied and is still loose, like two interlocking loops . But, as soon as it’s pulled tight, it looks quite different and is often hard to identify.”

Pioneering Uses

  • To tie large diameter (1/2-inch diameter or larger) ropes together, especially if there will be heavy strain on the rope.
  • To tie two ropes of any size together when the rope is wet or slippery and when you need a knot that will untie easily.
Tying a True Carrick Bend

To tie a true carrick bend, where the ends of the rope emerge diagonally from opposite sides, start by making an underhand loop at the end of one rope (red and white rope) and bring the end of the other rope (blue and white rope) under the loop as in the left photo. Then, weave the end of the other rope (blue and white rope) over and under at every crossing, as in the middle and right photos.

The carrick bend’s main function is to join the ends of large diameter lines that are stiff and not at all easy to form into other common bends. In these instances, the knot can be left in its elongated form and the ends are seized to their standing part. This way, after maximum strain is applied, the carrick bend can be easily untied.

A Carrick Bend With the Ends Seized

Favorite Pioneering Knots: Constrictor

VIEW VIDEO: How to Tie a Constrictor Knot

Link to: Older Pamphlet InfoThe following text is by Adolph E. Peschke as presented in the 1998 printing of the 1993 edition of the Pioneering Merit Badge Pamphlet:

Once you learn to tie and use the constrictor, you will wonder where it has been hiding in all those knot books and why it isn’t in wider use today.

In the days when black powder was used for blasting in mining operations, this was the knot that was tied around the top of the bag containing the black powder to hold the fuse in securely; hence, it’s other common name, the Bag Knot. *

The constructor is based on the clove hitch, except that it has an extra half-knot that provides an extra hold when the knot is pulled tight. Like the clove hHitch, the constrictor can be tied using the end of the rope (see figures 19 and 20) or by forming a twisted loop and slipping it over a spar (see figures 21, 22, and 23).

Pioneering Uses

  • To use interchangeably with a clove hitch, except once the constrictor is pulled tight, it is quite hard to untie.
  • To start a lashing. When it’s tied to a vertical spar, the crossing spar can rest on it while the lashing is being made.
  • To make a good temporary whipping at the cut end of a rope, or to start the West country whipping.
  • To start a splice, use it to stop off the unlaid strands of the rope so they won’t unravel further as you’re working the splice.
The Constrictor Knot

* The constrictor is also referred to as a Miller’s Knot in that it was used to tie the tops of bags of flour.

Favorite Pioneering Knots: Butterfly Knot

VIEW VIDEO: How to Tie a Butterfly Knot

Start with an overhand loop, then twist the rope to form a second overhand loop. Next drop the upper loop down in back. When the upper loop is dropped down, pull it under the two crossed standing parts of  the rope. Then pull it up through the top loops to complete the Butterfly Knot. To pull the knot tight, pull the upper part while holding the two standing parts of the rope at the bottom.
Great knot for tying a rope tackle!

The following text is by Adolph E. Peschke as presented in the 1998 printing of the 1993 edition of the Pioneering Merit Badge Pamphlet:

A butterfly knot is a fixed loop tied in the middle of a rope. There are a number of other knots that do the same thing, but the butterfly knot tends to work better because it doesn’t jam when strained and it’s easy to untie.

Since it’s tied in a symmetrical fashion, strain can be put on it from any direction. Even though this knot is usually tied in the middle of the rope, you can also tie it at the end of the line if you need a fixed loop that is easily untied.

The butterfly knot is a favored knot for mountain/rock climbers, used for hand or foot loops or used to hook their carabiners into. It has many uses in pioneering work.

Butterfly Knot Instruction at a Camporee

Pioneering Uses

  • When using a rope to pull a heavy object (such as a log), tie a series of butterfly knots to form loops for each person’s hand or shoulder.
  • When climbing a rope, you can tie a series of butterfly knots to form loops for your hands and feet.
  • To provide a fixed loop to use with a toggle.
  • When making a rope tackle, the loop in the butterfly knot serves as the pulley. (See Rope Tackle.)
  • To tie up horses or anchor canoes on shore, tie a series of in a picket line for each horse or canoe.
butterfly-knot
YOU’LL USE IT AGAIN AND AGAIN!

The butterfly knot, also named the Alpine Butterfly and the Lineman’s Loop, has been referred to as the “Queen of Knots” by Pioneering legend, John Sweet.

Favorite Pioneering Knots: Timber Hitch

VIEW VIDEO: How to Tie a Timber Hitch

Steps to Tying a Timber Hitch

The following text is by Adolph E. Peschke as presented in the 1998 printing of the 1993 edition of the Pioneering Merit Badge Pamphlet in the Lashing Section describing the traditional diagonal lashing…

When putting crossed braces on a structure to keep it from racking (as used when making a trestle), the most important lashing is the diagonal lashing where the spars cross.

When the cross spars are properly assembled on the trestle, they will be standing apart where they cross. That is, there will be a few inches of space between the spars where they cross at the center of the X. To pull them tightly together, a timber hitch is used to start the lashing. As the timber hitch is pulled tight, the spars are sprung together.

 and in the Basic Knots Section describing the timber hitch:

The timber hitch is a knot that can be tied quickly. As strain is put on the rope, the knot gets tighter, yet it remains easy to untie.

To tie a timber hitch, first wrap the running end around the timber log or spar. Then loop the running end around the standing part of the rope, continuing to wrap the running end around itself a few more times. This will form a hitch that will tighten on the timber as the rope is pulled. After the timber is dragged or hoisted into position, the timber hitch is easy to untie.

TImber Hitch Drawing
When pulling or lifting a timber, log, or spar, throw a hitch around it at the end that is being pulled or lifted.
Killick Hitch

A note about this final half hitch: when using the timber hitch to lift or pull an object, that added half hitch combined with the timber hitch forms what has been referred to as a Killick Hitch. John Sweet in Scout Pioneering suggests this combination when making a lobstick to throw a line over a branch. The Killick Hitch is also known as a Kelleg Hitch. The timber hitch is most always exampled as the first step in tying the combination.