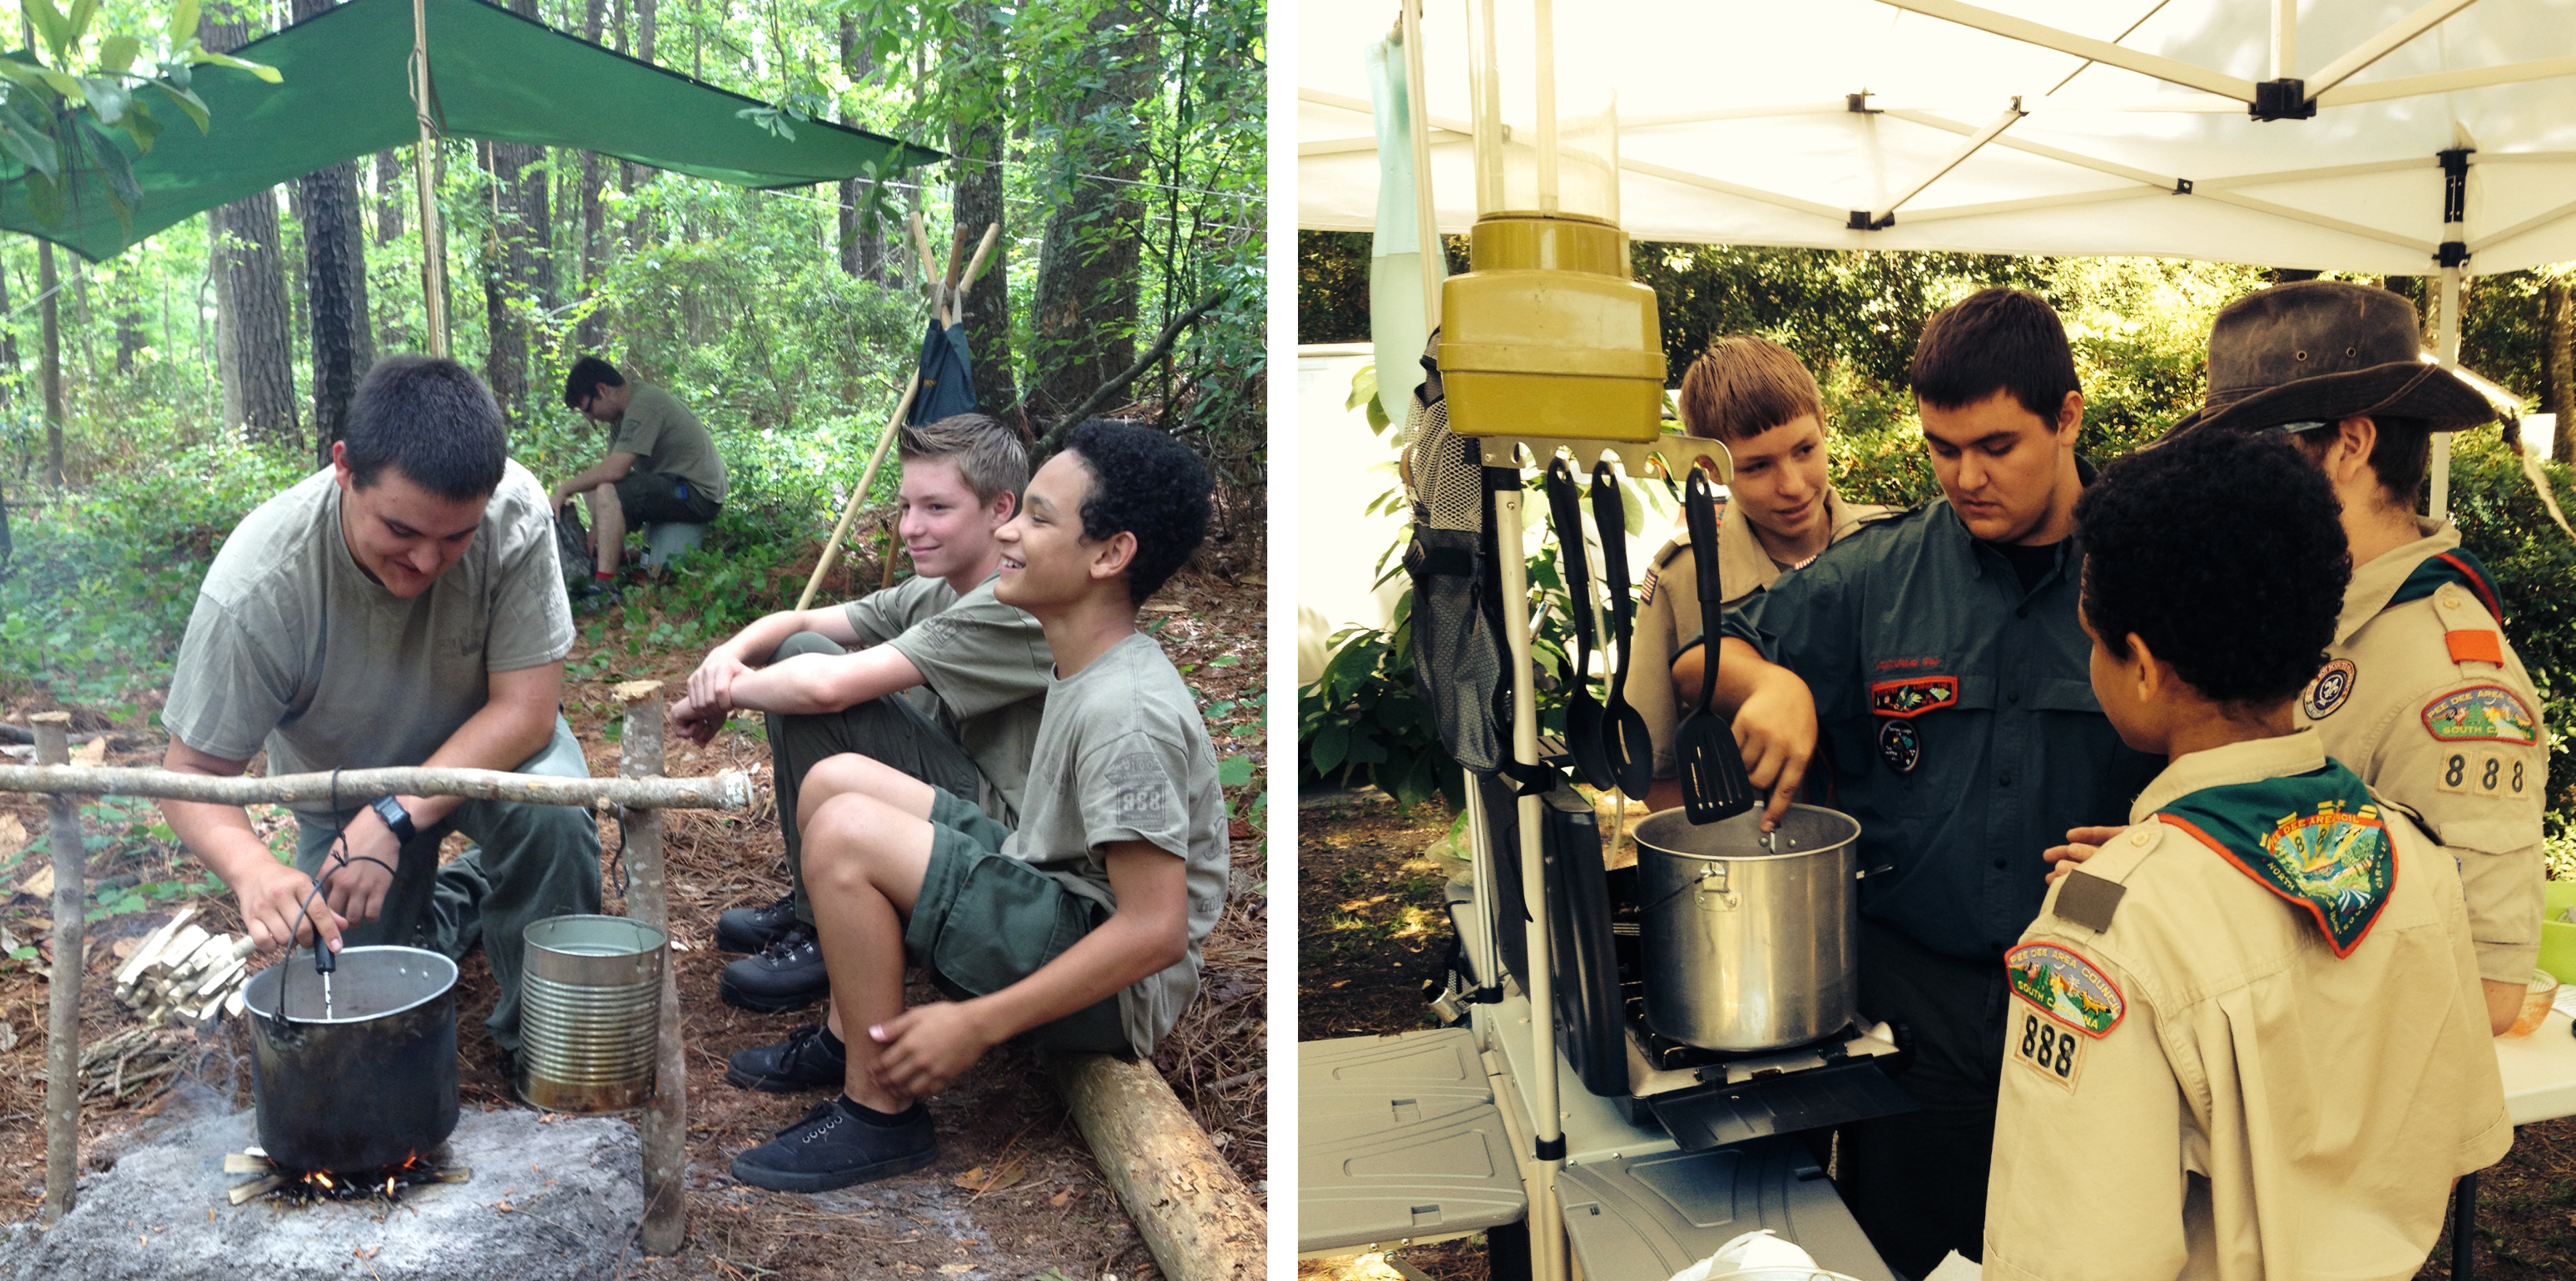
Action Photo Archive – Cooking Comparison


Team Building Opportunity. The challenge referred to as Crossing the Alligator Pit is an activity that requires 100% cooperation and teamwork. The Scout on the A-Frame “walker” is totally reliant on his fellow Scouts to keep him aloft and facilitate his forward progress. The whole time that he’s bringing into play his balance along with his leg, shoulder and arm muscles, it’s the members of his patrol that not only greatly increase the effect of his movements, but also keep him from spilling over.
Crossing the Alligator Pit can initially be tackled using what we can term “group leadership,” where several members of the patrol all contribute their opinions on how to best get the “walker” moving and not falling over. As the successful crew experiences the necessity of coordinating the handling of the guylines with the movements of the Scout on the “walker,” invariably one Scout will need to assume the role of calling the shots and keeping everyone on their toes.

Scout Spirit! This was best exampled during a District Camporee devoted to Junior Leader Training. Scouts from Troop 822 out of Mount Vernon, SC poured themselves into the activity and not only mastered the challenge, but provided spectators with some fun and excitement as well. They approached the task of building their A-Frame with enthusiasm. Finishing in good form, they wasted no time in standing up the structure and holding it in position with their guylines. As soon as their rider climbed on board, it became obvious: it was the top two lines that required the most unfaltering attention to keep the A-Frame vertical. The Scout on the A-Frame was exuberant as he discovered how to swing the walker forward one leg at a time. The patrol then totally got the hang of how to use the bottom guylines to add that real oomph to the “walker” propelling it forward. As they smoothly traversed the fifteen feet of the “alligator pit,” their leader reminded us of a coxswain, rhythmically yelling out, “Pull!” to the crew manning the oars in a boat race. “One, two, THREE!…one two, THREE!…one two, THREE!” On each “THREE!” the rider swung one leg of the “walker” forward, as the Scout manning that leg’s forward guyline simultaneously heaved on his rope, while the others remained alert to help guide and steady the A-Frame. Their “walker” actually walked in rhythm and it was quite a spectacle!

They kept on going! Crossing the Alligator Pit is more challenging than the majority of other interpatrol competitions, demanding a full measure of concentration and cooperation. With a well-lashed A-Frame and a rider who gets the knack of balancing his weight and swinging the legs of the “walker,” a patrol that can keep their structure upright will eventually be able to successfully cover the fifteen foot distance. Fifteen feet is fifteen feet and decently doable, especially on flat terrain. A hundred and fifty feet up a hill is a horse of a different color, and that’s what this patrol from Troop 822 challenged themselves to do. They kept going across the field up a hill towards the dining hall, and they didn’t stop until they reached the top! When they finally stopped, it was already getting dark outside. Their persistence, and teamwork was nothing short of amazing! These Scouts went far, and it makes sense that with all their determination, they’ll continue to go far in whatever direction they set out for themselves.


This is the sixth post in a series that will eventually comprise an activity-based, unit pioneering program curriculum.
SUPPORTING VIDEO: How to Tie a Tripod Lashing
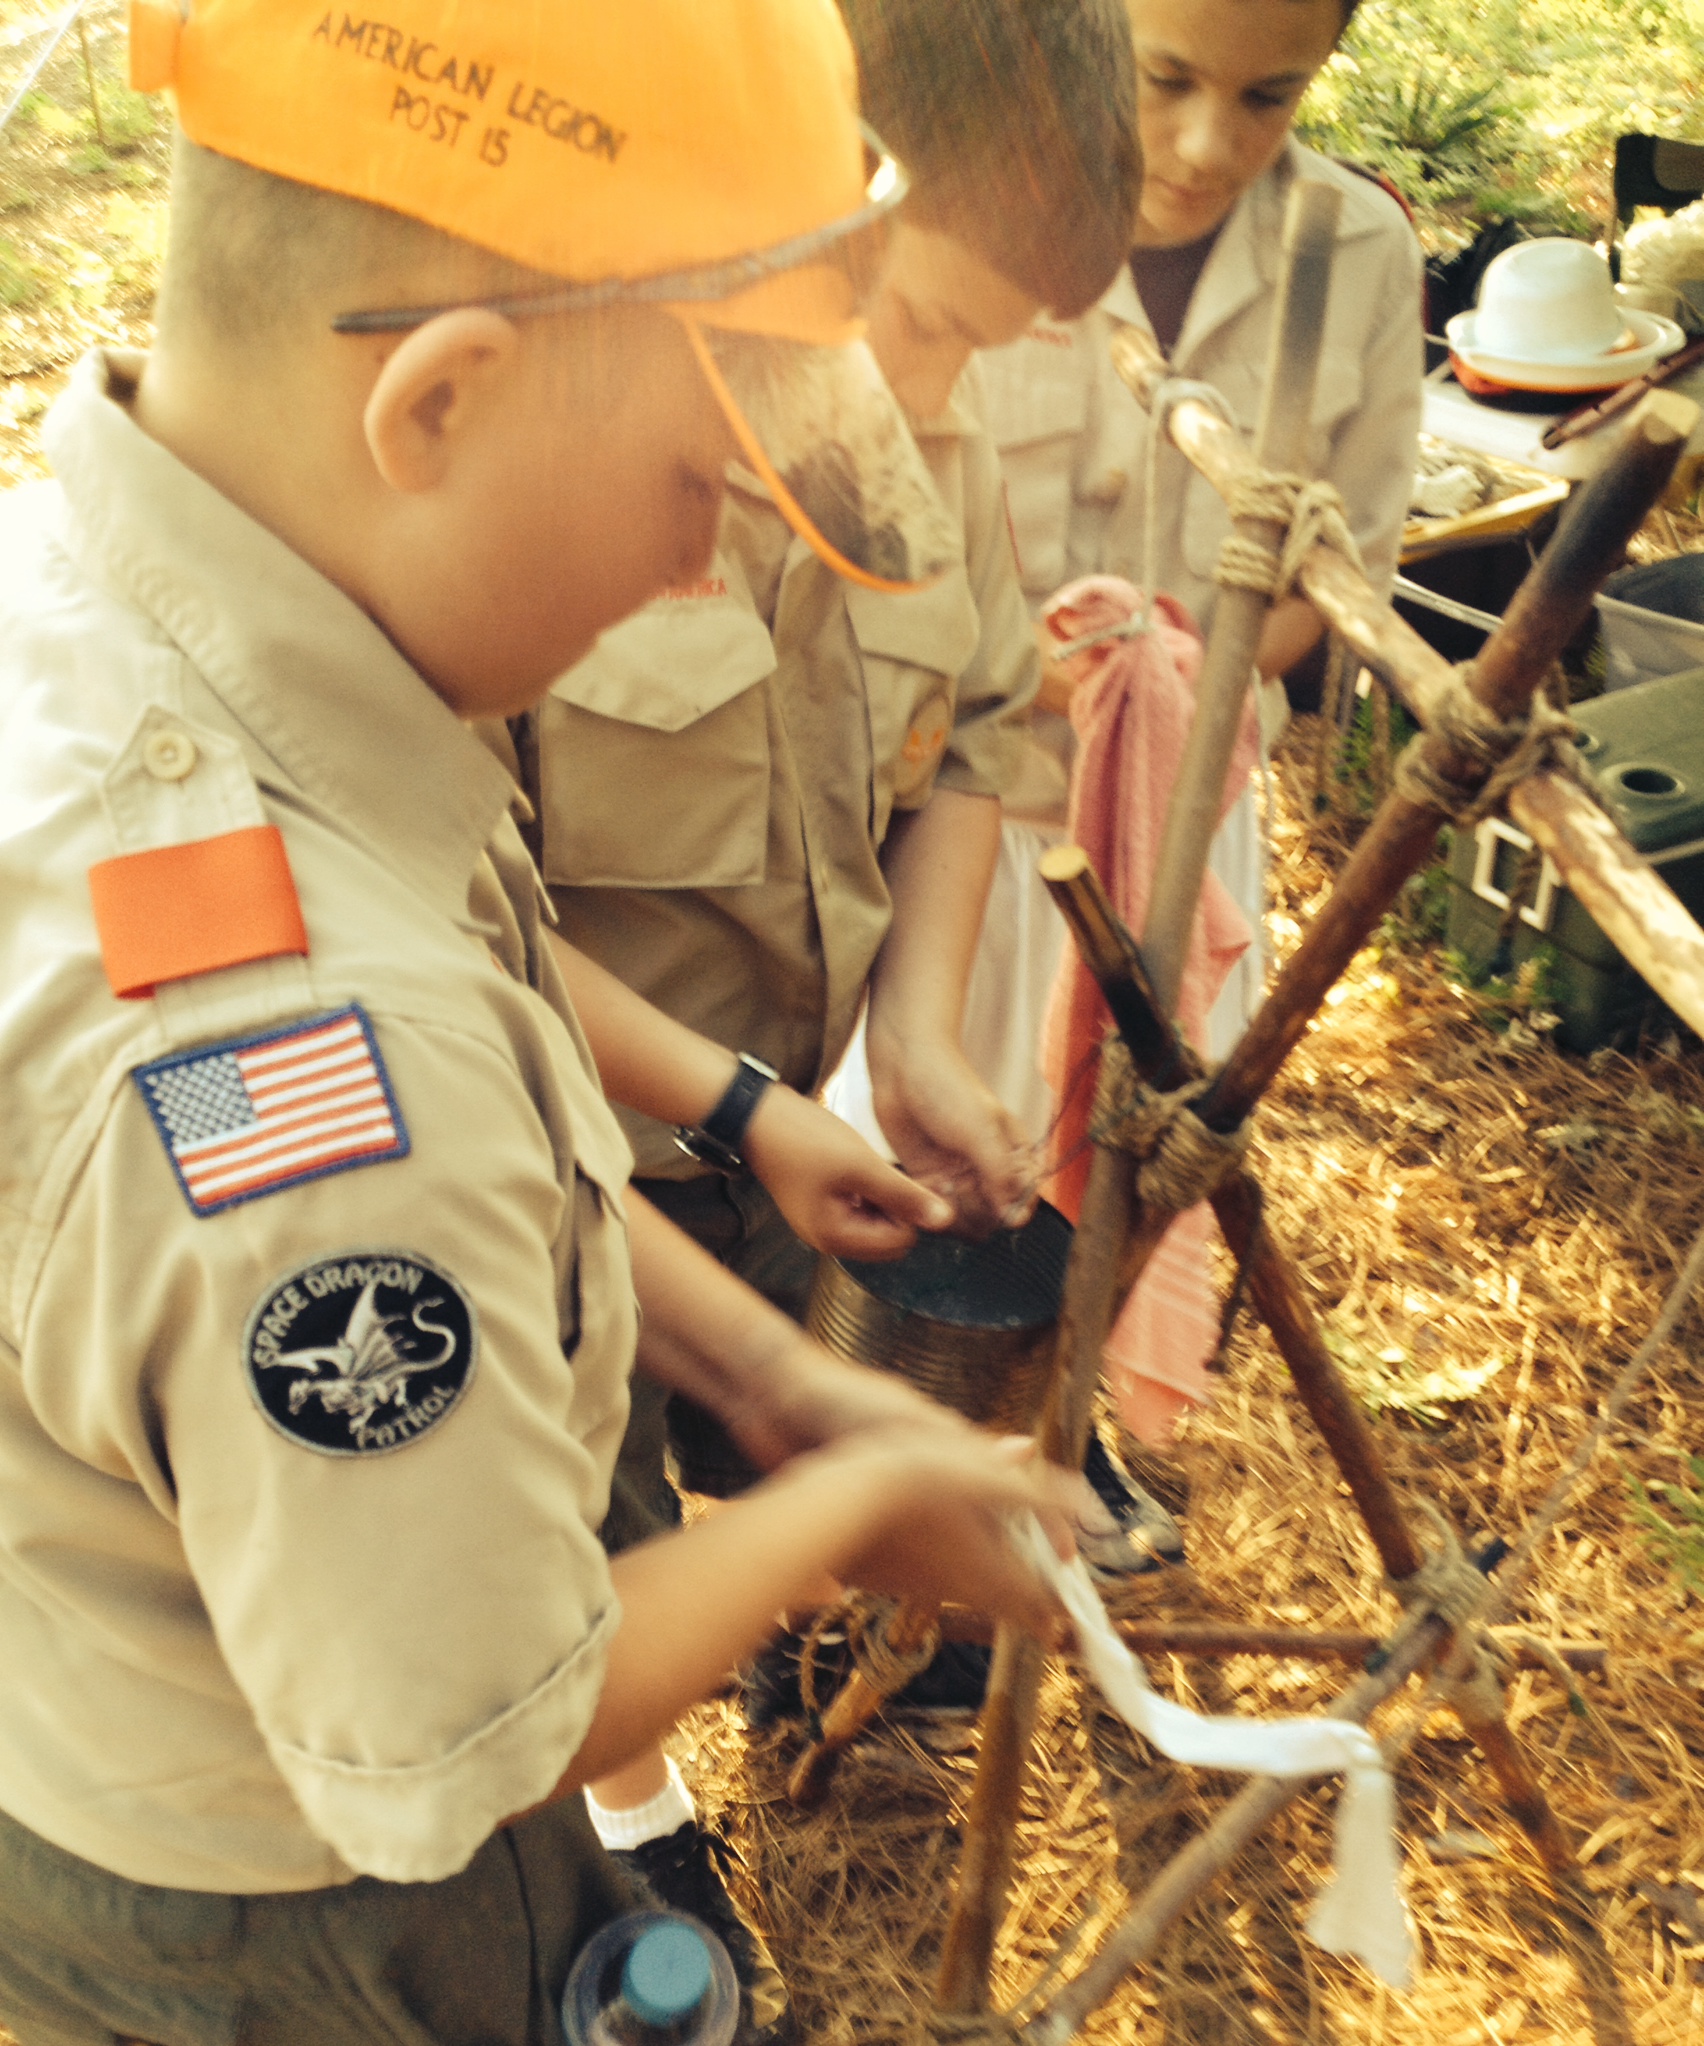
VI. The tripod is the most simple and most easy to erect self-standing pioneering structure. It frequently comes into play in the construction of simple campsite improvements as in providing a stand to hang a lantern or water bag, and in our favorite First Class Camp Gadget: the Wash Station. In larger projects, two tripods can support a crossbar as in a swing set, or support two parallel lateral spars for a platform as in the Double Tripod Chippewa Kitchen.
The Tripod Lashing with Plain Turns is a simple and quick way to lash together three spars into a tripod. For many projects, the wraps can be made with simple plain turns in lieu of racking turns, (as in what’s often referred to as the Figure of Eight Lashing). Here’s an illustration from the 1967 printing of the Boy Scout Field Book.


OBJECTIVES
A. Scouts will demonstrate they can tie a tripod lashing by:
B. Scouts will demonstrate they can erect their tripod by:
C. Scouts will stabilize their tripod by:
MATERIALS
PROCEDURE A
1) The instructor demonstrates how to tie a tripod lashing narrating each step as he proceeds.
2) With the assistance of the instructor(s), using three Scout Staves and a 12-1/2-foot lashing rope, each Scout lashes the staves together as per the demonstration.
PROCEDURE B
1) Once their lashing is adequately completed, each Scout crosses the two outside legs underneath the middle leg to stand up his tripod.

2) Once their tripod is erect, each Scout connects the tripod legs with three 3-foot sticks with square lashings, using six 6-foot lashing ropes.
3) When their legs of their tripod are stabilized with with the three cross braces, each Scout suspends a pot or No. 10 can filled half way up with water, by hanging it on the tripod with a 3-foot cord attached to the bail.
* A Note About Frapping: When finishing the wraps, if the running end is carried between the end and middle pole without completing a full wrap around all three poles, the rope will be carried over the middle pole to start the second set of fraps (as pictured above).
If a full wrap is completed around all three poles, after the frapping turns are made, the rope will be carried under the middle pole to start the second set of fraps. In either case, the first and second set of frapping turns proceed in opposite directions! (This note applies to Tripod Lashings with both plain turns and racking turns.)
INTERPATROL COMPETITION: Everyone on the Tripod
This is the fifth post in a series that will eventually comprise an activity-based, unit pioneering program curriculum.
SUPPORTING VIDEO: How to Tie a Shear Lashing
V. With the square lashing under their belts, Scouts can start to actually build pioneering projects. Though the basic and oft-used A-frame can be readily completed using three square lashings, the shear lashing is most frequently chosen to start lashing together this common support structure.
OBJECTIVES
A. Scouts will demonstrate they can tie a shear lashing by:
B. Scouts will demonstrate they can construct an A-frame by:
MATERIALS
PROCEDURE A
1) The instructor shares the purpose and application of the shear lashing, explaining how we use it when we want to connect two spars and open them out to form the legs of an A-frame.
2) Scouts gather around the instructor who, using two Scout Staves and a 10-foot lashing rope, demonstrates lashing the ends of the staves together with a shear lashing, narrating each step as he does.

3) With the assistance of the instructor(s), using two Scout Staves and a 10-foot lashing rope, each Scout proceeds to to tie a shear lashing applying the following steps:
PROCEDURE B
1) When their shear lashing is adequately completed, each Scout is given a third Scout Stave and two 6-foot lashing ropes.
2) With square lashings, each Scout joins one end of the third stave to one leg of the inverted ‘V’ and then the other end of the third stave to the other leg of the inverted ‘V.’ (Both ends should be lashed in the same position on each leg, and the square lashings should be tied tightly so they don’t slip.)
3) When all three lashings are well-formed and tight enough, each Scout should pick up the resulting A-frame and give it a shake, testing that it is indeed sturdy.

INTERPATROL COMPETITION: Simple A-Frame Chariot Race
Related Post with Photographed Lashing Procedure: The Somewhat Ambiguous Shear Lashing

DEFINITION: ambiguous |amˈbigyoōəs|adjective(of language) open to more than one interpretation; having a double meaning; unclear or inexact

One Thing is NOT Ambiguous! The shear lashing’s USE is quite clear. References to the lashing in John Thurman’s Pioneering books, in John Sweet’s Scout Pioneering, and the Lashing section in the Pioneering Merit Badge Pamphlets by Pioneering Legend Adolph Peschke all describe its fundamental use exactly the same way. Putting it neat like John Sweet: Use a sheer lashing “when two spars are to be opened out like scissors to make a pair of sheerlegs,” or right to the point like John Thurman in Pioneering Projects, the sheer lashing is “used for lashing together two parallel spars which will be opened out of the parallel to form sheer legs.”
What are sheer legs? Simply put: sheer legs are two upright spars lashed together at the tips with the butt ends splayed apart to support some kind of weight. Most always, in Scout Pioneering we use sheer legs to form an A-Frame.
Ambiguous? Yes. Let’s start with ambiguous spelling! Most modern references to the lashing spell it s-h-e-a-r. Yet, the much respected and revered John Thurman was emphatic that the correct spelling was s-h-e-e-r!
Terminology. In John Sweet’s book, sheer lashing has two different forms each with the same name. When two spars are lashed together for strength, or lap-jointed to extend their length a sheer lashing is used BUT with the clove hitches tied around both spars and without any frapping turns. He still calls it a sheer lashing, but of course this is commonly known as a round lashing! John Thurman refers to a true round lashing as the Sheer Lashing Mark II and the lashing used to make sheer legs as the Sheer Lashing Mark I.
Let’s take this opportunity to further clarify two lashing designations that keep popping up. A SHEAR Lashing is used to make shear legs. A ROUND Lashing is used to attach one pole to another in the same direction as in extending the overall length of shorter poles. (It can also be used to bind more than one pole together to make a stronger pole.) SHEAR Lashings incorporate frapping turns. ROUND Lashings do not! Along these lines, the West Country Shear Lashing should be called the West Country Round Lashing, and rightfully so!
Nowhere is this stated more clearly than in Gerald Finley’s book, Rope Works: “West Country Round Lashing is also called West Country Shear Lashing, but this name contributes to the confusion caused by lumping shear and round lashings together. West Country Round Lashing is used to form a rigid joint between two parallel poles; it does not form the flexible joint of a shear lashing and it has no frapping turns.”
Two-Spar Shear Lashing. To add to the possible confusion, Adolph Peschke calls what John Thurman refers to as the Sheer Lashing Mark I (which is in actuality THE shear lashing) the Two-Spar Shear Lashing. This name can also be related to the tying of a Tripod Lashing With Plain Turns, wherein the procedure is exactly like the Two-Spar Shear Lashing but with three spars. It follows that it’s easy to dub this tried and true form of tripod lashing (just like the Two-Spar Shear Lashing) the THREE-Spar Shear Lashing. The Two-Spar Shear Lashing is used to make an A-Frame, and the Three- Spar Shear Lashing is used to make a simple tripod.
Ambiguity in Tying the Lashing. Though the formation is the same: clove hitch around one spar, six to eight wraps, two fraps, finish with clove hitch around one spar, there are varied approaches to actually tying the shear lashing. These discrepancies all hinge on… the hinge. (Pun intended.) The spars have to pivot in order to spread out the desired distance. How can this be accomplished so the lashing is tight but not so tight that when spreading the legs into position, the legs and lashing rope resist the strain to the point that something breaks? The tighter the wraps, and the more wrapping turns you take, the stiffer the lashing will be.
Whatever works well will also depend on the diameter of the spars, how straight they are, and indeed on the structure itself.


This section is about Pioneering and the Order of the Arrow. The OA is unique to the BSA, but for those readers from other countries, its correlation with Pioneering can apply to all Scouting groups seeking to render cheerful service and promote camping.
It’s been seen time and again, Scouts are impressed by well-built, pioneering structures. Tall gateways, strong bridges, or clever camp gadgets are found to be especially exciting when experienced outdoors during a Scout gathering. The attraction is even more pronounced in those Scouts who would love to have the chance to get involved firsthand in the challenge and fun, but frequently don’t possess the various skills or have the opportunities to build more involved or larger pioneering structures.

So, what’s all this have to do with the Order of the Arrow? First and foremost, Pioneering aside, Scouts who are members of the OA should be seen as exemplifying the Scout Oath and Law in their daily lives. But, as the BSA’s national honor society, a very favorable impact is created when a specially-trained chapter or lodge pioneering crew can demonstrate they know how to accomplish some “bigger” things. They can build them! Then, as a celebration of Scouting, they can help others to enjoy what they’ve built! It’s a worthwhile opportunity to cheerfully serve their fellow Scouts, promote camping, and also contribute to the overall value of a district or council event. The resulting impact definitely serves to impress their fellow Scouts who will naturally hold the Order of the Arrow in an even higher regard.
Wooden poles are the main ingredient in building a pioneering structure. Everyone knows what a pole is. Depending on the project at hand, we use them in all different lengths and diameters. But, what are all these references to spars? Is a spar different than a pole?
What is a spar? Simply stated, in pioneering, a spar is a thick, strong pole. Obviously, when completed, a pioneering project has to be able to withstand the strain and stress that will occur while performing its intended function. We can’t build a structure out of spindly sticks tied together with string and expect it to work. We use spars lashed together with good, natural fiber rope!

Okay. So a spar is a thick, strong pole. Now there are a lot of givens, but we’ll go through them anyway, and quickly:
Is a Scout Stave a spar? No. By themselves, they’re too skinny. Scout Staves are great for instruction and small projects, but a 5-foot Scout Stave is a strong stick, not a spar. Many camp gadgets can be built using short, smaller diameter poles, like Scout Staves.
Is a bamboo pole a spar? A bamboo pole is a bamboo pole. Large diameter bamboo is certainly thick, and depending on it’s condition, also strong, however it should be born in mind, bamboo can withstand vertical stress much better than horizontal stress. It’s super for a variety of pioneering uses because it’s wonderfully straight and for its size it’s very light weight. Due to it’s surface being so slick, lashing bamboo poles together presents additional challenges.
RELEVANT LINKS
This is the fourth post in a series that will eventually comprise an activity-based, unit pioneering program curriculum.
SUPPORTING VIDEO: How to Tie a Mark II Square Lashing
IV. Simply speaking, Pioneering can be seen as building structures by lashing together spars. In most cases, the lashing that is used is the square lashing. For ease, simplicity and above all efficiency, the square lashing used here is the Mark II Square Lashing.

OBJECTIVES
MATERIALS
PROCEDURE A
1) Instructor crouches down or sits in a chair in front of a crossbar. A Scout Stave is leaning against the bar on the other side. Scouts are gathered behind and to the sides of the instructor, so they can watch his hands as he demonstrates the Mark II Square Lashing while narrating:
Note: An Instructor monitors each of the following steps:

2) Using a Scout Stave and a 10-foot lashing rope, each Scout takes a position in front of the crossbar, which will serve as the horizontal (crossing) spar. They place their Scout Stave behind the crossbar.
3) Scouts halve their rope and place it behind their Scout Stave with an end on either side and under the horizontal spar.
4) Scouts start theirs wraps, keeping them neat, even, and flush to one another.
5) After three wraps, Scouts bring the ends of the rope to the front and cross them to begin their wraps.
6) Pulling their two fraps tightly, Scouts finish their lashing with a square knot.
PROCEDURE B
1) Each Scout is given two Scout Staves and a 6-foot lashing rope and instructed to lash the poles together in the middle with a neat, tight square lashing.
INTERPATROL COMPETITIONS: Indoor Ladder Race and Free-Standing Flagpole
Here are two videos that will reveal something of what went on in the Pioneering Area up on Garden Ground Mountain at the Summit. MUCH better when viewed in Full screen!
This is the third post in a series that will eventually comprise an activity-based, unit pioneering program curriculum.
SUPPORTING VIDEOS: How to Always Tie a Square Knot Right / How to Tie a Roundturn With Two Half Hitches
III A. In the BSA, the square knot is commonly referred to as a joining knot and tying it is a requirement to earn the Scout rank. However, the square knot (reef knot) is first and foremost a binding knot. For our purposes, its primary use will be to complete a Mark II Square Lashing.
III B. A roundturn with two half hitches is one of the basic knots that is very reliable for a number of uses in pioneering work. It is easy to tie and untie and does not reduce the strength of the rope due to sharp turns when under a hard pull.
OBJECTIVES
MATERIALS
PROCEDURE A


5. Alternating the position of the running ends of overhand knots tied around the horizontal pole, races are run between individuals to determine that the ability to rely only on the appearance of the initial overhand knot has been mastered. Reviews are conducted as necessary.

PROCEDURE B
1. The instructor wraps the 1/2-inch cord around the horizontal pole forming a roundturn. He explains that a roundturn goes around the pole twice, and when maintaining a grip on the running end, a good deal of stress can be held because of the friction around the pole created by the roundturn.

2. The instructor ties a half hitch around the standing part of the rope and cinches it up to the roundturn on the pole.
3. The instructor ties a second half hitch around the standing part and cinches that up to the first. He explains that these two half hitches have formed a clove hitch around the standing part and the knot is often called two half hitches. He further explains that when two half hitches are tied like this after a roundturn, the knot is called a roundturn with two half hitches and, as will be seen later, is often used on guylines and anchor points when building a pioneering structure.

4. The class is divided into twos. The first Scout holds the end of the 15-foot rope and stands about 12 feet away from the horizontal pole. The second Scout goes to the pole and with the other end of the rope applies a roundturn, while the first gives the rope some tension with a slight, steady pull. When the roundturn is completed, the second Scout lets go of the standing part and with one hand grabbing the running end, he holds the strain still applied by the first Scout. He then adds two half hitches. When the roundturn with two half hitches is tied, the second Scout lets go of the rope entirely. The two Scouts switch so that everyone in the class can demonstrate they are comfortable tying the knot.
INTERPATROL ACTIVITY: Flagpole Race
This is the second post in a series that will eventually comprise an activity-based, unit pioneering program curriculum.
SUPPORTING VIDEOS: How to Tie and Apply Half Hitches and the Clove Hitch / How to Tie a Round Lashing

II. In Pioneering, half hitches are everywhere! Two of them next to each other is a clove hitch, and that’s something we use time and time again. As John Thurman declares, “If only we can get Scouts to learn that if you make one half hitch and another half hitch and bring them together they make a clove hitch, what a lot of time the Movement would save in the amount of fiddling and fumbling that goes on when a clove hitch is the order of the day.”
OBJECTIVES

MATERIALS
PROCEDURE A


PROCEDURE B
INTERPATROL ACTIVITY: Catch the Snapper
This is the first post in a series that will eventually comprise an activity-based, unit pioneering program curriculum.
I. There are numerous terms pertaining to knots and working with rope, but the four presented here, along with some simple “moves” requiring a minimum amount of dexterity, will be useful when learning and applying some of the basics that follow.
OBJECTIVES
MATERIALS
PROCEDURE A


PROCEDURE B


Situated adjacent to the catapults, like a giant, rope-propelled see-saw, the swing boat up on Garden Ground Mountain repeatedly attracted Scouts and Venturers. The pull rope on each side allowed the riders to raise one another up and back as high as they wanted, and by rhythmically pulling on and releasing the rope, they could control their height and speed, back and forth.


The carousel has been a mainstay for the past several jamborees. It was located at the entrance to Peschke Field just beyond the Indian Village, and was one of the most popular attractions in the pioneering area. Because it was so much fun, there was often a line of Scouts and Venturers waiting their turn to get on board. Notice the transformation of the carousel grounds after days of use and lots of rain. (Click on the photos for full page views.)

PIONEERING AREA: ACTIVITY STATIONS & GAMES
JAMBOREE PIONEERING AREA: MAIN PAGE
