The concept for this gateway originated from the bamboo version placed at one end of Peschke Field at the 2013 national jamboree. Just like the name describes, this gateway flies a banner in the middle surrounded on each side by three flags. Each side is in the shape of a standing triangular prism. If the legs of each prism were far enough apart, symmetrical, and proficiently lashed, the structure could easily be self-standing. However in this instance, we’re using long, thin, yellow pine spars with unequal diameters and with an array of curves. So for stability, the gateway definitely needs to be guyed down at the front and back (outside) legs of each side!
Six Flag Banner Gateway: From the Drawing Board to the Open Field
To sport a ten foot banner and fly six 3 x 5-foot flags, a gateway like this conceivably can span as little as 20 to 24 feet. The dimensions of the above gateway are purposely larger, employing 8-foot spars to connect the legs, separated by two 14-foot center spars, so the width is closer to 30 feet. Since this project:
is not designed for climbing
relies on four guylines to keep it erect
is fairly long and wide which can make hoisting a bit of a challenge
most of the spars can be thinner, lighter-weight pine. (Bamboo would be much better!) Naturally, the two triangular prisms should be bottom-heavy, so lash thicker, heavier connector spars at the bases of each side.
Here’s a list of materials:
six 8-foot x 3-inch bottom leg connector spars
twelve 8-foot x 2-inch middle and top leg connector spars
two 14-foot x 2-1/2-inch center spars
four 16-foot x 3-inch front and back (outside) leg spars
two 18-foot x 3-inch middle leg spars
eight rings or small pulleys
eight 3-foot cords to attach rings or pulleys
eight 40-foot x 1/4-inch braided nylon ropes for halyards
eight lightweight carabiners for the flags and banner
forty 15-foot x 1/4-inch manila lashing ropes
four 6-foot straight spars for right and left front and rear flagpoles (optional)
two 8-foot straight spars for right and left middle flagpoles (optional)
twelve lashing ropes for round lashings to attach flagpoles to the tops of the legs (optional)
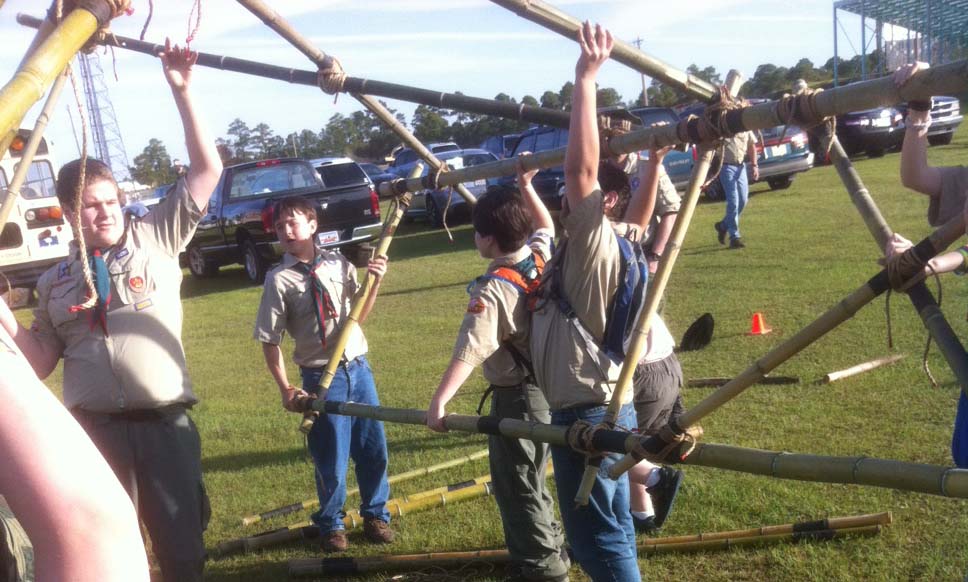
One key to building this gateway is to connect the middle and front leg of each prism shape with three leg connector spars, while both legs are lying flat on the ground. Once connected, the connector spars for the rear legs can be attached to the front and middle legs, after which the rear legs themselves can be held in position and lashed.
On the left: lashing on base connecting spars to the middle and front legs of the right triangular prism. On the right: lashing on the rear leg to form the right triangular prism.
Another key to constructing the gateway is marking the positions on each leg, measuring up from the butt ends, where the connector spars will be lashed. The intent is to assure they’re evenly-spaced, parallel to one another and perpendicular to the legs.
After the center spars are lashed to the right and left middle legs, and when all the rings and halyards for the flags and banner are tied in the proper positions, the structure is hoisted from the back using the four guylines attached to the outside legs of both prisms (with rolling hitches or roundturns with two half hitches), and three hauling ropes attached to the top center spar with draw hitches. Refer to:“Hoisting the Tower”
All Hands on Deck to Hoist the Gateway
The final step before securing the guylines to 1-1 anchors with rope tackles is to rotate each prism so that the front and back legs (outside) of each are positioned out at an equal distance from the middle legs.
Using the 14′ Double Ladder Signal Tower as a point of reference, here are the plans for a very tall campsite gateway that stands out (and up) and serves as an impressive feat of Scout engineering. One of the perks included in this project is it provides an opportunity for new Scouts to experience hoisting a “boy-sized” structure replete with their own special colors e.g. their patrol flags.
Since this 14-foot structure isn’t climbed on, the spars can be considerably thinner in diameter. Bamboo is ideal. Lashing on those flags attached to each corner creates a spectacular effect and hence the name “4 Flag Tower!”
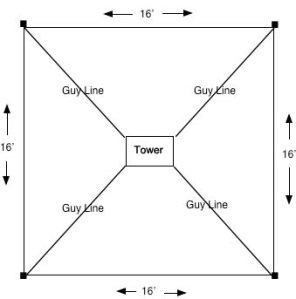
14′ Tower Gateway Schematic / Gateway to a Scout Expo Photo
Note: This design is not self-standing. Therefore, using it as a gateway at a camporee or Scout Expo with the necessary guylines requires an area wide and deep enough to accommodate a 16 x 16-foot space.
Scouts lash together a 4′ Side.
Materials Needed:
four 2-1/2 to 3-inch x 14-foot leg spars
six 2-inch x 8-foot X-brace spars
four 2-inch x 6-foot X-brace spars
four 2-inch x 6-foot support spars
six 2-inch x 4-foot leg spreader
forty-five 15-foot x 1/4-inch lashing ropes
four 25-foot guylines
eight 24-inch pioneering stakes
Assemble the 4-foot sides. Begin by laying out two pairs of 14-foot spars for the tower legs, side by side, 3 and 1/2 feet apart. Be sure the butt ends are even at the bottom so the tower will stand up straight.
NOTE:All lashings need to be very tight.
Diagram 1
Lash the legs together starting with a 4-foot bottom leg spreader about 6 inches up from the butt ends. Lash on a 4-foot middle leg spreader in the middle of the 14-foot legs (7 feet up), and a 4-foot top spreader about 3 inches from the top of the 14-foot legs.
When the legs are joined with the three 4-foot spreaders, lash on two 6-foot X-brace spars using square lashings to lash the ends to the legs, and a diagonal lashing where they cross, forming a trestle in the bottom half of the legs (see diagram 1). Three of the ends are lashed to the outside of the legs, and one on the inside, so that a slight gap is created where they cross. As the diagonal lashing begins, this gap will be cinched together with the timber hitch. Repeat the whole process with the other two 14-foot legs.
Diagram 2
Join the 4-foot sides. Turn both sides up horizontally, parallel to one another about 5 and 1/2 feet apart. Make sure the bottoms are even.
Lash on one of the 6-foot support spars directly above the 4-foot middle spreader (see diagram 2).
Lash another one of the 6-foot support spars directly under the 4-foot side spreader at the very top.
Lashing the X Braces with a Diagonal Lashing.
Now, lash on two of the 8-foot X brace spars diagonally between the two 6-foot supports using square lashings to lash the ends to the legs, and a diagonal lashing where they cross forming a trestle in the top part of the wide (6-foot) side (see diagram 2). Three of the ends are lashed to the outside of the legs, and one on the inside, so that a slight gap is created where they cross. As the diagonal lashing begins, this gap will be sprung together with the timber hitch.
Lash the other side. To make the lashings on the other side, you have to get the whole crew together to carefully lift and roll the tower over 180° so that it’s laying on the X-brace, and the other sides of the 4-foot sides are easier to get to.
Repeat the same procedure as before.
Scouts carefully lift the structure and rotatie it 180° to lash the other side.
Lash on the middle X-brace. This X-brace is what will keep the four sides from racking. Lash the two remaining 8-foot X brace spars diagonally across the legs just under the 4-foot middle leg spreader (see Tower Gateway Schematic on the top of this page). Use square lashings to lash them to the legs and a diagonal lashing where they cross. To accomplish this, some crew members will have to hold up the top of the tower so that there is better access to all four ends of the 8′ X brace spars.
Lash on the flags. If you want a flag or flags to fly from the top of the tower, lash the flagpole(s) to the top of each tower legs using a couple of tight round lashings.
Tower Gateway Layout
Anchors and guylines. When all the lashings are done, move the tower to where it will be hoisted. Before actually hoisting the tower, lay out the position of the four legs on the ground. Then determine where the four anchors for the guylines will be placed to steady the legs of the tower.
Using the pioneering stakes, build four 1-1 anchors. Each should extend 16 feet, 45° out from the leg.
NOTE: Make sure the flags are unfurled before hoisting the tower.
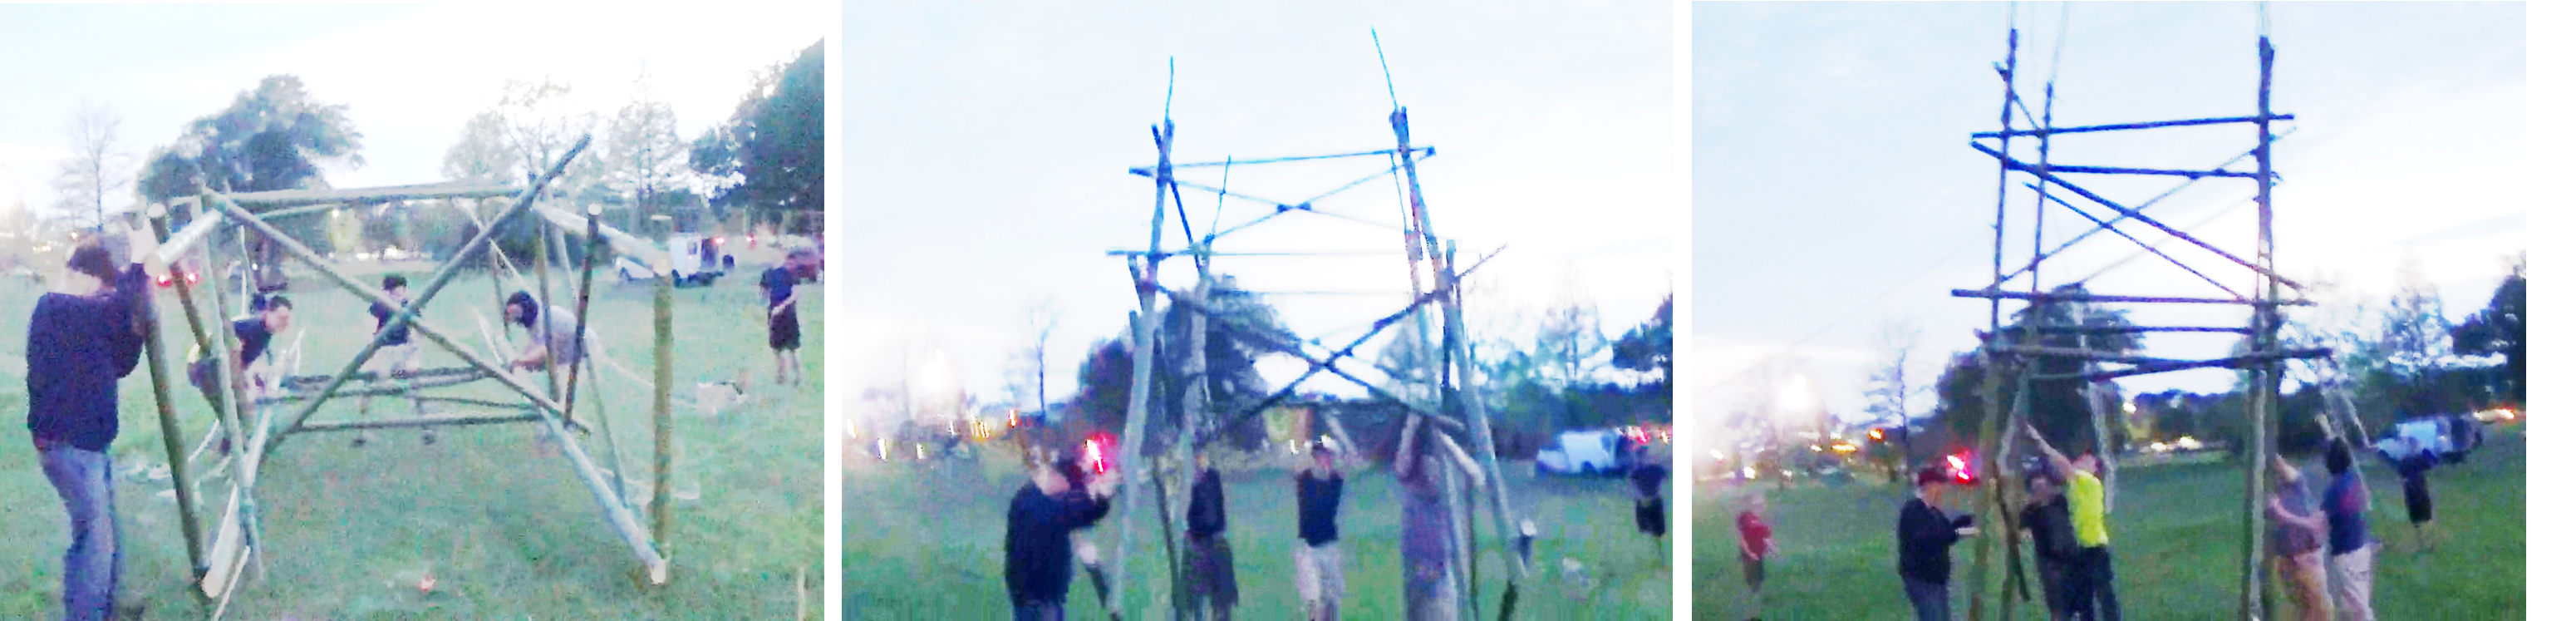
Hoisting the tower. You’ll need a whole crew to do the hoisting. Get ready to hoist the tower by delegating the following:
One signal caller who tells the crew members when and how fast to pull on the ropes.
One safety officer who observes for all safety considerations and signs of trouble during the hoisting.
Four Scouts to serve as “Lifters” to lift the top 6′ support spar that’s on the ground. Their job is to first left and then push the tower up.
Two Scouts, one on each of the 2 guylines attached to the legs, to make sure the tower isn’t over pulled and topples over
Four “Pullers” who will use the two guylines as hoisting ropes to pull the tower until it is standing
We did it!
When everyone is in position, the signal caller should direct the Scouts on the hoisting ropes (the pullers) to hoist the tower into position, while the lifters start lifting. Care should be exercised not to over pull the tower.
As soon as the tower is standing, four Scouts should temporarily tie the guylines to the anchors using a roundturn with two half hitches.
Heeling the tower. If the tower is uneven, you can heel the the butt ends of the legs 4 to 6 inches deep as needed to make it more level.
Tighten the guylines. As soon as the tower is in position, go to each of the anchors and untie the Roundturn with Two Half Hitches and replace it with a rope tackle. Use the rope tackles to hold the tower steady, by gradually applying strain to each of the four guylines at the same time. Do this by tying a butterfly knot in each guyline about 6 to 8 feet from the anchor. Then wrap the running end of the guyline around the forward stake of the anchor and back through the loop in the butterfly knot. When rope tackles are tied to all four anchors, gradually tighten the lines. Apply enough strain to each of the guylines to hold the tower firm and in a vertical position. Then tie off the rope tackles and secure the running ends with half hitches.
Hoisting a Larger Version: 17′ high x 8′ wide x 6′ deep