An Opportunity Identified: Last spring, on April 12-14, a Scout Expo was held on the extensive grounds of the Myrtle Beach Speedway in Myrtle Beach, SC. for the purpose of increasing public awareness and celebrating Scouting throughout the eleven counties of the Pee Dee Area Council. Units were invited to camp overnight on Friday and Saturday, and from 10:00 to 5:00 p.m. on April 13, the Expo’s festivities were open to the general public. To promote Scouting, all units were invited to set up a fun, and/or informational display.
 A Challenge Accepted: To contribute to the overall impact of the event and to increase awareness of the Order of the Arrow, the Chicora Chapter of Santee Lodge 116 received permission to set up their own exhibit. They wanted to communicate and share with everyone in attendance that members of the Order of the Arrow were capable of providing an outstanding activity—one that provided real interactive fun, and one that promoted camping by demonstrating advanced Scout skills.
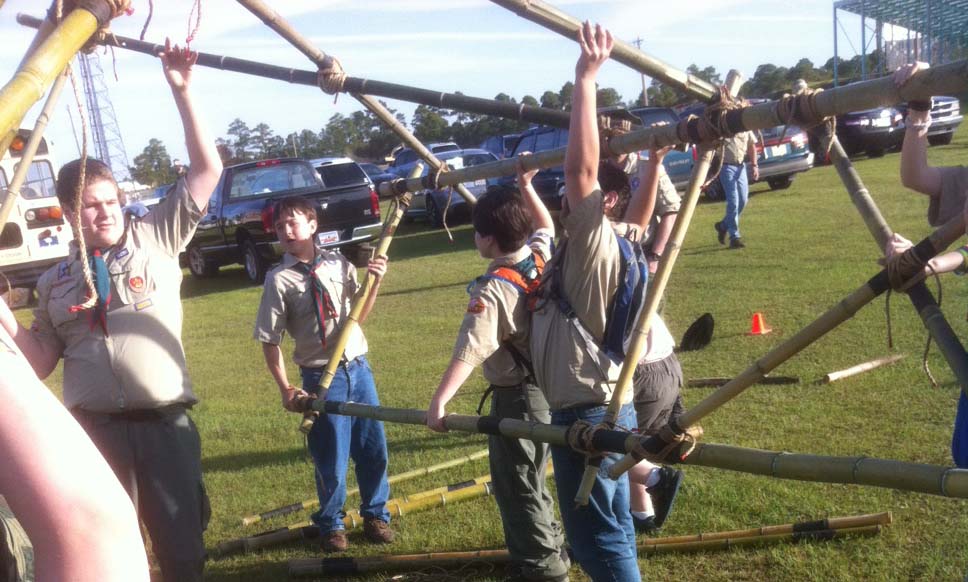
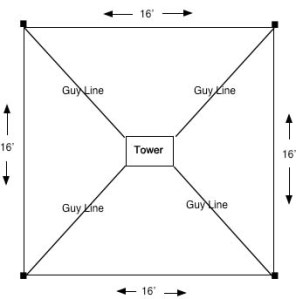
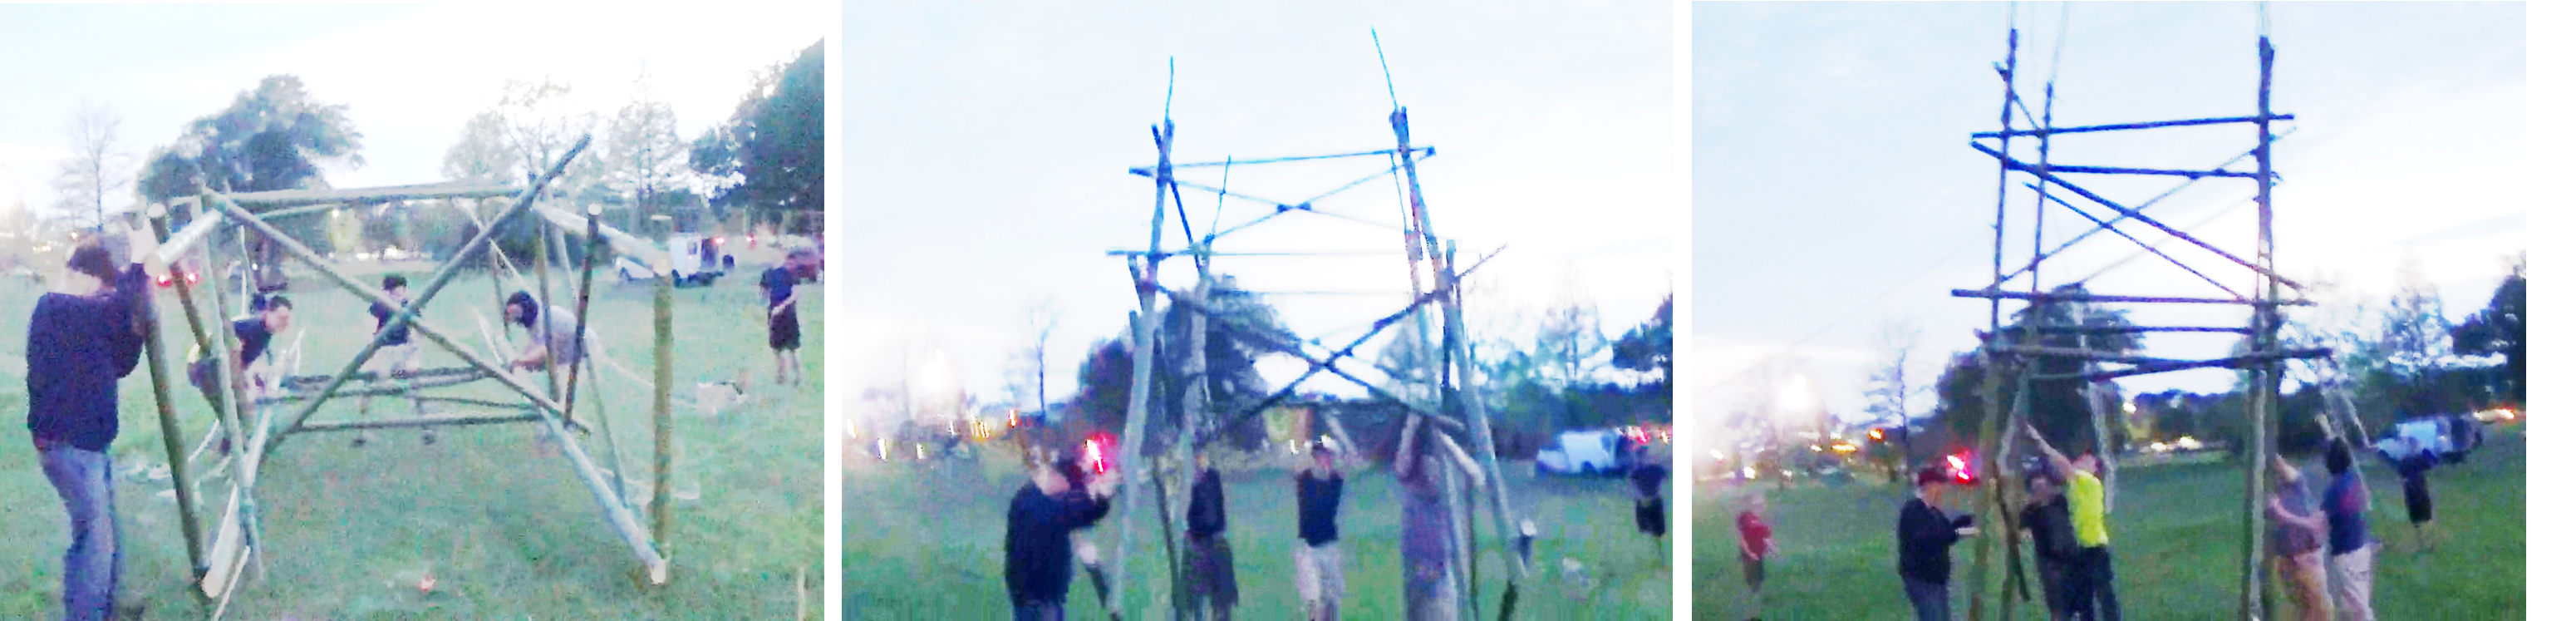
Addressing the Opportunity and the Challenge: To take advantage of this opportunity, the chapter decided to challenge itself to assemble a Scout Pioneering exhibit—one that would engage and impress Expo attendees. It would be a special rope bridge. But, instead of the typical single or double A-frame versions, an elaborate design was developed featuring two 5’ climbing towers.
 What They Did:
- They formed a Pioneering crew made up of chapter members who readily volunteered to participate.
- They fine-tuned the project design and gathered together all the materials needed.
- They provided themselves with the pioneering skills required to build a safe structure.
- They formalized a plan of action for actual project construction, with assembly procedures and building assignments.
- They made meal plans and camping arrangements for all crew members.
- They organized a schedule for manning the bridge to assure it was used safely and properly during the seven hours of Expo festivities.
- They carried out all their plans
 Who was involved: Twelve members of the chapter rendered cheerful service in building the project on Friday, maintaining and supervising its safe operation on Saturday, and disassembling the structure on Sunday.
The Costs: The only money involved was the cost of Friday evening’s dinner for the Pioneering crew, and the price of registration for those brothers who were not already camping with their troop.
The Success: The success of Scout Pioneering can be measured in two ways. One, did those building the project complete it safely and effectively? Two, did the completed project accomplish whatever it was designed to do? Their efforts were successful on both counts. The chapter brothers cheerfully worked hard and worked together building a project that was stable and strong. When the work was done, they proudly shared the fruits of their labor with numerous, appreciative Scouts and Expo guests.
 The Result: For seven hours, their display enjoyed a continual stream of eager Cub Scouts, Webelos Scouts, Boy Scouts, and Expo visitors. The Council-wide Scout Expo was well-attended. Though there was not an exact count, it is easy to say that throughout the day, hundreds of people crossed the bridge, supervised and safe-guarded by the helpful Order of the Arrow attendants. The Expo organizers were very happy with the participants’ response to the OA exhibit, and the Pioneering crew regularly received high praise from Expo attendees.
The Benefit: The Chicora Chapter’s original intention in setting up a Scout Pioneering exhibit at the Expo was to benefit both Scouting and the Order of the Arrow, by contributing to the overall impact of the event, and by providing those attending with positive exposure to our Brotherhood of Cheerful Service. Because their display was so cool, and because its presentation was so impressive, the conclusion is that in both these lights, they hit the ball out of the park! In line with an honor organization that promotes camping, they wanted to have Scouts associate the Order of the Arrow with advanced Scouting skills that are functional and fun. For many, it was the first time they ever got to try a rope bridge. For everybody, it was the first time they ever saw a monkey bridge with a double platform! The exhibit was well-manned and the cheerful Arrowmen looked great with their sashes symbolizing the service they provided to their fellow Scouts and Expo visitors.
 The Future: As an outgrowth of the favorable impression made at the Scout Expo, opportunities to serve their district and council are on the rise. In October the chapter was asked to build a traditional Double A-Frame Monkey Bridge at a District Webeloree. Then in November, they received a request to assist in an afternoon team-building session during a multi-district Boy Scout Camporee, by presenting Pioneering activities as patrol challenges. More and more arrowmen are becoming aware of the fun and positive impact this kind of service provides, and an increase in participation by other chapters throughout Santee Lodge is foreseen.
 Plans to Grow: The more the Pioneering skills are developed through learning and application, the greater will be the capacity for sharing these skills through the construction of interactive Pioneering displays, while exampling cheerful service! Those who appreciate the fun in using only poles and rope to build a useful structure, who enjoy working together as a team utilizing specialized skills to get the job done, and who have experienced the sense of accomplishment that goes along with completing a Pioneering project that illustrates “old-school” Scouting know-how, need no coaxing when invited to do it again and again! The chapter just found out that a local pack has requested they build a simple Single A-Frame Bridge with twin walkways for their outdoor Webelos crossover ceremony this February. But, they’re most excited by the largest venture coming up in April! Santee Lodge is hosting this year’s Dixie Fellowship at Camp Coker. With the input of the Chicora Chapter Pioneering Crew and with the help of many other, eager lodge brothers, Pioneering crews will be erecting an enormous gateway flying the American flag, the Order of the Arrow flag, the World Scout Crest flag, and the state flags of NC, SC, and GA. These six flags will surround a 10’ banner welcoming everyone to the Dixie Fellowship! The OA Pioneering Crews will also build a 12’ Swing Boat and 10’ Atomic Pile for intermittent fun during the Fellowship. With over 1,000 OA brothers in attendance, sharing the satisfaction inherent in serving Scouting and promoting the Order of the Arrow through well-presented displays of Scout Pioneering will be a blast! (See: Pioneering at the 2014 Dixie Fellowship.)
 Sustaining the Idea: The idea is fostered that if provided the wherewithal, in every OA lodge there are many Scouts who would enjoy building fun and useful Pioneering structures that are really cool. There are also those closely involved with Scout Pioneering who would be very happy to make it a priority to help equip and train fellow arrowmen, so they can implement their own program and serve their councils in like fashion. Building Pioneering projects provides outdoor fun that quite simply stands the test of time. The Native Americans did it in a big way, and so did the folks who settled our country. Especially today, even with a modern emphasis on the high-tech, the fascination with old school Scouting skills always persists. This is evidenced by the joyful responses well-built Pioneering projects consistently receive. The Order of the Arrow is steeped in rich Scouting traditions, and hence provides wonderfully fertile grounds for a welcome resurgence of the timeless Scouting skills that are embodied in Scout Pioneering—a golden opportunity to both promote Scout camping while exampling cheerful service during Scouting events!
Furthering the Mission and Purpose of the Order of the Arrow: For 100 years, the Order of the Arrow has inspired numerous Scouts, both young and old, by linking a love for the outdoors and camping with the cheerful rendering of service to our fellow man. When, in preparation for an organized Scouting event, arrowmen dedicate their time and skills to the building of an impressive, interactive pioneering structure, they are setting the stage for something very special. In addition to enhancing the event’s impact, their accomplishment carries with it a dual purpose. One: a properly presented and well-built Pioneering project in itself promotes a love for the outdoors and camping. Two: unselfishly giving their time to share the fun inherent in their work, by answering questions about their project in a friendly manner and providing safe guidance in its use, is the kind of action that inspires, motivates, and indeed exemplifies the cheerful service that embraces the watchwords of our order.