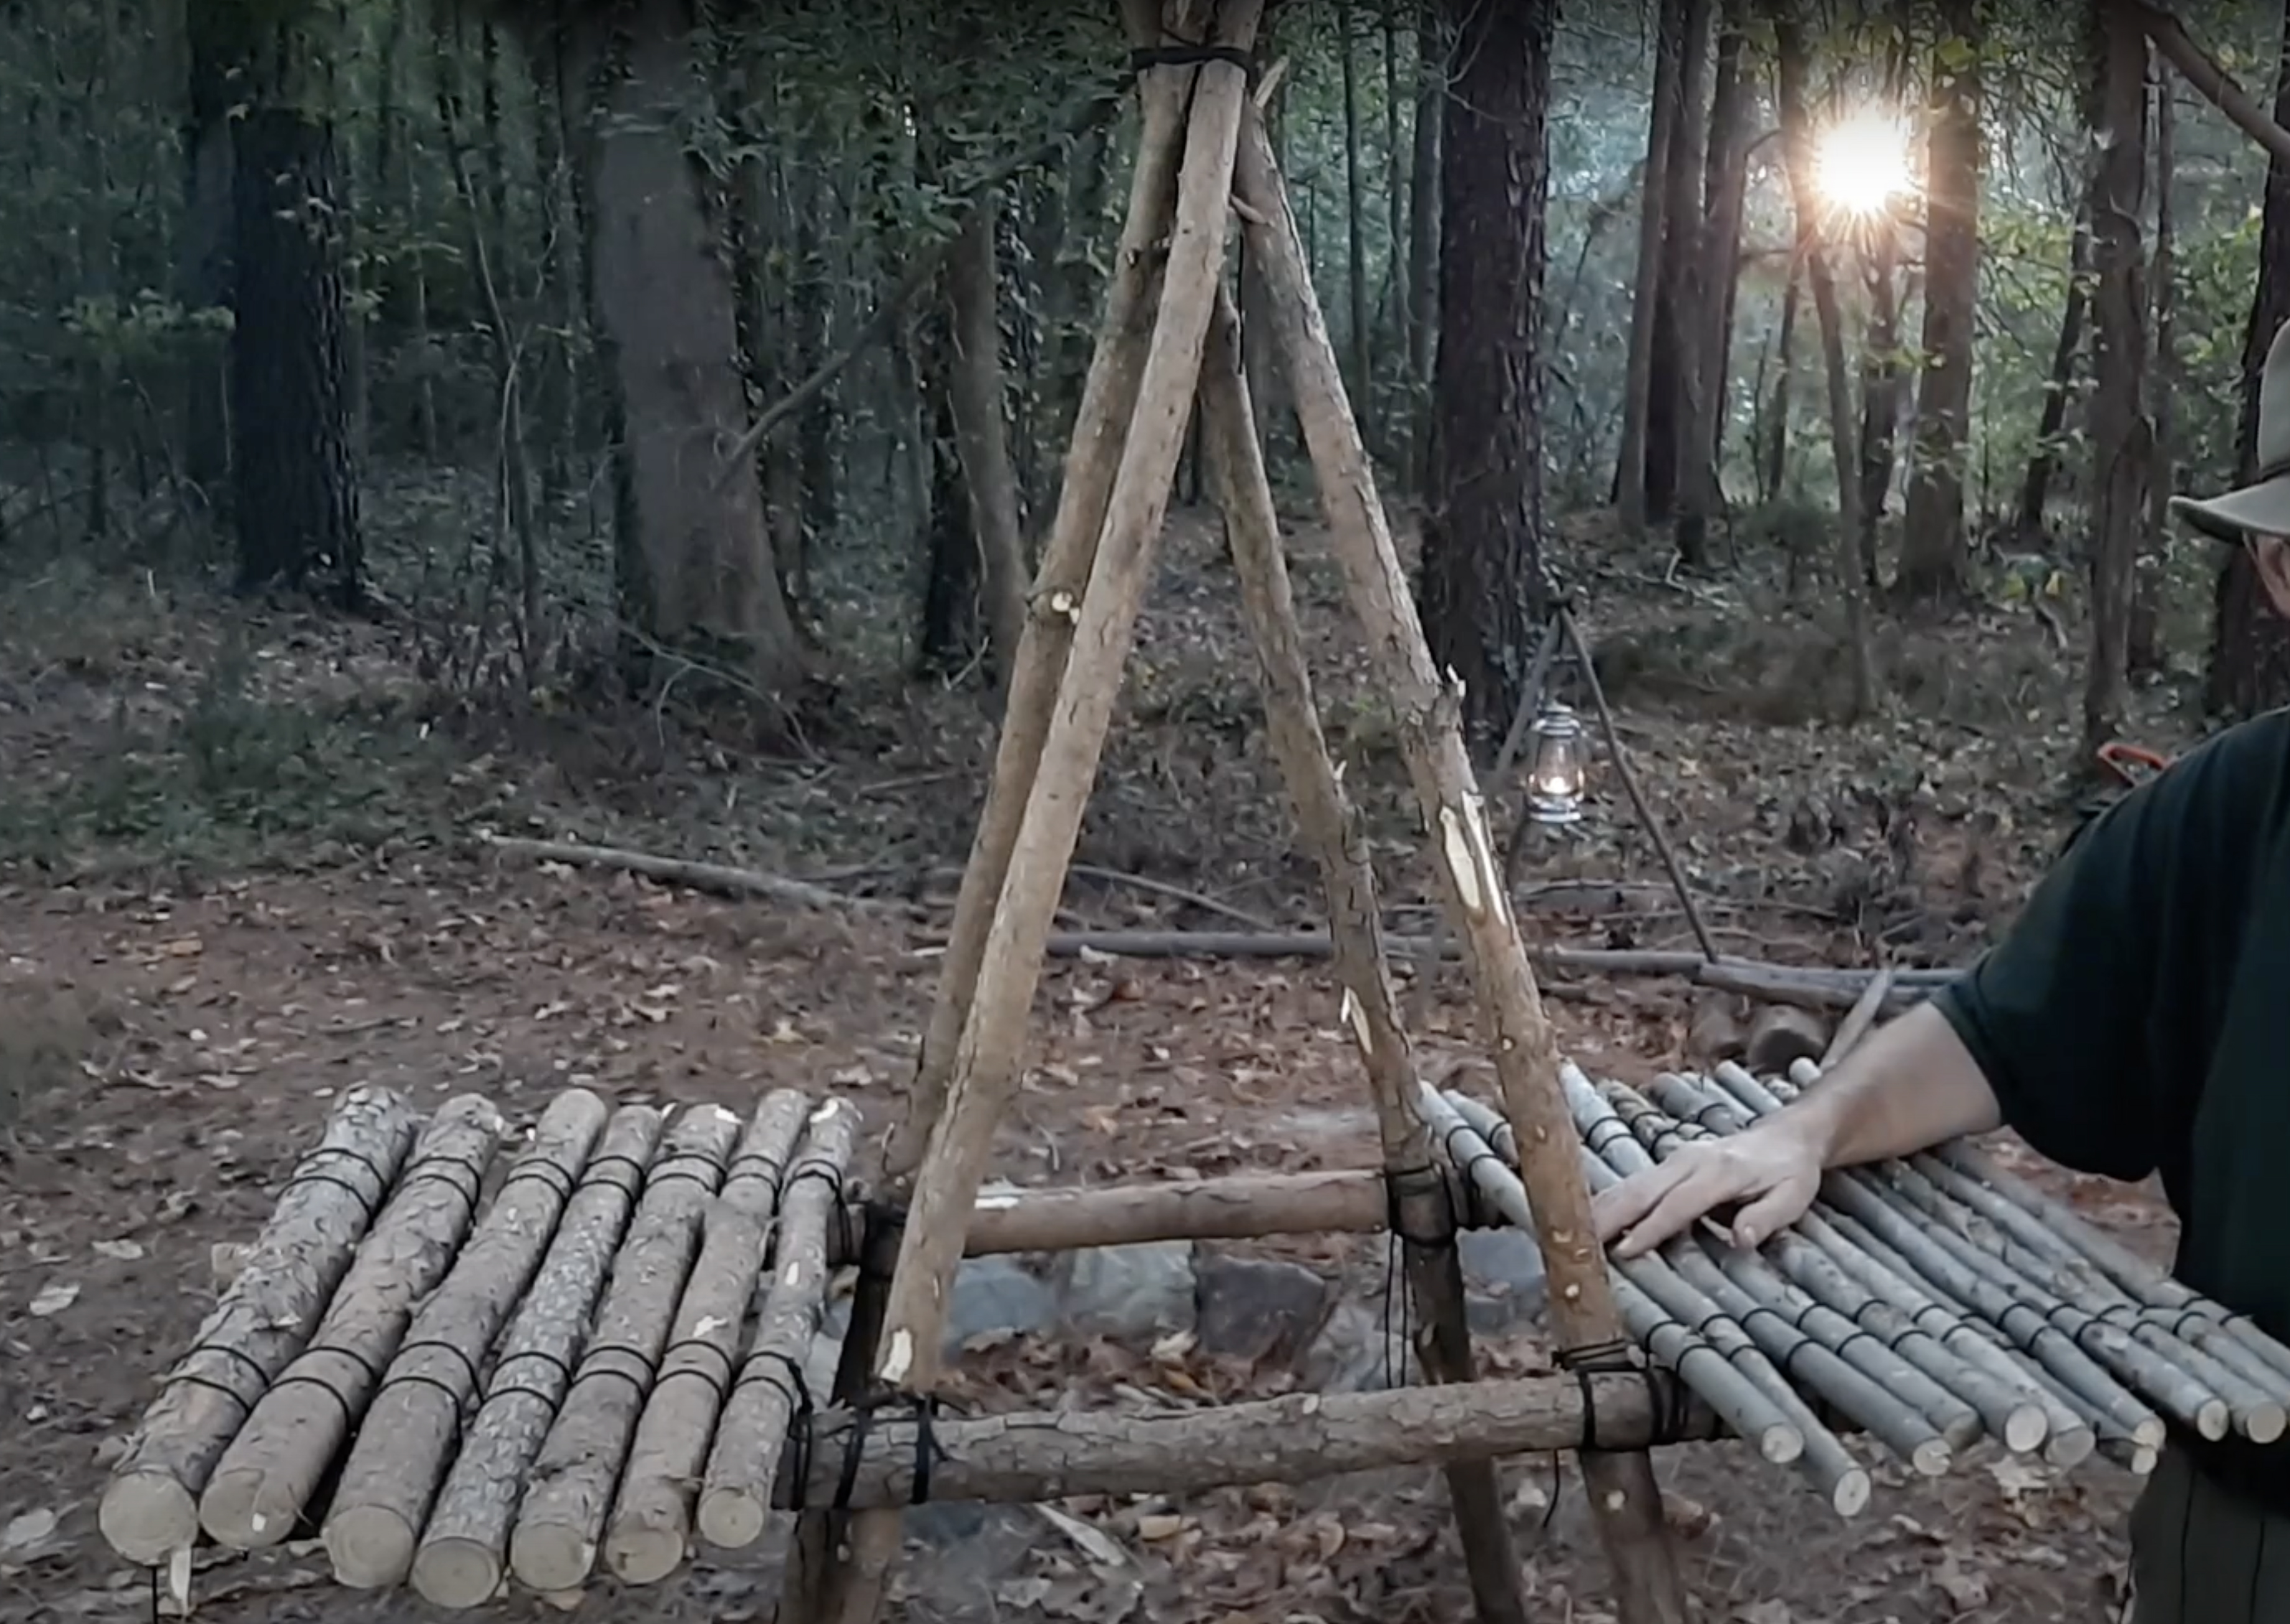
This small camp table can be comprised almost completely of Scout staves. It is 100% functional and provides a convenient raised surface for personal, patrol, or general use. It’s simple design makes it quick and easy to set up, and it is remarkably stable.
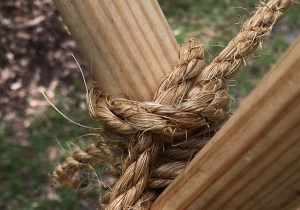
Make the table legs. Start by lashing together four Scout staves into two sets of shear legs with 6-foot manila lashing ropes. If you prefer, square lashings can be used instead of shear lashings. (In lieu of Scout staves, straight poles an inch or so in diameter are just fine.)
Lash on the table top supports. Next, with two square lashings, lash a 2-1/2-foot stick to connect each set of shear legs about 30 inches off the ground. (A Scout stave cut in two is ideal.) This will form two A-frames, one for each side of the table. Make sure each of these support sticks are lashed on straight and at the same distance from the bottom end of both sets of legs.
Securely hold up the A-frames. This is surely the best part. Find the midpoint of a 20-foot line. At about two feet away, tie a clove hitch at the top of one of the Scout staves of one of the A-frames. Repeat this process on the other side attaching the line with a clove hitch to one of the Scout staves of the other A-frame.
Secure each end of the 20-foot line to stakes driven into the ground on either side, about 5 feet away, so the line extends out evenly from each end of this table framework. You can use round turns with two half hitches, taut-line hitches, or rope tackles. Here’s the beauty of this configuration: you can manipulate the distance between the A-frames by adjusting the clove hitches, and provide optimum stability to the table by placing a good, reasonable strain on the line at each stake. It will stand up in an impressively rigid fashion.
Lash on the table top. Finally, lay 12 Scout staves, (or similar poles) side by side, on top of the 2-1/2-foot support sticks, and using binder twine, lash them on with floor lashings.
You’ve got to love this design. It’s compact, it’s sturdy, and it’s ingenious!
This drying rack is based on suspending two concentric, equilateral triangles to make six cross sections for hanging wet clothing or towels during a long term encampment, and there’s no reason you can’t put it up on an overnighter if there’s a practical need. All that’s been said before regarding the advantages of this kind of campsite improvement apply to this simple camp gadget:
It takes up less space while drying more wet things.
It eliminates the clutter of clothing and towels haphazardly strewn around on tables, tree branches, tent platforms, or overcrowded on a disorganized array of drooping clothes lines.
It can be set up in a location where there is the most sunshine.
It’s especially useful when camping in an open area with few trees.
Materials (adapt these as you like)
three 4-foot x 1-inch sticks
three 5-foot x 1-inch sticks (Scout staves are ideal)
one 6-foot x 1-1/2 to 2-1/2-inch straight pole for the upright (or an additional 5-foot Scout stave)
one 30-inch pioneering stake
eight camp gadget lashing ropes (6 to 10-foot)
three 15-foot lashing ropes
three small stakes
Two Equilateral Triangles
Procedure
Lash the triangles. Start by lashing together two equilateral triangles, one smaller for the top (three 4-foot sticks), and the larger one for the bottom (three 5-foot staves). Use square lashings. One easy way is to lash two at 90° and then bend them in and tie the third square lashing to make the triangle. This yields a nice, tightly-lashed triangle, (but be careful you’re not putting too much stress on the ropes and poles when preparing to apply the third lashing).
Pioneering Stake
Erect the upright. Pound in a pioneering stake and lash the 6-foot pole to it securely with two tight strop lashings or round lashings. Making this upright stand up vertically without moving or wobbling at all is a key to a good and sturdy clothing dryer. So, solidly pound in the stake and make sure it’s as straight as possible. Also, make sure the lashings are well-tied and tight.
—> ALTERNATIVE APPROACH: A clothes drying rack can be erected without having to either pound in a stake or sink the center pole, by using the same principle as when erecting a flagpole. The key is using the support ropes as guylines. SEE PHOTO.
Rolling Hitches
Attach the triangles. Lay the triangles on the ground over the upright, first the larger triangle, and then the smaller one on top.
Tie each corner of the smaller triangle to a support rope so it will be suspended about 5 feet above the ground. Use clove hitches which can be adjusted as necessary to assure the triangle hangs evenly and the 4-foot sticks are horizontal. Continuing with each of the three support ropes, repeat this process for the larger triangle so that it will hang about 4 feet above the ground.
Clove Hitch
Taut Line Hitch at Stake
Anchor the support ropes. Hammer in a small stake a foot or so out, in line with each corner of the bottom triangle. Using the remaining length of the support ropes, attach them to the stakes with a simple taut-line hitch. This will further stabilize the clothing dryer and enable you to make fine-tune adjustments to the way the triangles lay. (You can also just make them fast to the stakes with a roundturn with two half hitches, or another clove hitch.)
An assembled clothes drying rack at the 2013 Jamboree gets the once over.
Getting that garbage bag off the ground has all kinds of advantages, but sometimes, you can’t hammer sticks into the ground to make the easy three stake holder. There might be any number of reasons. The ground’s got too many rocks. The ground is rock. You’re in a parking lot or on the sidewalk during a fundraiser. You’re indoors.
In these cases, to hold up a trash bag (when there is no trash can), you can simply lash three Scout Staves or similar poles into a tripod and lash on some short cross pieces to keep it stable. All that’s required is seven lashing ropes, one for a tripod lashing and six for square lashings. For the poles you need three 4 to 5-foot sticks for the tripod legs, and three short sticks for the tripod leg supports.
Note: The tripod lashing is tied below the middle of the longer sticks. The length that the sticks extend on top of the lashing will be determined by the size of the bag your holding. Also, to secure the bag on the holder, and too shorten or lengthen the amount the bag hangs, you can fold the top of the bag as much or as little as you like over the three upper leg extensions.
Please refer to the “sales pitch” provided in the Tool Rack post spelling out all the advantages inherent in building one of these simple camp gadgets. It is a good-looking campsite improvement project, but mainly, it’s got major functionality.
The main difference between this version and the other is with the first tool rack, all the tools are hung, suspended by a cord from the upper cross piece and are supported by resting against the lower cross piece. In this tool rack, the tools’ handles are slipped in between two parallel cross pieces. This way, they’re held very nicely in place, and any shifting or wobbling around, often experienced in the first rack, is eliminated.
The two racks are also constructed in like manner, again refer back to the Tool Rack post. No need repeating it here. However, in this version, the diameter of the two 6-foot uprights need to be a little larger than the diameter of the thickest handle of any tool you’ll be hanging.
Parallel Square Lashings
When you’re ready to lash on the cross pieces, lash on the first higher than the longest tool. It needs to be at a height easy enough to comfortably place the tools on and take the tools off the rack, without needing to reach up too high or bend over. Secure the first cross piece in front of the uprights with a couple of tight square lashings, and then secure the second cross piece to the uprights in exactly the same position, but on the other side of the uprights. You’ll be tying a tight square lashing here too, and there’s plenty of room to wrap and frap. That’s all there is to it.
By the way, if you’d like to erect a cover over the tool rack, lash another cross piece to the very top, and rig up a tarp, using this third cross piece as a ridge pole.
Protecting the tools from rain and providing a covered area for storage.
Designed very closely along the lines of the Simple Camp Table, this is an easy solution to how to dry wet clothing and towels at a long-term camp.
It takes up less space while drying more wet things.
It eliminates the clutter of clothing and towels haphazardly strewn around on tables, tree branches, tent platforms, or overcrowded on a disorganized array of drooping clothes lines.
It can be set up in a location where there is the most sunshine.
It’s especially useful when camping in an open area with few trees.
A large camp clothing drying rack can be built using four 6-foot x 2-inch spars, or a smaller one with four 5-foot Scout staves.
Attaching the long line to the rack ends
Build the framework. For each side of the rack, lash two poles with a tight shear lashing. Make sure the distance where they intersect at the top is the same for each pole.
If you’re making a larger rack, strengthen the sides by connecting the poles with a 4 or 5-foot cross brace, lashed on with tight square lashings. This will form an A-frame for each side. (For a smaller rack, all you’ll need are the Shear Lashed staves forming two inverted ‘Vs’.)
Set up the supporting line. What holds up the sides of the rack and serves as the highest drying line is a long rope. A 50-foot x 1/4-inch manila rope works great, but most any long cord will be fine. Drive in two narrow pioneering stakes, one for each side, extending about ten feet beyond the length of the drying rack. The larger the rack, the longer this length can be.
Attach the long rope to each rack side with a an Open-Ended Clove Hitch around the top of one pole, right where they intersect. The distance between each side is the length of the drying rack where wet clothes and towels will be hung.
Larger Drying Rack
Raise the rack. After the clove hitches are in place, lift up one rack side and secure the end of the long rope to the corresponding stake with a taut-line hitch or rope tackle. Repeat this process with the other rack side. Tightening the ropes at the stakes is what keeps the drying rack firmly in place.
Add some lines. Adding more lines increases the capacity of the rack to dry more and more wet clothing and towels. Tie additional ropes or cords to the rack sides at lower heights, attaching one end around the pole with a clove hitch or two half hitches, and the other at the other pole with a taut-line hitch. To increase the rack’s stability, you can heel in the butt ends of the rack sides an inch or two into the ground. This will keep them from shifting when the additional lines are made taut.
NOTE: For a very sturdy drying rack, replace the single stake at each end with a 1-1 anchor, and then, instead of using shorter lines secured only between the rack sides, use long ropes or cords, attaching them with a clove hitch at the poles, and then around each 1-1 anchor with a tight taut-line hitch or rope tackle. If you’re using manila (which has a low stretch factor) as your long rope, and you’re getting a decent strain on the line, there’s no reason you can’t just secure the rack to the stakes using roundturns with two half hitches.
Fundamentally speaking, as long as a campsite is safe and clean, all’s well. However, especially for longer term camps (or when displaying demonstrations of Scoutcraft skills), there’s definitely something to say for the added convenience of a campsite tool rack. Set up in a prominent location (in or near an axe yard), a tool rack serves as a reminder to put tools back where they belong. A place for everything, and everything in its place, especially wood tools, goes a long way in not just keeping things well-organized, but also towards limiting accidents.
Construction is very simple. Basically, all that’s needed are four poles; two 6-foot uprights, and two 5-foot cross pieces work fine. The cross pieces are connected to the uprights with four square lashings.
Tools are hung on the rack, suspended by a looped cord attached to the top cross piece with a lark’s head.
Scouts attach a 6-foot stave to a pioneering stake with two round lashings.
If the two upright’s cannot be sunk or hammered into the ground, pound in a couple of pioneering stakes and hold the uprights in a vertical position by lashing them firmly to the stakes with a couple of tight round lashings.
Jokes for the Cook: Leave-No-Trace Cooking Fire with Forked Sticks and Crossbar
Boiling up some water on a cold morning.
It’s a sight right out of the old frontier, a cooking fire with some game roasting on a wooden spit supported by two forked sticks. It’s easy to make, and the wooden spit is often a crossbar from which pots are suspended for boiling water and cooking food. In the photo to the left, the forked sticks are placed outside the fire ring and round lashed to two pioneering stakes driven into the ground deep enough to hold the sticks upright (click on the photo to catch the detail).
As this photo shows, if the crossbar is long enough, one side of the fireplace can be set up to simultaneously cook food over coals on a grill, in a frying pan, or in foil packets. If the fireplace is to be used for a campfire, and the crossbar is not needed, it can simply be lifted off and set aside.
Fire place with straight forked sticks
This old fashioned camp gadget can also be set up without any lashing, as seen in the photo to the right. Just find a couple of straight sticks with a branch growing out at about 45° and saw them to size. (Procure them in a conservation-minded way!) Sharpen the bottom and the forked sticks can be hammered directly into the ground without breaking.
Once fashioned, these two prepared straight sticks, along with the crossbar, can be reused repeatedly on future front country outings. They’re a whole lot more portable than other gear that’s carted into a campsite, and very functional.
The Chippewa Kitchen can be seen as the indisputable KING of all “camp gadgets.” It’s the ultimate camp kitchen pioneering project, providing a huge element of convenience to a wide range of camp cooking operations. The Chippewa Kitchen can provide a raised surface for food preparation, a nifty place to hang tools and utensils, a framework from which a pot can be safely suspended over a cooking fire, and primarily, a convenient, raised cooking surface for cooking over hot coals.
There are all kinds of Chippewa Kitchens. They come in all sizes and shapes.
When our troop first started making Chippewa Kitchens, we built them with one 10-foot tripod, with one 6-foot crossbar, and two 8-foot crossbars each of those extending out so that a shelf could be constructed where we’d pour the coals and do the cooking. We’d tie a rope from the top of the tripod and hang an 8 qt. pot over a fire built on the ground in the middle between the three legs of the tripod. This always worked well, but with all the weight from the mineral soil, coals, food, and dutch ovens, it was a lot less stable. That design tended to make it difficult to keep the tripod from leaning and the crossbar extensions from shifting lower. DOUBLE TRIPOD CHIPPEWA KITCHEN. Our more recent constructions consist of two 8-foot tripods connected with two parallel 8-foot or 10-foot platform supports over which we lash the cooking platform. With this design, you can build a cooking fire under one or both tripods and suspend a pot over each. Of course the platform is superb for Dutch Oven use and ideal for foil cooking.
Looking good and feeling good at Playcard Environmental Education Center during Swampfest.
Materials needed for a Double Tripod Chippewa Kitchen
two 10-foot x 3-inch platform support spars (For a smaller Chippewa Kitchen, 8-foot spars work great.)
six 8-foot x 3-inch tripod leg spars
four 6-foot x 2-1/2-inch tripod braces
two 6-foot x 2-1/2 to 3-inch front tripod braces (to support the platform support spars)
twenty to forty 3 to 4-foot x 2-inch floor spars (depending on the size of the cooking surface required)
sixteen 15-foot x 1/4-inch manila lashing ropes for square lashings
two 20-foot x 1/4-inch manila lashing ropes for tripod lashings
binder twine for floor lashing
piece(s) of burlap, terry cloth, or canvas to cover cooking platform
Here’s a procedure to make a Double Tripod Chippewa Kitchen:
Build the tripods. Lay three 8-foot tripod legs side by side and lash them together with a tight tripod lashing. Make sure the butt ends are at the bottom and even.
Stand the tripod up by crossing the outside legs underneath the middle leg.
Repeat this process for the second tripod.
Labelled Chippewa Kitchen Spars (Click on the photo for a larger view.)
Lash on the tripod braces. Connect the two outside legs with one of the 6-foot front tripod braces. With tight square lashings, lash the brace so it is perpendicular to the ground and three feet high. Lash another 6-foot tripod brace to each outside leg and connect them to the middle leg with square lashings, about two feet and two and a half feet high respectfully.
Repeat this process for the second tripod, making sure the front tripod brace connecting the outside legs is again, three feet high.
Position the tripods. Place the tripods so the 6-foot tripod braces lashed to the outside legs (the stout ones that are three feet off the ground) are facing each other. These braces are the ones that will hold up the long platform support spars, which in turn will support the cooking platform. The distance between the two tripods should be close enough so the long platform support spars can extend over each brace by at least six inches.
Lash on the platform support spars. Place the long platform support spars parallel to each other on top of the three foot high tripod brace on each tripod. Space them apart so the shortest floor spar will extend over their edges by six inches on either side. Lash them in place with tight square lashings.
Lash on the floor spars. The cooking surface is made up of 3 to 4-foot x 2-inch floor spars, depending on how wide a cooking area will be required. These are lashed onto the parallel platform supports with a floor lashing using binder twine.
Prepare the cooking surface. Prior to adding 2 to 3 inches of mineral soil, and to keep he mineral soil from falling though spaces between the floor spars, spread pieces of burlap, terry cloth, or canvas over the platform.
Finally, cover the platform with a layer of mineral soil thick enough to protect the floor spars from the intense heat that will be generated from the coals during cooking.
Construction is logical and easy. Burlap is a practical layer between the platform floor spars and the mineral soil.
A Covered Double Tripod Chippewa Kitchen during an American Legion Open House
One of the essential mandates in the BSA’s Outdoor Code is: BE CAREFUL WITH FIRE.
I will prevent wildfire.
I will build my fires only where they are appropriate.
When I have finished using a fire, I will make sure it is cold out.
I will leave a clean fire ring, or remove all evidence of my fire.
In addition to being the height of simplicity, the Double Fire Bucket Holder makes an invaluable contribution towards safety around the fire circle. In our campsites, since it’s always a safe bet to have a supply of water right near our cooking and campfires, why not add some convenience and accessibility, especially because when fire buckets are on the ground, they’re frequently knocked over, inadvertently kicked, and even stepped in!
Very Useful Camp Gadget
The materials needed for this ultra simple campsite improvement are two pioneering stakes, a solid stick about 30 inches long with a notch on either end to hang the buckets, and two short 1/4-inch manila lashing ropes, 6 to 10 feet long. In a sensible place near the fire circle, simply pound in the pioneering stakes, approximately 1 and 3/4 feet apart. Then, making sure the notches on the 30-inch crossbar are facing up, lash it to the two stakes with tight square lashings. Fill the fire buckets and hang them on either side. That’s all there is to it. As illustrated in the drawing below, this same design can be used in a variety of ways.