A Triumphant Success—posing on their Single A-Frame Bridge
In the Pioneering Area of the 2013 national jamboree, we put together a couple of Single A-Frame Bridge kits, so Scouts and Venturers could build this simple crossing bridge during their visit to Garden Ground Mountain. Each kit included:
Whenever a crew wanted to build a bridge, we provided an overview of the design and gave them a quick introduction to tying a rope tackle and the Japanese Mark II Square Lashing. What follows are some photo montages of the Single A-Frame bridges built from the kits during the jamboree. For larger and largest views, click on the photos once, and then once again:
Positioning their A-Frame in the ditch while preparing the guylines, and lashing the walkways to the transom.Lashing the transom to the legs and putting tension on a guyline.Positioning their A-Frame and hammering stakes in the corners of the walkways.Lashing on the transom to the legs.Lashing on the ledger and holding the A-Frame up while adjusting the height of the transom.The Shear Lashing at the top of the legs, and lashing the ledger at the bottom.Lashing the A-Frame legs with a Shear Lashing, and lashing on the transom.Carrying their A-Frame to the ditch and placing the walkways on the transom.Lashing on the transom and attaching the walkways.Tightly frapping a Square Lashing for the transom and working together to join the walkways to the A-Frame.Strop lashing the walkways to their A-Frame.
On occasion, a pair of Scouts wanted to build a bridge, and with persistence, and the help of staff or friendly Scouter, they were able to get it done.
Positioning the Trestle and Lashing both Walkway Underpars to the Trestle TransomDriving in the Pioneering Stakes / Lashing the Walkways to the StakesLashing the Handrails to the Trestle LegsSingle Trestle Bridge Built Over a Shallow Creek at Camp Coker, Society Hill, SC
Though there have been some changes and modifications through the years, in most respects, pioneering in the Boy Scouts remains constant. Why Pioneering!
The following text has been extracted from the Introduction to the 1981 Printing of the 1974 Revision of the BSA Pioneering Merit Badge Pamphlet. Most of the action photos have been scanned from the Pioneering Projects section. (Many are also featured in the GREAT 1976 printing of the 1967 revision of the Boy Scout Field Book.)
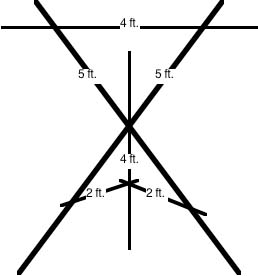
Crossing a Stream on an X-frame Monkey Bridge!
Remember Robinson Crusoe? He was the guy who was shipwrecked on a desert isle and managed to survive. Of course he was lucky—he salvaged a lot of useful equipment. But his story makes you wonder what you’d do if the same thing happened to you.
Have you ever thought what you’d like to have if you found yourself all alone in a wilderness with no chance of escape? So let’s make the problem easier—you can choose just one item, one “tool,” to take with you.
Interlocking the Trestles on a Single Lock Bridge!
Only one tool? Impossible, you may think. The guys who have this merit badge would be very likely to choose rope. For with it anyone skilled in the outdoor arts of pioneering can build many useful things.
It’s one of the oldest tools we know. Thousands of years ago, primitive men twisted vines or plant fibers to make rope that they used to attach handles to their simple tools. Ropes were used in building the pyramids.
Lashing on Walkway Cross Spars!
In Central and South America, Indian tribes were crossing deep valleys on rope suspension bridges long before the first explorers arrived from Europe. And with the help of rope our own pioneers could, when they had to, build a temporary bridge that would enable woman and children to cross a stream safely. They could build a raft to carry a winter’s catch of fur to market.
Take a look at this pamphlet, and you’ll discover why rope would be a good “tool” to have in the wilderness. Everyone of the requirements depends on rope. Pioneering, in the Scout sense, means being able to construct a great variety of things with poles and rope. In order to build a bridge without nails or a tower without bolts, the builder needs ropes—plus the knowledge of how to use them. Most pioneering is concerned with lashing poles together to make something—usually temporary—that makes living in the outdoors a little easier.
In pioneering, the use of knots and lashings is of supreme importance. A wrong knot, an insecure lashing, or a weak rope could lead to disaster. Did you know, for example, that tying a Bowline in a rope cuts its efficiency by 40%? And that a Square Knot reduces the rope’s efficiency by 50%? Which means that it’s only half as strong as an unknotted rope. Knots, turns, and hitches weaken a rope by forming a bend that distributes the load on the fibers unequally.
Lashing on Walkway Floor Spars.
All this knowledge comes in handy in pioneering—but our wilderness has shrunk so much that the average troop no longer can go into the woods and cut the trees needed for building a rope-lashed tower. However, there are isolated areas where Scouts might get permission to clear out some trees, and the thinning might make the ones left standing grow better. A troop that can acquire poles this way should keep them perhaps on a campsite—and use them over and over.
–
–
Lashing Together a 24′ Signal Tower Side!
Most often the best bet for anyone who wants to learn pioneering is summer camp. Here there will be the poles, the ropes, and—just as important—someone with the skills to teach you how to make Square Lashings, Diagonal Lashings, and Shear Lashings. Ever hear of a parbuckle? Can you tie the required 10 knots and explain their use? The best way to learn is by observing someone who already knows.
Our pioneers were good at improvising. They had to be. Without being able to improvise they never could have settled the wilderness., built bridges and houses, and turned it into the comfortable communities we live in today. Scouts who want to try their hands at pioneering will learn to improvise—and will be using some basic engineering principles that still have plenty of applications.
Hoisting a 24′ Signal Tower!
For example, engineers working in mountainous areas often use rope conveyers in preference to rigid railways. The aerial cableway used in the construction of the Hoover Dam in Colorado consisted of six steel-wire ropes crossing a 1,256-foot span. The “bucket” or carriage they supported could carry 150 tones of excavated material away from the site at one time or bring in the same amount of concrete from the mixing plant.
Tightening the Lashings on a 24′ Signal Tower!
You need not wait until you get to summer camp to begin your own pioneering. Even in a big city, you can learn to tie the knots and find out the best applications for each. Learn how to make Eye, End, and Short splices. And learn how to make lashings by building scale models. A scale of 1 inch to 1 foot is convenient and easy to use: This means that a tower 24 feet tall will scale down to 24 inches in your model.
Pioneering merit badge is not one of those required for Eagle. But in a time when most people have no understanding of what our ancestors had to know to live in the wilderness, pioneering is a cultural tie with the past, an emergency skill worth learning, and a real test of your cooperative spirit. The patrol or troop has to work together as a team, and learning the give-and-take in carrying out a construction project is as important as learning the technical skills of pioneering.
“Why Pioneering? To me the overriding reason for presenting Pioneering is that Scouts like it.”
We know with certainty that the majority of Scouts do like pioneering, and the better they get at it, the more they like it. So, if the Scouts have the desire, why aren’t more Scout units providing the remarkable fun that goes hand in hand with building and enjoying a wide range of pioneering structures?
The reason or reasons are obvious. Somewhere there’s an obstacle or obstacles, and a problem or problems. If there wasn’t, more and more Scouts would be happily involved in unit pioneering programs, building ever-more wonderful things at camp, on outings, and during camporees. The fun, adventure, involvement and challenges are built right in—and also the success. And, nothing succeeds like success! So lets start right there:
STUMBLING BLOCK 1: Nothing Succeeds Like Success!
Generally speaking, experiencing failure is not great for sparking enthusiasm and rarely results in an exclamation like, “Hey! That was fun!” In his book Pioneering Projects, Gilwell Camp Chief, John Thurman wrote, “if any Patrol, Troop, or Scouter tries to start pioneering before establishing a sound background of basic Scout training in regard to knotting and lashing, then pioneering will become unpopular and will go down in the history of the Patrol or Troop as a failure.” Why? Because without the prerequisite skills, the structure won’t work or stay standing. That’s no way to equate pioneering with something the Scouts can successfully accomplish, and that’s no fun.
An Introduction to Round Lashing for New Scouts During a Troop Meeting
But, just teaching Scouts the ropes is not enough! Unless the training sessions on knotting and lashing are “tied” to some fun or practical application, then repeated knot-tying and lashing sessions will be a source of exasperation and boredom—an inevitable turn off. Not good! After introducing some basics, give the Scouts a real opportunity to put them into action! Not with an elaborate project, but with a challenge or game where they actually get to use what they learned.
Scouts use they’re round lashings to play “Catch the Snapper.”
(Refer to Favorite Scout Meeting Challenges.) Make sure the activity matches their skill level. That way, success is assured, and each new success is a building block to a bigger one. When these initial forays into pioneering are successfully carried out, then it’s a sure bet that actually building the useful camp gadget and larger campsite improvement will result in its own success story with a tangible outcome in the form of a concrete accomplishment. “We built that!”
Now, if the youth and adults are really interested, what else will hold a troop back from implementing an effective Pioneering program?
STUMBLING BLOCK 2: Lack of Scouter Training.
Pioneering Team Building Challenge at a Camporee
(a) It’s possible the Scouters themselves don’t possess the necessary knowledge and skills required to introduce their Scouts to the knotting and lashing techniques required to construct even a simple camp gadget, not to mention a bridge.
No excuse. The basic knowledge and skills required are super easy to gain. Knot and lashing diagrams, online animations and demonstrations, and learning sessions from fellow Scouters are available to one and all. What it takes is devoting some time to mastering each technique so it can be passed along directly to the Scouts or to those who will be doing the instructing. VIEW: HOW-TO PIONEERING SKILL VIDEOS
(b) Perhaps the Scouters never actually built the pioneering projects themselves, resulting in a natural hesitation to embark on ventures into unfamiliar territory. When there’s a desire to get into pioneering, but there is very little or no pioneering experience, the best training by far is from qualified individuals who have presented a well-rounded pioneering program to their units and have themselves helped provide the opportunities to successfully build the projects. In lieu of that, a great place to start is to get information that is both understandable and dependable. Successful pioneering programs have been developed from scratch by utilizing the 1993, 1998 edition of the Pioneering Merit Badge Pamphlet by Adolph Peschke. The pamphlet is like an A to Z primer on the modus operandi of basic pioneering. Additionally, as a source of comprehensive information, the book Scout Pioneering spoon feeds the reader with practical approaches and ideas.
STUMBLING BLOCK 3: Lack of equipment.
Lack of equipment is easily the most understandable of all deterrents. Naturally, when there are limited or even zero materials, implementing a unit pioneering program can be daunting proposition. For smaller camp gadgets you can use sticks, Scout staves and binder twine. But, for larger projects, you need the right kind of lashing ropes and the right kinds of spars.
A collection of pine spars ready for transport to the unit’s storage facility.
A favorite John Thurman quote is, “Determination remains the enduring answer to most problems.” So, coupled with the determination that Scouts will be rewarded with rich pioneering experiences, here are some avenues to pursue:
A collection of bamboo, in the quantity and size to build the chosen project.
Make an ongoing and concerted effort to get everyone on deck to help locate and gather the materials needed to build the targeted project(s). This is a whole lot easier and more practical than when one individual takes on the responsibility all by themself.
Check with the owners of land where there are stands of trees that are good for making spars, sharing with them what you want to do with the spars, and offering to do a little unnoticeable thinning out of some trees, which will be beneficial to the overall tree population. Forest Stewardship
Start with what you need. Expand as you go. Necessity is the mother of invention.
Team up with other Scouters in neighboring units, in the District, or in the Council, and put together a pioneering kit for communal use. (For a unit interested in putting together their own pioneering kit, a good place to start is to gather the materials necessary to undertake the specific project or projects the unit wishes to build. More supplies can be added to the unit’s kit to meet additional demands for materials, as required by the desire and wherewithal to tackle new and different projects.)
Gather the materials you need based on where you are in the cumulative pioneering process. Start with what’s necessary for training and interpatrol activities, and then add the components required for a chosen project, starting from the more simple, e.g. a Double A-frame Monkey Bridge. That way, you can start building your pioneering program around the specific project you’ve got in your sights.
If you’re in an area that just ain’t got no trees, check into building a pioneering kit made up of laminated spars.
Nothing really worth doing is ever really easy. The keys are a willingness to learn, a desire strong enough to motivate you to persevere, and the sound conviction that: this is going to be great!
As John Sweet says in Scout Pioneering, in regards to giving Scouts the opportunity to experience the joys of Pioneering, “…greater efforts are obviously needed to open up this adventurous, creative, challenging Scouting activity to the Scouts who would undoubtedly revel in it if given the chance to do so. Everything, finally, will depend on the attitude of the Troop Scout Leader, and they are the one who must be won over. Scouters who are themselves well-versed in the simple techniques of pioneering will need no encouragement and might even have to be restrained! To the others, a vast company, we would merely say that in all fairness they should at least allow their Scouts to have a go. One thing is pretty certain. If they do they will add another dimension to their training programme.”
These 22 Safety Points are included in the manuscript for the next edition of the Pioneering Merit Badge.
The following text is by Adolph E. Peschke as presented in the 1998 printing of the 1993 edition of the Pioneering Merit Badge Pamphlet:
As you begin your pioneering activities, safety must be your first consideration. The following safety points are some that you and your group should keep in mind:
Check all equipment, rope, tools, and hardware to ensure they are in good working condition.
Appoint a safety officer as soon as you arrive at the work site.
The safety officer, along with the rest of the group, should constantly check the work site to keep it clean of debris. Equipment should be kept in an organized fashion.
During the construction of a project, only one person should give instructions and signals.
Do not work during rainy or wet conditions. Rope and spars become slippery, as does your footing. Knots can slip when wet and become unsafe.
Wear clothing to fit the season and wear gloves when necessary to protect your hands.
Take regular breaks to discuss the work in progress and ensure that everyone understands what is required of them.
Double-check all anchors and holdfasts on the pioneering project as strain is applied during use.
Test the structure or bridge before allowing general use.
Ensure that you have good footing, use both hands to make the work easier, and do not lift more than you can handle.
When the day’s work is complete, untie all knots, coil all ropes, check all hardware, and store everything in its proper place.
When tying knots that will be out of reach, secure the running end with a piece of light cord.
When the bottom end of a spar, such as the leg of a tower, rests on hard ground, it should be “heeled in”— that is, set in a 4″ to 6” deep hole to keep it from shifting.
When raising towers, have at least two hoisting lines on the opposite side to prevent overpulling the proper position.
If the design calls for a certain size and type of rope or spar, do not substitute something of lesser strength.
Here are some obvious but necessary additional safety measures that should be remembered:
General
Spars resting on the ground are not for standing upon. They can unexpectedly roll causing injuries.
Only one person at a time belongs on a ladder. Persons coming down from a project use the ladder first.
Racing up or down a ladder can result in slipping and an accident.
The number of people using a platform should be strictly limited to the maximum number established beforehand and announced by the safety officer.
Jumping or playing around while on a platform is totally unnecessary and can have dire results.
When lifting the a spar to facilitate the frapping of a tripod lashing, care should always be taken to ensure that the person working the rope doesn’t injure his fingers.
There should always be plenty of room between the person carrying spars and other people.
When working with newer manila lashing ropes, rope splinters can be avoided by wearing gloves.
When using heavy mallets to pound in pioneering stakes, pain can be avoided by being especially careful.
All equipment should be treated with respect and used appropriately for its intended purpose.
Monkey Bridges
There should only be one person on a monkey bridge at a time.
While crossing the bridge, people shouldn’t bounce or purposely swing or sway on the ropes, nor should anyone race to see how quickly they can get across, which can easily lead to losing their footing.
Those waiting their turn to cross the bridge should stay off the ropes between the anchors and the bridge framework.
Whenever the foot rope and/or hand ropes are being tightened, or the spanner ropes are being adjusted, everyone should stay completely off the bridge.
You’ve got to love this design. It’s compact, it’s sturdy, and it’s ingenious!
This drying rack is based on suspending two concentric, equilateral triangles to make six cross sections for hanging wet clothing or towels during a long term encampment, and there’s no reason you can’t put it up on an overnighter if there’s a practical need. All that’s been said before regarding the advantages of this kind of campsite improvement apply to this simple camp gadget:
It takes up less space while drying more wet things.
It eliminates the clutter of clothing and towels haphazardly strewn around on tables, tree branches, tent platforms, or overcrowded on a disorganized array of drooping clothes lines.
It can be set up in a location where there is the most sunshine.
It’s especially useful when camping in an open area with few trees.
Materials (adapt these as you like)
three 4-foot x 1-inch sticks
three 5-foot x 1-inch sticks (Scout staves are ideal)
one 6-foot x 1-1/2 to 2-1/2-inch straight pole for the upright (or an additional 5-foot Scout stave)
one 30-inch pioneering stake
eight camp gadget lashing ropes (6 to 10-foot)
three 15-foot lashing ropes
three small stakes
Two Equilateral Triangles
Procedure
Lash the triangles. Start by lashing together two equilateral triangles, one smaller for the top (three 4-foot sticks), and the larger one for the bottom (three 5-foot staves). Use square lashings. One easy way is to lash two at 90° and then bend them in and tie the third square lashing to make the triangle. This yields a nice, tightly-lashed triangle, (but be careful you’re not putting too much stress on the ropes and poles when preparing to apply the third lashing).
Pioneering Stake
Erect the upright. Pound in a pioneering stake and lash the 6-foot pole to it securely with two tight strop lashings or round lashings. Making this upright stand up vertically without moving or wobbling at all is a key to a good and sturdy clothing dryer. So, solidly pound in the stake and make sure it’s as straight as possible. Also, make sure the lashings are well-tied and tight.
—> ALTERNATIVE APPROACH: A clothes drying rack can be erected without having to either pound in a stake or sink the center pole, by using the same principle as when erecting a flagpole. The key is using the support ropes as guylines. SEE PHOTO.
Rolling Hitches
Attach the triangles. Lay the triangles on the ground over the upright, first the larger triangle, and then the smaller one on top.
Tie each corner of the smaller triangle to a support rope so it will be suspended about 5 feet above the ground. Use clove hitches which can be adjusted as necessary to assure the triangle hangs evenly and the 4-foot sticks are horizontal. Continuing with each of the three support ropes, repeat this process for the larger triangle so that it will hang about 4 feet above the ground.
Clove HitchTaut Line Hitch at Stake
Anchor the support ropes. Hammer in a small stake a foot or so out, in line with each corner of the bottom triangle. Using the remaining length of the support ropes, attach them to the stakes with a simple taut-line hitch. This will further stabilize the clothing dryer and enable you to make fine-tune adjustments to the way the triangles lay. (You can also just make them fast to the stakes with a roundturn with two half hitches, or another clove hitch.)
An assembled clothes drying rack at the 2013 Jamboree gets the once over.
The following text is by Adolph E. Peschke as presented in the 1998 printing of the 1993 edition of the Pioneering Merit Badge Pamphlet:
Pioneering is the knowledge and skill of using simple materials to build structures that are used in a wide range of Scouting activities. These skills are sometimes referred to as “backwoods engineering.”
Down through the ages, people have used ropes, spars, and simple hardware to build bridges, towers, and even their own shelters. In the early development of our country, pioneering methods were used in mining and transportation, to clear the wilderness, and to build roads and bridges. So it is understandable that the term “backwoods engineering” was applied.
The same skills can be used by Scouts to build pioneering projects ranging in complexity from a simple camp gadget to a signal tower.
Whatever the project, the same applied principles of physics, geometry, and math are used to build pioneering projects and structures. But, keep in mind that all the information (in this pamphlet*) is eventually used for a practical, hands-on application—that is, to build something.
Pioneering is a good foundation for many Scouting activities. You must learn, and then use, such disciplines as planning ahead and teamwork. You can also put to use the basic skills learned in rank advancement, such as knot tying.
But most of all, pioneering provides a practical way to experience the joy of accomplishment when you’ve built something that is needed for yourself or others; it can be something that makes living in camp easier and more comfortable. Pioneering can be both fun and challenging when you use your skill and knowledge to choose the right materials (ropes and spars) and build a usable structure.
The basics of pioneering, such as tying knots, making lashings, using rope tackle, constructing anchors, and basic rope knowledge can be done at home. The projects and structures (shown in this pamphlet**) can usually be constructed with materials available at summer camp or at council camping events.
This wash station is the ideal First Class Camp Gadget! It’s sturdy, portable, and very useful when camping away from washroom facilities. Inherent in its design is a sound approach to a variety of pioneering concepts and skills. When this project’s built with all the lashings tight and all the legs, cross bar, and support pieces properly positioned, it’s a fine example of a well-engineered, highly functional camp gadget. Each of the three legs making up the tripod gets a lashed on support piece, and the wash station’s stability stems from the fact the design contains three triangles.
Getting it done!
To start, you’ll need six good, straight sticks as follows:
two 2-foot x 3/4 to 1-inch for the leg braces
two 4-foot x 3/4 to 1-inch for the back leg and crossbar
two 5-foot x 3/4 to 1-inch for the front legs
For the lashings, you’ll need:
one 10-foot x 1/4-inch manila rope for the tripod lashing
six 6-foot x 1/4-inch manila ropes for the square lashings
NOTE: This and several types of camp gadgets can be happily lashed together simply using binder twine!
You’ll also need
bar of soap in a sock with a 3-foot cord
small to medium-sized towel with a 3-foot cord
No. 10 can with a bail or 4-quart cooking pot with a bail.
Here’s the assembly procedure:
Position of the sticks.
Make the tripod. Using the 10-foot rope, lash the two 5-foot sticks and one 4-foot stick together with a tight tripod lashing. The 4-foot stick should be in the middle. Make sure the “butt” ends of all three these sticks are even. Separate the legs and set the tripod up. The success of this project relies on a well-tied, tight tripod lashing.
Lash on the braces. Using four tight square lashings, with the 6-foot ropes lash one end of the 2-foot sticks to the 5-foot legs and the other end of the 2-foot sticks to the four-foot leg.
Lash on the crossbar. Using two more square lashings, tightly lash the other 4-foot stick to the top extended sections of the two 5-foot sticks to make a cross bar for the towel and soap-in-a-sock.
Add the soap, water, and towel. Tie the end of one 3-foot cord to the soap-in-a-sock and the end of the other 3-foot cord to the towel, and hang them on either side of the 4-foot crossbar.
Washing his hands before breakfast on a cold, winter camping trip.
Hang the can filled with water to the end of the 4-foot stick extending from the front of the tripod.
During the camping trip, change the water as necessary. See that the soap-in-a-sock is not left in the can after use as it will melt.
One of the beauties of using metal containers is that in cold weather, the can of water can be heated in the fire.
Adjusting knots and lashings after the first test crossing.
The well-known, time-tested, traditional Monkey Bridge is perhaps the most familiar of all Scout pioneering projects. It’s frequently featured at Scout Expos, Camporees, Scout Camps, and is often a central attraction at public gatherings where Scouting is represented.
The following instructions and guidelines are provided by Adolph Peschke, taken from the 1993 edition of the Pioneering Merit Badge Pamphlet:
Using a double A-frame to build a monkey bridge is a departure from the usual X-frame that supports the foot rope and hand ropes. This new method has two distinct advantages over the X- frame version. First, the double A-frame provides a wider base making it less likely to tip over. The second advantage is that the positions of the A-frames can be adjusted so the span between the hand ropes can be narrowed for better balance as you make the crossing.
Building the A-frames. The first step in building the monkey bridge is to build four A-frames using the 8-foot spars for the two legs, and 6-foot spars for the ledger. Lay out the first set of three spars (two legs and one ledger) on the ground in position for lashing. Before lashing, drive three stakes, as follows, to help you make all four A-frames the same size: Drive a stake at the top to mark where the leg spars cross. Then drive stakes to mark the positions of where the bottom ledger crosses the legs. This will also indicate how far the legs are spread apart. Now you can lash the four A-frames together, laying them out one at a time using the stakes. Remember that all three lashings on the A-frames are square lashings, even though the spars cross at less than 90˚ angle.
Schematic of A-frame alignment
Double A-frame. When you have four A-frames, you can lash two of them together to form a double A-frame. (see figure 140). Lay one A-frame on the ground and then put another on top of it so that the bottom ledgers overlap one-half their length (approximately 3 feet). The first step in lashing the A-frames together is to go up where the two legs cross (the X formed by one leg from each A-frame). Then with a good tight square lashing, lash the two legs together.
Note: The point where these two legs are lashed together is where the foot rope will rest. You can adjust the overlap of the two A-frames to adjust how high the foot rope will be off the ground. Also note where the tops of the A-frames are, because this is where the hand ropes will be. To complete the double A-frame, stand it up so the butt ends of all four legs rest solidly on level ground. Lash the two bottom ledgers together where they overlap with three strop lashings. Now repeat the entire process to build the second double A-frame.
Laying out the distance between A-frames and anchors
Site preparation. Before you can erect the double A-frames, you need to prepare the site. Begin by stretching a length of binder twine along the center line of where the monkey bridge is to be built. Working from the center, measure 10 feet toward each end to mark where the A-frames are to be placed. They should be 20 feet apart. Then mark out another 10′ from each A-frame to where the anchors are to be built.
Note: These dimensions are for building a bridge with a 20-foot span. This is the maximum span for a bridge using a 50-foot rope. The extra 30 feet of rope is needed to have 15 feet of rope at each end for the proper distance from the A-frames to the anchors (10 feet) and for the knots at the anchors (5 feet).
Build the anchors. The foot rope will be attached to anchors at both ends. Before erecting the double A-frames, build a 3-2-1 anchor, or a log and stake anchor, 10 feet from where the A-frames will be erected (see figure 141).
Rope grommet. After the anchors are built, attach a rope grommet with a ring or shackle in it. (You can make the rope grommet with a 10-foot length of 1/2-inch diameter polypropylene rope. Tie the ends together using a carrick bend, and permanently secure the ends with some strong twine).
Position the A-frames. Prepare to erect the monkey bridge by moving the A-frames into position no more than 20 feet apart. Lay them down on the binder twine that marks the center line of the bridge.
Hand and foot ropes. Now you can prepare the foot and hand ropes for the monkey bridge. Lay the foot rope in a straight line off to the side of where the A-frames are laying. Then lay the two hand ropes on the ground next to each other so they’re parallel to the foot rope and 42 inches away.
Stringer ropes. Now you can add the stringer ropes that will go from the foot rope to the hand ropes. Start by tying the center of an 8-foot long stringer rope (use 1/4-inch manila rope) at the center of the foot rope, using a clove hitch. The stringer rope is tied around the foot rope so that both ends are 4 feet long. Add two more stringer ropes on both sides of the center stringer rope (so there are five stringer ropes in all), tying them about 4 feet apart. Tie one end of each stringer rope to one of the hand ropes, again using a clove hitch. Then do the same with the other ends of the stringer ropes, attaching them to the other hand rope.
Assemble the bridge. You’re just about ready to assemble the bridge. First place a piece of heavy canvas (called a “saddle”) in the V formed by both double A-frames. This will protect the foot rope and allow it to slide a little in the V without interfering with the lashing rope.
Schematic of foot, hand ropes and anchors
Now get the crew together to erect the bridge. You will need a safety officer to watch for any problems that might occur, and a signal caller to tell the crew members what to do. You will need two Scouts to lift and hold each double A-frame in place, two more Scouts to lift the foot rope into the V of the double A-frames, and two more Scouts to lift the two hand ropes into place at the tops of the A-frames. Lift everything into place. Then, holding the A-frames steady, temporarily tie the hand and foot ropes into the rings of the grommets using a roundturn and two half hitches (see figure 142).
Tighten the foot rope. Now you can put a strain on the foot rope. It’s not necessary to use block and tackle since this will put too much strain on the lashings, anchors, and the foot rope itself when there is a load on the bridge.* Whatever strain three or four Scouts can put on the foot rope by pulling it by hand will be enough. As soon as the bridge is used a few times, there will be a sag in the rope. This is fine because it means that you are working with reduced strain on the foot rope as a safety measure.
Tighten the hand ropes. Next, tie the hand ropes to the top ends of the A-frames. First, loosen one end at a time from the anchors. Then, use a clove hitch to tie the hand rope to the top end of the leg of the double A-frame. As you’re tying these clove hitches, adjust the strain on the sections of the hand ropes between the double A-frames to match the sag of the foot rope. Also, adjust the length of the stringer ropes so there is even strain between the foot rope and both hand ropes. After the hand ropes are tied to the tops of the A-frames, move down and retie the ends of the hand ropes to the rings in the grommets using a roundturn and two half hitches.
Final testing. With caution, one crew member can get on the bridge as all lashings, anchors, and knots are observed by the safety officer and all other crew members. Make adjustments as required. Then secure the running ends of the hand ropes and foot rope with a piece of cord. Safe operation calls for only one Scout to be on the foot rope of the monkey bridge at a time.
LIST OF MATERIALS FOR DOUBLE A-FRAME MONKEY BRIDGE
eight 4-inch x 8-foot A-frame legs
four 3-inch x 6-foot ledgers
fourteen 1/4-inch x 15-foot lashing ropes for Square Lashings
one 1/2-inch or 3/4-inch x 50-foot rope
two 1/2-inch x 50-foot hand ropes
five 1/4-inch x 8-foot stringer ropes
six 1/4-inch x 10-foot lashing ropes for Strop Lashings
six pioneering stakes for each 3-2-1 anchor
eight pioneering stakes for each log-and-stake anchor
one 5-inch x 4-foot spar for log-and-stake anchor
two 1/2-inch x 10-foot polypropylene ropes for rope grommets
two pieces of scrap canvas for foot rope saddle
binder twine for anchor tieback straps
* It has been found that a rope tackle in the foot rope at each end (not a block and tackle) tightened by one Scout is an excellent procedure to maintain the optimum foot rope tension, and an easy-to-use remedy for too much sagging due to repeated, heavy use and over stretching. There are other configurations used to initially tighten and keep the hand and foot ropes at the optimum tension during use, depending on the weight the bridge must withstand and the amount of traffic it will bear.

")