The real challenge built into this activity comes into play after the lashing is finished. The patrol is simply building a very well-lashed A-frame. As with all pioneering endeavors, teamwork is essential. With this interpatrol challenge, it’s absolutely necessary! Cossing the Alligator Pit affords a superlative team building opportunity. Read about and view one patrol’s very impressive accomplishment!
Alligator Pit
Materials for each patrol:
two 8-foot x 4-inch spars to serve as A-frame shear legs
one 6-foot x 3-inch spar to serve as a ledger at the base (crossbar)
three 15-foot x 1/4-inch lashing ropes
six 20-foot x 1/4-inch lashing ropes (for guylines)
Method: The “Alligator Pits” are marked on the ground, one for each patrol, 15′ x 15′ square. Patrols line up on one side of their pits. On signal the patrols lash together an A-Frame “walker” using either three square lashings or two square lashings with a shear lashing at the top. At the top they attach two 20-foot lashing ropes, and attach two more ropes at each corner of the crossbar, using roundturns with two half hitches. These are the guylines. The patrol then stands the “walker” upright, and one member climbs on the crossbar. One Scout mans each guyline to help steady and to help propel the Scout on the crossbar as he tries to “walk” the A-Frame across the pit. Only the A-frame “walker” is allowed inside the pit. Note: This activity should only be held indoors if the floor is carpeted. Generally, tile or wood floors will be too slippery and hence minimize the likelihood of success.
Great Team Working Challenge! (Each Scout handling a guyline needs to be vigilant!)
The following text and some of the drawings are by Adolph E. Peschke as presented in the 1998 printing of the 1993 edition of the Pioneering Merit Badge Pamphlet:
We could imagine the first lashing made by man was wrapping a few strips of bark around a stone to hold it to a tree branch to make an ax to hunt and build with. Even today with all our modern ways to hold things together, it is still fascinating to lash sticks or spars together to make a camp gadget or useful structure.
There are still areas in the world where lashing spars (or bamboo poles) is the basic means of building structures. In Scouting, we use the same methods but have replaced strips of bark and vines with natural and synthetic fiber ropes.
The best choice of rope to use for lashing the type of pioneering projects (shown in this pamphlet) is pure manila rope. Therefore, all references to rope used for lashing in this section refer to manila rope.
Yet, sometimes we are faced with a problem—we have to use what is available and economical to get the job done. When making camp gadgets for temporary use, you could use lesser quality, less expensive rope or even binder twine for small projects.
SQUARE LASHINGS ***
The basic type of lashing for most projects is some form of a square lashing. This lashing is used to join two spars together, usually at a right angle, but not always. For example, square lashings are used when building a trestle to join the ledger and header to the legs at right angles. But it is also used to hold the ends of the X bracing to the legs at an angle. (Refer to “Making a Trestle.”)
In this section, three different square lashings are shown: (1) the Traditional Square Lashing, (2) the Modified Square Lashing, and (3) the Japanese Mark II. All three types of square lashings accomplish the same thing by making three wraps and two frapping turns around the spars being held together.
The only difference between these three different square lashings is the type of knot that is used to start and complete the lashing. You may learn that one of these knots is easier to tie, if so, you can stick with the one you are most comfortable with.
In addition to square lashings, you will most likely need to know how to make a diagonal and shear lashings. Some methods of making these types are also shown later in this section.
LASHING TERMS
No matter what kind of lashing you’re making, there are two basic terms you should be familiar with: wraps and fraps. The basic difference between the two terms is that a wrap is made around the spars, while a frap is made around the rope itself.
Wrap. A wrap is a turn made around the two spars to hold the spars tightly together. Usually, three wraps are made to form a Square Lashing. Some other lashings require more wraps.
Frap. A frap is a turn made between the spars. It goes around the wraps to pull the wraps tighter. Usually two frapping turns are made on a lashing.
Good lashings are not made in a hurry. Each wrap must be made with a strain on the rope. Frapping turns should be pulled up as tightly as possible before the final knot is tied.
ROPE LENGTH
When you set out to make a lashing, the size and length of the rope you need are among the first questions you have to answer. To determine the length of rope needed for a lashing, add the diameters (in inches) of the two spars at the point the lashing is being made. If one spar is 2-1/2 inches in diameter and the other is 3-1/2 inches in diameter, the total equals 6 inches. Multiply by 3 feet to get the length of the rope needed for lashing.
If you use a rope that is too short to make three wraps and two fraps for a lashing, you should add (Splice or join with a Square Knot) a length of rope to complete the lashing with three full wraps and two fraps. For safety, don’t leave the lashing short.
If you find you have extra rope, make more wraps or fraps to use up the rope to avoid cutting the rope or leaving long loose ends hanging out.
ROPE DIAMETER
In most cases, 1/4-inch diameter manila rope should take care of lashing two spars together as long as the combined diameter of both spars is 6″ or less. When the combined diameter is over 6 inches, use 3/8-inch diameter rope.
PIONEERING KIT
If your troop or camp puts together a pioneering kit, it should contain lashing ropes that are cut to standard lengths: 10, 15, 20, 30 and 50 feet.
Both ends of these lashing ropes should be properly whipped. It also helps to color-code the ends of all ropes with a bit of paint to denote each length. When storing ropes, make sure they are dry and properly coiled. Never “hank” ropes for storage. That is, don’t wrap them around your hand and elbow to form a coil. Tie each coil with a short piece of cord and store the coiled rope on pegs or in a ventilated storage box.*
In Scout Pioneering in the United States we most often see the square lashing started with a clove hitch. The clove hitch is tied on the vertical spar, just below where you want to join the crossing horizontal spar (see 1).
Using a clove hitch to start this lashing allows for two things. First, you can rest the crossing spar on the clove hitch to help support it as you begin the lashing while building your structure. Second, the clove hitch helps keep the structure from racking (twisting out of shape), causing the lashing to loosen as it is moved or hoisted into position.
After the clove hitch is tied, wrap the excess short end of the rope around the standing part of the rope (see 2). Hold the crossing spar up to the vertical spar and make three wraps around the spars using the long end (see 3, 4, and 5). Pull each wrap tight to hold the spars together. Make two frapping turns around the wraps (between the spars) to pull the wraps tight (see 6 and 7) and finish with another clove hitch on the horizontal spar (see 8 and 9).
One other point to make about the square lashing is that you shouldn’t be fooled by or limited by its name. Although two spars can be lashed together at 90° using a square lashing, it can also be used to lash two spars together at any angle. For example, a square lashing is used to lash the ends of two light spars to the uprights of a trestle to form the X bracing. A diagonal lashing is used at the center of the X to hold the crossed spars together.
MODIFIED SQUARE LASHING
The Modified Square Lashing was developed because of the difficulty usually experienced when tying a clove hitch to complete the traditional square lashing. The clove hitch that starts the lashing is easy enough to make, but tying a clove hitch at the end of the lashing is a different matter.
As shown in figure 104, the modified square lashing starts with a clove hitch. When tying the clove hitch, let the running end of the clove hitch extend about 12″. Also do not twist the short end around the standing part of the rope as in the traditional square lashing.
After tying the starting clove hitch, proceed as usual using the long end of the rope to make three wraps (see figure 105). Then make two frapping turns (see figure 106).
To complete the lashing, bring up the short end of the rope that extends from the clove hitch and tie a square knot (see figure 107). Bring the short end up in the opposite direction of the frapping turns.
As in the Traditional Square Lashing, there is some disadvantage in having to make the complete lashing using the one end of the rope.
Japanese Mark II Square Lashing Photographed Procedure
DIAGONAL LASHING ***
When putting crossed braces on a structure to keep it from racking (as used when making a trestle), the most important lashing is the diagonal lashing where the spars cross. (Refer to the “Making a Trestle” section.)
When the cross spars are properly assembled on the trestle, they will be standing apart where they cross. That is, there will be a few inches of space between the spars where they cross at the center of the X. To pull them tightly together, a timber hitch is used to start the lashing (figure 1). As the timber hitch is pulled tight, the spars are sprung together. Next, three wraps are made in each direction across the X (figures 2 thru 5). After the wraps, make two frapping turns between the spars, pulling the wrapping turns tightly together and taking up any slack (figures 6 and 7). Finally, tie a clove hitch on one spar to complete the lashing (figures 8 thru 10). When this lashing is added to the cross braces, it helps keep the trestle from racking. Filipino Diagonal Lashing.
Diagonal Lashing Diagram
WEST COUNTRY ROUND LASHING
The pattern you make with the rope for this lashing is the same as the one to make the whipping. The only difference is that this lashing is tied around two spars to hold them together.
To make this lashing, tie a series of half-knots (overhand knots) around the two spars (see figure 115). Tie one half-knot in front and the next half-knot in back (see figure 116). Make sure each half-knot is pulled up as tight as possible. After tying six to ten half-knots, finish off the lashing with a square knot (see figure 117). By using six to ten half-knots in this lashing, it makes it very strong and effective, but can be a little difficult to untie.
The West Country Round Lashing is used to tie two spars together to extend the overall length of the spars. When this is done, you should make two sets of lashings, not just one lashing. Make one lashing at each end of the overlapping spars.
West Country Shear Lashing Diagram
TWO-SPAR SHEAR LASHING (Shear Lashing)
The main application for the Two-Spar Shear Lashing is when spar legs are to be spread apart to form an A-frame.
The Two-Spar Shear Lashing starts with a clove hitch on one spar (see figure 118). After making the clove hitch, wrap the excess part of the short running end around the standing part of the rope (see figure 119).
Two-Spar Shear Lashing Diagram (this drawing has been modified for the purpose of clarity)
Completed Shear Lashing Before the Spars have been Spread
Shear Lashing After Spreading the Shear Legs
Unlike square lashings, the shear lashing requires eight or ten wraps around the spars before making the frapping turns between the spars to pull the wraps tight (see figure 120). This lashing then ends with a clove hitch on the other spar (see figure 121).
If you’re making an A-frame, start the spars side by side and tie a clove hitch on one spar, about 1 foot from the top end of the spars depending on the project. Then you can take ten wrapping turns around the spars, making the wraps somewhat loose. The legs can then be spread to the required distance. This should put strain on the wraps.
With the legs apart, you can make the frapping turns around the wraps to pull them tight. Finally, complete the lashing by tying a clove hitch on the opposite spar.
In some pioneering situations all that’s needed is a few wraps with a rope, a light cord, or binder twine to hold two small spars or sticks together. Wrap the rope or cord around the spars a few times and finish with a Square Knot. This is called a strop lashing.
A strop lashing can be drawn down tight, or it can be made as a loose wrap so that it allows movement or acts as a hinge.
The strop lashing can have several simple applications at camp. For example, if you don’t want to dig a hole for the staff of your patrol flag, drive a tall stake in the ground. Then use a light cord or binder twine to make two strop lashings about 1 foot apart to hold the staff to the stake (see figure 122).
If your patrol just completed a signal tower and you want to show who did it, lash your patrol flag to the top of one of the legs with a strop lashing.
When you’re adding walkways to a bridge, they need to be joined to the trestle to form a single unit. The way to do that is to lash the two walkways to the transom at the center of the bridge with two or three strop lashings (see figure 123).
The ends of the walkways also need to be held to stakes. Use a strop lashing to hold the ends of the walkway to the stakes (see figure 124).
* An approach that is seen as a practical way to preserve and organize your lashing ropes is to coil ropes of the same length into manageable groupings, i.e. a large coil containing more than a single rope, and then tying up the grouping at one end with a 3-foot light cord.
** Round lashings are more frequently used to very effectively extend Scout staves or smaller diameter spars.
*** In a square lashing, the wraps and fraps form a square. In a diagonal lashing the wrapping turns cross the poles diagonally. Both lashings can be used to join two poles together that cross each other from 45º to 90º. It’s the square lashing that is used most because there is more contact between the rope and the poles, and hence it is stronger. A diagonal lashing is used when there is a need to close a gap between two spars or when they spring apart, in other words, when we want to bind poles together where they cross each other but do not touch. This most commonly occurs when the ends of the spars are already lashed in place in a structure, as in forming the X-brace of an H-Trestle.
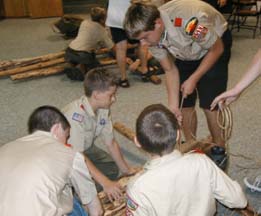
Some years ago a newly-formed and very young troop, barely a year old, attended a Council-wide Camporee. One of the patrol competitions was an Everyone on the Tripod race. They entered three patrols. When the smoke cleared, and the judging was completed, out of over fifty patrols present at the camporee, they placed first, second and third. Why? Well, one reason was they were familiar with the activity having done it at a couple of troop meetings as an interpatrol competition. But, perhaps the main keys to their new-found success was they had an active pioneering program in place, and had been taught the Mark II Square Lashing and the tripod lashing found in an old edition of the BSA Fieldbook (Tripod Lashing with Plain Turns).
This is a WONDERFUL interpatrol challenge!
Lashing the Tripod Legs Together
Materials required for each patrol:
three 8-foot x 3 to 4-inch tripod leg spars
three 6-foot x 3-inch tripod support spars
six 15-foot x 1/4-inch lashing ropes
one 20-foot x 1/4-inch lashing rope
Here’s the Procedure:
On signal, patrol members lash the three 8-foot spars into a tripod, using the 20-foot rope.
Lashing on the Support Spars
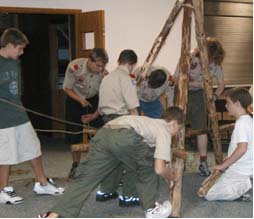
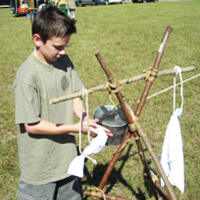
When finished, they set up the tripod and using six square lashings, lash a 6-foot spar between each of the legs.
When all lashings are completed and the tripod is strong and secure, all the patrol members stand on the 6-foot spars, making sure their weight is evenly distributed.
Of course, this challenge lends itself equally, if not more so, to being presented outdoors.
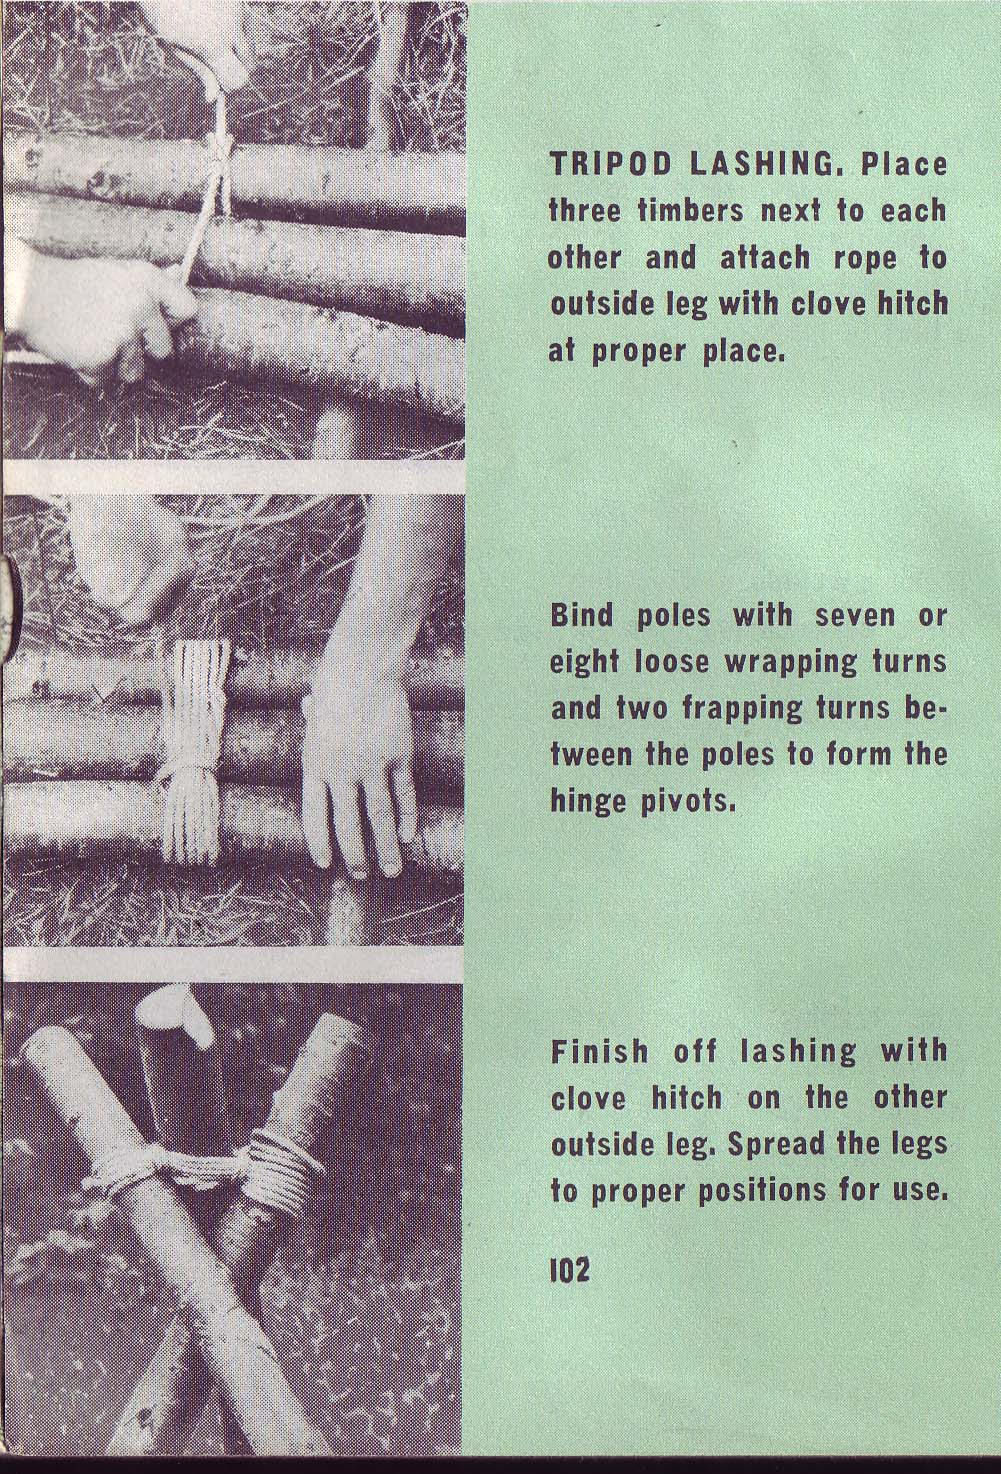
This is a simple and quick way to tie a tripod lashing. The wraps are not woven in and out between the spars. The running end is simply wrapped around all three, snugly but not too tight. In Rope Works Plus, Gerald Findley refers to this lashing as a Tripod Lashing with Plain Turns. Here’s a page right out of the 1967 printing of the BSA Fieldbook:
Tripod Lashing
Notice how the outside legs cross under the middle leg. In that way, the strength of the tripod is not entirely dependent on the strength of the lashing rope, but also on the support given by the wood of the outside legs.
Racking Turns
Note: This lashing works very well for most Scout Pioneering applications, but for a heavy tripod, or a large one that will be supporting a lot of weight for a longer period of time, using racking turns (Figure of Eight Tripod Lashing) provides more contact between the rope and the spars.
The following text is by Adolph E. Peschke as presented in the 1998 printing of the 1993 edition of the Pioneering Merit Badge Pamphlet:
This is one of the basic knots that is very reliable for a number of uses in pioneering work. It is easy to tie and untie and does not reduce the strength of the rope due to sharp turns when under a hard pull.
You start by making a roundturn. This provides extra surface around the spar when chafing or slipping might be a problem. Once you’ve made the roundturn, the rope has a grip on whatever it’s around (see 1). The strain on the rope can then be adjusted before finishing off with two half hitches (see 2 and 3).
The knot is well suited for both ends of a guyline. When it is used in a place where you will not have easy access, as at the top of a tower, secure the running end, (after the two half hitches are tied) with a piece of light cord.
It can be tied in the middle of a long rope by making a long bight with enough rope to make two half hitches after the roundturn.
1, 2, and 3 (below) illustrate the half hitches tied loosely. In actual use both half hitches are pulled up tight.
Tying a Roundturn with Two Half Hitches
To make the knot, start by making a roundturn over a spar.
Next, make a half hitch around the standing part of the rope. Then make another half hitch.
When both half hitches are made, pull them tight, and secure the ends with a small cord.
PIONEERING USES
At both ends of large hand and foot ropes for a monkey bridge. Be sure to secure the running ends with a light cord.
When wear is a factor when tied to an iron ring.
For guylines because it does not jam, and is easy to untie when adjustments are needed.
As stated by John Sweet in Scout Pioneering, “The chariot race originated at Gilwell in the early days of Leader Training and for many years was used on every Scout Wood Badge Course as a classic demonstration of B.P.’s method in action:
the Patrol as the unit of activity
the immediate application of newly acquired skills (Square Lashing, Diagonal Lashing)
the construction of a basic unit in mainline pioneering (the trestle)
light-hearted competition between Patrols”
The classic chariot race has been run in a variety of ways. This one uses an H-Frame Trestle, which is the basic component of many pioneering projects. For that matter, in pioneering circles when we refer to a trestle, we mean the H-Frame, so there should be no confusion. As stated, there are a variety of ways to run a chariot race. One thing to note: depending on how the chariot is transported, it can be hard on turf, so think twice before dragging it on a nice lawn! That’s the very reason why one way to run it is to have the rider hold on as the trestle is literally picked up and carried by at least four patrol members. Many times, when the chariot is dragged, the “charioteer” simply stands on the ledger and holds onto the transom, as patrol members grab onto any part of the trestle they can reach. But, to imitate an actual chariot to the fullest extent, the rider should grab a hold of a rope serving as the “reins” while two other Scouts act as “wheels” keeping the chariot upright, as patrol members pull the chariot like horses using two hauling lines tied to the transom at each leg.
From: Scout Pioneering – Patrols in Action, by John Sweet
This interpatrol activity can be presented indoors or outdoors. If indoors, and the trestle is dragged, care should be taken to avoid scuffing the floor of the church fellowship hall or damaging the carpet. The following is furnished for each patrol:
Materials (Heavier Version)
two 8-foot x 2 to 3-inch diameter spars for the legs
four 6-foot x 2 to 3-inch diameter spars for the ledger, transom, and cross braces (The ledgers can be 4 to 6 feet in length.
nine 15-foot lashing ropes
one 10-foot lashing rope for the reins
two 15-foot lashing ropes for the hauling lines
Materials (Light Version)
six Scout Staves
nine lashing ropes (6 feet will do for the 8 square lashings and a 10-footer for the diagonal lashing)
one 10-foot lashing rope for the reins
two 15-foot lashing ropes for the hauling lines
See Note 1 and 2. Adjust the angles between the ledger and the legs so they are less than 90º and make sure the width between the legs at the ledger is narrow enough so the charioteer can plant his feet right next to the legs.
Note 1: When using Scout Staves (Light Version), it will be necessary to angle the legs inward from the ledger to the transom. When the angle between the legs and the ledger is less than 90º, the lashings are much less likely to slip down over the smooth surface of the Scout Stave. That will mean, the distance between the legs where the transom is to be lashed will need to be less than the distance between the legs where the ledger is to be lashed.
Note 2: Since the Scout Stave comprising the ledger will bow and possibly break if the feet of the charioteer are not planted as near as possible to the legs, it is necessary to lash the ledger to the legs at a width that will correspond comfortably with the size of the charioteer.
On signal, each patrol will build a trestle as per the above drawing. As soon as their “chariot” is built and they have selected a “charioteer” (usually their lightest member), two members to hold the trestle upright, and their “horses,” they run a specified course or race to a turn-around-line and back to where they started.
Note: A Mark II Square Lashing can be used to spring the spars together at the X-brace, in lieu of a diagonal lashing.
The following text is by Adolph E. Peschke as presented in the 1998 printing of the 1993 edition of the Pioneering Merit Badge Pamphlet:
A butterfly knot is a fixed loop tied in the middle of a rope. There are a number of other knots that do the same thing, but the butterfly knot tends to work better because it doesn’t jam when strained and it’s easy to untie.
Since it’s tied in a symmetrical fashion, strain can be put on it from any direction. Even though this knot is usually tied in the middle of the rope, you can also tie it at the end of the line if you need a fixed loop that is easily untied.
The butterfly knot is a favored knot for mountain/rock climbers, used for hand or foot loops or used to hook their carabiners into. It has many uses in pioneering work.
Butterfly Knot Instruction at a Camporee
Pioneering Uses
When using a rope to pull a heavy object (such as a log), tie a series of butterfly knots to form loops for each person’s hand or shoulder.
When climbing a rope, you can tie a series of butterfly knots to form loops for your hands and feet.
To provide a fixed loop to use with a toggle.
When making a rope tackle, the loop in the butterfly knot serves as the pulley. (See Rope Tackle.)
To tie up horses or anchor canoes on shore, tie a series of in a picket line for each horse or canoe.
YOU’LL USE IT AGAIN AND AGAIN!
The butterfly knot, also named the Alpine Butterfly and the Lineman’s Loop, has been referred to as the “Queen of Knots” by Pioneering legend, John Sweet.
The following text is by Adolph E. Peschke as presented in the 1998 printing of the 1993 edition of the Pioneering Merit Badge Pamphlet:
Pioneering is the knowledge and skill of using simple materials to build structures that are used in a wide range of Scouting activities. These skills are sometimes referred to as “backwoods engineering.”
Down through the ages, people have used ropes, spars, and simple hardware to build bridges, towers, and even their own shelters. In the early development of our country, pioneering methods were used in mining and transportation, to clear the wilderness, and to build roads and bridges. So it is understandable that the term “backwoods engineering” was applied.
The same skills can be used by Scouts to build pioneering projects ranging in complexity from a simple camp gadget to a signal tower.
Whatever the project, the same applied principles of physics, geometry, and math are used to build pioneering projects and structures. But, keep in mind that all the information (in this pamphlet*) is eventually used for a practical, hands-on application—that is, to build something.
Pioneering is a good foundation for many Scouting activities. You must learn, and then use, such disciplines as planning ahead and teamwork. You can also put to use the basic skills learned in rank advancement, such as knot tying.
But most of all, pioneering provides a practical way to experience the joy of accomplishment when you’ve built something that is needed for yourself or others; it can be something that makes living in camp easier and more comfortable. Pioneering can be both fun and challenging when you use your skill and knowledge to choose the right materials (ropes and spars) and build a usable structure.
The basics of pioneering, such as tying knots, making lashings, using rope tackle, constructing anchors, and basic rope knowledge can be done at home. The projects and structures (shown in this pamphlet**) can usually be constructed with materials available at summer camp or at council camping events.
The following text is by Adolph E. Peschke as presented in the 1998 printing of the 1993 edition of the Pioneering Merit Badge Pamphlet:
Building pioneering projects often requires some type of strong point for attaching a guyline for a tower or derrick. An anchor point might also be needed to anchor one or both ends of a monkey bridge.
Sometimes nature will provide a tree or rock in just the right location or you might be able to shift the location of the project to take advantage of a natural anchor.
STAKES
Pioneering Stakes
When nature does not provide a solution, anchors can be constructed using stout pioneering stakes.
Note: Under no conditions should tent pegs be used for pioneering stakes. They’re not long enough or strong enough to make a safe anchor.
Pioneering stakes should be made of hardwood, such as oak or hickory. The most common size of stake (for the projects shown in this pamphlet) is 2-1/2 inches in diameter and about 24 to 30 inches long (see figure 84). After cutting the stake to this size, cut a point on one end. Then bevel the top edge to prevent it from mushrooming or splitting when the stake is driven into the ground.
MALLET
Wooden Mallets
When driving stakes into the ground, it’s best to use a wooden mallet. Using a metal sledge hammer or an ax head will damage the stake.
To make a wooden mallet, cut a 4-inch diameter piece of hardwood, such as hickory, elm, or sycamore, about 11 inches long (see figure 85). It should weigh about four pounds. Drill a 1-1/8-inch diameter hole to mount the handle. The handle can be made from a 24-inch length of hardwood (similar to making a stake). Use a knife or ax to round the end of the handle to fit the hole in the mallet head. Secure the handle in place with a wedge placed crosswise to the length of the head.
Buried Spar & Guyline Placement
SOIL CONDITIONS
When driving the stake into the ground, drive it at about a 20° angle. Soil conditions can vary and will dictate how large and long a stake you need. If there will be a heavy strain on the anchor, you might need additional stakes as in the 3-2-1 configuration (shown in figure 89). After the stake is driven into the ground, keep your eye on it as strain is applied to see how it’s holding.
If ground conditions are unsuitable for even the largest stake you have, use a 4-inch diameter spar that’s buried 35 inches in the ground at a 30° angle and anchored in place with a stake (see figure 86).
GUYLINE
Always attach the guyline around the stake as close to the ground as you can get it. If the guyline is placed or slips higher on the stake, there will probably be enough leverage to pull the stake loose (See figure 87).
ANGLES FOR GUYLINES
Both the 3-2-1 anchor and the log-and-stake anchor should be positioned so that the guyline is at a 15° angle, or a maximum of 25°. To determine this, measure the height at the point where the guyline is attached. Double this distance to determine the minimum distance required between the base and the anchor. For example, if the guyline is attached 10′ up the pole, the anchor should be a minimum of 20′ from the base (see figure 88). If your line is long enough, it won’t hurt to place the anchor a few feet further out.
Angles for Guylines and Guyline Length
3-2-1 ANCHOR
Strong Anchor for Pioneering Projects
As the name implies, the 3-2-1 anchor is made by driving stakes in a series: three stakes, then two stakes, and then one stake to form the anchor (see figure 89). All six stakes are 30 inches long and are driven 18 inches into the ground at a 20° angle.
First drive in the set of three stakes. Next drive in the set of two stakes about 24 inches away from the first set. Then tie a rope from the top of the three-stake set to the bottom of the two stake set using at least two loops of 1/4-inch manila rope, or six to eight loops of binder twine. Then use a small stick to twist the rope tight in a tourniquet. After the rope is twisted tight, push the end of the stick in the ground to keep it from unwinding.
Finally, drive a single stake in the ground about 12 inches from the two-stake set. Once again, use a twisted rope or binder twine as a tourniquet to hold the two-stake set tightly in place.
Depending on the strain, you can use other configurations, such as 2-1-1, or even 1-1-1 for a light strain. When using any stake anchor, be sure that it is in direct alignment with the strain being applied.
LOG-AND-STAKE ANCHOR
Log-and-Stake Anchor
The log-and-stake anchor is easy to make and can hold a considerable amount of pull. You can tie the line directly to the log, or you can use a ring-and-rope grommet as shown in figure 90.
To make the log-and-stake anchor, place a log 4 to 6 inches in diameter perpendicular to the pull of the line. Then drive in four large stakes in front of the log. Next, slip the rope grommet through the ring and then slip the ends of the grommet around the log (see figure 90).
Drive a second row of stakes 24 inches behind the front stakes. Then anchor the front stakes to the rear stakes with a tourniquet made of binder twine or rope.
STROPS
It is good practice to use a device called a strop to avoid damage to your long lines. It also makes it easier to tie off your long lines and to make adjustments.
A strop can be made by using a 10-foot length of 1/2-inch diameter manila or polypropylene rope. To make a strop, splice a thimble and ring into one end of the rope (see figure 91), or use a screw pin shackle with a thimble.
The strop can then be wrapped around a rock or tree to attach the line (see figure 92). It can also be used around a spar that is anchored between two trees (see figure 93).
Strops
Note: Be sure to use a piece of canvas or burlap to protect your rope from sharp edges of a rock or to protect the bark of the tree from rope burns.
GROMMETS
A grommet is often used in conjunction with an anchor. A large grommet can be made by splicing together the ends of a 10-foot length of 1/2-inch manila or polypropylene rope. If you don’t have a spliced grommet in your pioneering kit, tie the ends of the rope with a square knot or a carrick bend. Be sure to secure the ends of the rope.
The completed grommet is useful when attaching a long line to an anchor of stakes. It provides a strong and more convenient way to attach a guyline or other long line.
The grommet you use must be made of a larger-diameter rope than the guyline to avoid creating a weak link in the chain between the structure and the anchor.
From certain perspectives, the following pioneering kit presented in the informative older Pioneering Merit Badge Pamphlet is undoubtedly very extensive for a single unit, and better suited for a kit stored in a large shed or storage facility earmarked for multi-unit use in a District or Council.
—> For a unit interested in putting together their own pioneering kit, a good place to start is to gather the materials necessary to undertake the specific project or projects the unit wishes to build. More supplies can be added to the unit’s kit to meet additional demands for materials, as required by the desire and wherewithal to tackle new and different projects.
The following text is by Adolph E. Peschke as presented in the 1998 printing of the 1993 edition of the Pioneering Merit Badge Pamphlet:
The easiest way to make sure that you have all the necessary ropes, spars, and equipment ready to build a pioneering project is to put together a pioneering kit. It saves a lot of time if the pioneering kit is organized and ready to go so you don’t have to spend time gathering all your equipment every time you want to build a pioneering project.
The pioneering kit described here consists of enough spars and ropes to build the projects shown in this pamphlet. It is designed to be used by a troop at summer camp to build “boy-size” structures: that is, projects that can be built by Scouts of Scouts BSA age. This kit is also ideal to provide the equipment necessary for teaching pioneering skills to new Scouts.
The sizes and quantities of ropes and spars described here should be a good starting point for your pioneering kit. You can always add more equipment as the number of Scouts participating increases, or if some Scouts become more skilled in building a wider range of projects.
SPARS
Knowing that this pamphlet might be used by Scouts all over the world presents some problems concerning availability of suitable species of trees to use for spars. Generally, pine makes the best spars because pine trees are straight. Also, when pine is stripped of its bark and dried out, it makes spars that are not too heavy, therefore suitable for “Scout-size” projects.
If pine is not available, cut spars from the straightest trees you can find. It might be to your advantage to make spars from hardwood species of trees. Given the strength of hardwoods, you might be able to use slightly smaller diameters as a weight-saving measure. Don’t overlook softwood spars for light, smaller projects.
Some lumberyards and farm supply stores carry round, treated fence posts that can be used for short lengths. Barn poles might also be available for a few of the longer lengths. Remember that barn poles are quoted at the top diameter, not the butt end. The supply yard might let you select and match what you need.
On all spars, you should remove the bark and cut the ends square. It is recommended that you cut all the spars to exact, even lengths, regardless of their butt diameter, as shown in the chart below.
Large Pioneering Kit: SPARS for Multi-Unit Use
Color-Code for Spars
There are several combinations of lengths and diameters of spars suggested for this pioneering kit. This is because various projects might require the same length spar, but in different diameters depending on where it is to be used in the structure.
Both ends of the spars in your pioneering kit should be color-coded with a band of paint to denote length. Here are the colors that can be used to easily show the lengths of the spars without having to measure them each time.
ROPES
The best all-around rope to use for pioneering projects is pure manila, three-strand, twisted. (Refer to the “Rope” section.)
All ropes in your pioneering kit should be whipped on both ends. In the case of plastic rope, whether it’s twisted or braided, it must be first melted back and then whipped.
Large Pioneering Kit: ROPES for Multi-Unit Use
Rope Color-Code
Ropes cut to the standard lengths shown above should have the ends color-coded with a dab of paint to denote the length. Here is a recommended color-coding system for all rope, regardless of diameter of the rope:
You might also have a need for ropes of specific diameters and lengths that are used for projects that are built often. These should be identified with a tag and coiled separately. These ropes, along with slings, grommets, strops, and anchor ropes should be stored in a separate box.
OTHER EQUIPMENT
In addition to spars and ropes, your pioneering kit should contain some basic equipment needed for building projects. This equipment includes
2 round-point long-handle shovels
4 wooden mallets
50 pioneering stakes
4 binder twine boxes
1 bow saw
1 hand ax
10 wooden cleats and nails
8 welded steel rings, 3/8″ x 3″
8 screw pin shackles, 3/8″
10 quick links, 5/16″
You might also find that putting this equipment on a trailer that can be pulled by a truck will help get your pioneering kit to your project site. The trailer will also help you move your pioneering kit to a dry shelter when not in use.
James Keller, Director of the Pioneering area at the 2013 National Jamboree, related a story about the Japanese Mark II Square Lashing. He described how back in 1993, Adolph Peschke had mandated that his staff should just use the Japanese Mark II Square Lashing for the national jamboree’s pioneering projects. Some of the Pioneering staff back then had not as of yet become familiar with the lashing, and at first, some were a little hesitant to adopt it. But, after becoming acquainted, their overwhelming consensus was, why had they wasted so much time over the years using the “traditional” approach starting and ending with a clove hitch?
Scouts Lashing on the Transoms of a Single A-Frame Bridges at the 2013 Jamboree
The following text is by Adolph E. Peschke as presented in the 1998 printing of the 1993 edition of the Pioneering Merit Badge Pamphlet:
The Japanese Mark II Square Lashing has found its way into Scouting in the United States through Wood Badge training in England, and because of the work of John Thurman, camp chief of Gilwell. He observed it on one of his many world trips related to Wood Badge training.
This lashing is a straightforward approach to the task of lashing two spars together. Begin by placing the spars in the desired position. Now fold your lashing rope in half.
The midpoint of the rope is placed around the vertical spar and just under the crossing spar (see figure 108). Now work both ends of the rope at the same time to make three wraps around the spars (see figure 109).
After completing the three wraps, bring the two ends up between the spars in opposite directions to make the frapping turns around the wraps (see figure 110). Pull the frapping turns tight, and complete the lashing by tying the two ends with a Square Knot (see figure 111). It’s that simple.
Tying the Japanese Mark II Square Lashing
The advantage of this lashing is that you’re working both ends of the rope at the same time. This makes it much quicker to tie since each hand has less rope to pull through. This lashing has the same holding effect as both the traditional and modified Square Lashings.
If more support is needed for the crossing spar, a Clove Hitch can be tied at the midpoint of the rope. Tie the Clove Hitch to the vertical spar just below the crossing spar. You can rest the crossing spar on the Clove Hitch as the lashing is being made. Then use both ends to complete the lashing as described above.
Photographed Procedure (First click on the above image, then for a a full-page view, start second wrap, click on smaller image that appears.)
The following text is by Adolph E. Peschke as presented in the 1998 printing of the 1993 edition of the Pioneering Merit Badge Pamphlet in the Lashing Section describing the traditional diagonal lashing…
When putting crossed braces on a structure to keep it from racking (as used when making a trestle), the most important lashing is the diagonal lashing where the spars cross.
When the cross spars are properly assembled on the trestle, they will be standing apart where they cross. That is, there will be a few inches of space between the spars where they cross at the center of the X. To pull them tightly together, a timber hitch is used to start the lashing. As the timber hitch is pulled tight, the spars are sprung together.
and in the Basic Knots Section describing the timber hitch:
The timber hitch is a knot that can be tied quickly. As strain is put on the rope, the knot gets tighter, yet it remains easy to untie.
To tie a timber hitch, first wrap the running end around the timber log or spar. Then loop the running end around the standing part of the rope, continuing to wrap the running end around itself a few more times. This will form a hitch that will tighten on the timber as the rope is pulled. After the timber is dragged or hoisted into position, the timber hitch is easy to untie.
TImber Hitch Drawing
Killick Hitch
A note about this final half hitch: when using the timber hitch to lift or pull an object, that added half hitch combined with the timber hitch forms what has been referred to as a Killick Hitch. John Sweet in Scout Pioneering suggests this combination when making a lobstick to throw a line over a branch. The Killick Hitch is also known as a Kelleg Hitch. The timber hitch is most always exampled as the first step in tying the combination.
From: “Scout Pioneering” Construction and Care of Rope by John Sweet
The following text is by Adolph E. Peschke as presented in the 1998 printing of the 1993 edition of the Pioneering Merit Badge Pamphlet:
KEY FACTORS TO CONSIDER
There are several important factors to consider when selecting the kind and size of rope to use in pioneering and camping activities. Three of the most important factors to consider are the strength in both the working load and breaking point of the rope, the stretch factor of the rope, and how easily the rope handles.
Some other considerations are the rope’s resistance to mildew, its ability to stand up to repeated wetting and drying, and whether or not it retains kinks from knots after having been under a hard strain, making it difficult to use a second time.
Cost is always an important factor to consider when equipping a pioneering kit. Factors that affect cost are quality, grade, packaged cut length, and source of supply. Scout units can usually buy rope from wholesale suppliers if it’s purchased in standard package lengths. Manila rope in 1/4″ diameter comes in a standard 1200′ coil, while larger diameters come in 600′ coils. Most other types of rope come in 600′ spools as a standard package. Shorter lengths are available from retail suppliers.
ADDITIONAL FACTORS
Since all rope types and sizes come in different grades of quality, which can relate to the strength, it is best to refer to the manufacturer’s specifications that appear on the package. It is a good idea to keep the package for future reference.
Braided rope is about 10 percent stronger than twisted rope of the same diameter and type.
Even the best knots can reduce rope strength 20 percent.
Overhand knots reduce strength 50 percent.
Polypropylene ropes lose strength when exposed to sunlight for extended periods of time.
Nylon rope is 20 percent elastic and stretches to add 20 percent to its original length.
The working load strength of most types of rope is up to 20 percent of its breaking strength. If available, go to the manufacturer’s specifications to determine the safe working load.
Good care and storage will prolong useful life.
Frequent inspections and discarding questionable rope is essential to ensure safe working equipment.
TYPES OF ROPE
Manila. Pure manila rope is by far the best all-around rope. It is easy to handle, has good strength-to-size ratio, and does not have an objectionable stretch factor. It handles well in three important pioneering areas: knot tying, lashing, and in using a block and tackle.
Manila rope can be spliced easily and withstands repeated wetting and drying cycles, making it suitable for boat and marine use, as well as many camping and pioneering applications. Manila rope should provide the bulk of the rope needed for your troop’s pioneering kit. (Its cost is mid-range.) Properly cared for it will give good service for quite a few years.
Polypropylene. Rope made of this man-made plastic fiber should be considered for pioneering activities because it is lightweight and its strength-to-size ratio is good. Size for size it is twice as strong as manila rope, but has a little higher stretch factor. Its strength makes it suitable for anchor strops and for any application involving heavy strain.
Polypropylene does stretch under a hard pull, but should not pose a problem if taken into consideration beforehand. A hard pull will result in kinking with some knots. Polypropylene resists mildew and will float, making it a good rope for waterfront activities and in wet conditions.
It is easy to splice in a twisted three-strand form. Because it is somewhat slippery, four tucks should be made instead of the usual three tucks. Cut ends should be both melted back and whipped with a good flax cord.
A disadvantage of polypropylene is that long exposure to sunlight has a weakening effect on the fibers. But, all things considered it is is worth including in your pioneering supplies.
Nylon. Nylon is commonly available in both braided nylon and twisted forms. Both forms come in a loose braid or twist and in a hard solid braid or twist. The loose braid or twist is not as strong and its fibers can easily get caught on bark, which can be bothersome. The hard twist or braid costs more, but is well worth its price.
Nylon rope is strong for its size, It is two an a half times stronger than the same size manila rope but loses some of its strength when wet. The three-strand twisted form of nylon can be spliced, but, as with polypropylene rope, it’s best to make four tucks instead of the usual three tucks and the cut ends should be both melted back and whipped to prevent raveling.
The most prevalent disadvantage of nylon rope is that it has a 20 percent stretch factor. But in cases where the stretch factor can be taken up with adjustment to the strain on the line, its strength can be an advantage. Nylon rope also has a tendency to slip when a hard pull is put on some knots. Because of these two factors, it is almost useless as a lashing rope.
All things considered, there is a place for both twisted and braided nylon rope in the solid, not loose, form.
Polyester. This man-made fiber rope is usually seen in the braided form. It handles well, is strong, and its stretch factor is less than nylon. It costs more than manila or nylon, but some sizes and lengths could be used in pioneering activities on a selected basis. A 6′ length of 1/4″-diameter polyester rope makes an excellent rope for practicing knot tying and pioneering games.
Polyethylene. This is the cheapest of man-made fiber ropes. It is most often seen in braided form and has a distinctive shine. Don’t let the low cost lure you into buying any quantity of polyethylene for pioneering or camp use. It is not suited for either knot tying or lashing because it holds kinks after being under a strain. (Since it floats it does have some very limited use at he waterfront for ski ropes or other waterfront activities).
Sisal. Sisal rope has much the same appearance as manila rope, but it is quite inferior in strength and does not handle well when used for lashing or knot tying. When sisal rope that is tied into a knot or lashing gets wet and then dries, it becomes useless because of the kinks that remain.
Even though it costs less. it is not cost effective because it breaks down quickly during use and when it gets wet. It might offer limited use in cases where expendable, but overall the cost is high when compared to other types of rope that can be used again and again.
Cotton. Cotton rope in both twisted and braided forms is outclassed in strength by other types and today there is little use for it in pioneering and camping.
Binder twine. Binder twine is made from loosely twisted jute fibers that are treated with oil during manufacturing. Its principle use today is for tying up bales of hay as the baling machine compresses the hay.
Binder twine is readily available in varying quantities at hardware and farm supply stores. Its low cost makes it a throwaway item after use. But don’t be too quick to toss it in the trash—a balled up handful of discarded twine makes a very good fire starter in camp.
Here are some uses for binder twine:
When pioneering projects or camp gadgets call for the use of saplings less than 2″ in diameter, binder twine can be used for lashing. (Do not use binder twine as a replacement for 1/4″ rope in general pioneering use or lashings.)
Use binder twine to make a simple strop lashing with six or eight wraps and a square knot.
Use binder twine to hold the cross spars of a light bridge walkway in place.
Two strands of binder twine quickly twisted together will equal a light cord. Use binder twine for the back stays of anchor stakes.
Use binder twine to outline the ax yard for safety.
Use binder twine for the construction of pioneering camp gadgets.
If the site where you hold your meetings can feature a “permanent” crossbar about 10 feet high, then your Scouts can frequently practice and enjoy this activity whenever the opportunity is presented. Otherwise, erecting the crossbar is itself a mini-pioneering challenge, and if you have the grounds, can be regularly put up by a patrol prior to or during as many meetings as desired.
Also referred to as the Rope-Throw-Log-Lift Game and the Heaving Bar, this is an activity requiring a series of rope-handling and knot-tying skills. Because the skills that are called into play aren’t normally combined in such a sequence, and because there’s an element of fast-paced, fun competition, those Scouts knowing how to tie the featured knots most often get a kick out of giving it a go. The activity can be a competition to complete the task in the fastest time between individual Scouts or played with a team of three Scouts, each assigned a specific task.
Here’s how Adolph Peschke describes this activity in the 1993 edition of the Pioneering Merit Badge Pamphlet:
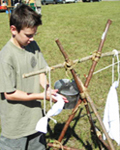
Long log! (Good Half Hitch, but is that a Timber Hitch?)
This game is intended to develop the knot tying skills of an individual Scout or of a team of three Scouts. It is important to know that the knots used (clove hitch, timber hitch, sheep shank) are each tied in a typical application for each knot. Additionally, you will develop the skills of coiling and throwing a rope.
To prepare for this challenge, you should practice tying the individual knots and coiling and throwing a rope. The challenge starts for a single Scout with the rope coiled ready to throw. The rope is thrown over the cross spar. If the throw misses the mark, the Scout recoils the rope and throws again. If the throw is good, he uses the end of the rope he is holding to tie a clove hitch on the stake next to where he’s standing.
Next he moves to the end of the rope that was thrown over the cross spar and uses it to tie a timber hitch around a short length of log (about 4 inches in diameter and 4 feet long). Then he ties a half hitch around one end of the log (forming a Killick Hitch).
To complete the challenge, he moves to the part of the rope between the stake and the upright structure, and ties a sheep shank to shorten the rope enough to suspend the log above the ground.
This is how it should look!
When the challenge is played with a team of three Scouts, the first Scout throws the rope over the cross spar and ties the clove hitch on the stake. the second Scout moves to the log and ties the timber hitch with the additional half hitch. The third Scout ties a sheep shank to shorten the rope and hold the log off the ground. The challenge comes when the game is played while being timed with a stopwatch. As a patrol, the times of the individual Scouts can be added up for a total patrol score.
Three Scouts at once!
The following materials will be needed so that three Scouts or three teams of Scouts can play simultaneously:
three 50-foot x 1/4 or 3/8-inch throwing ropes
two 8 to 10-foot x 2 to 3-inch legs
one 10-foot x 2 to 3-inch crossbar
two 15-foot x 1/4-inch lashing ropes
seven stakes
three 4-foot x 4-inch logs
four 20-foot guylines
To set up the upright structure, lash the cross bar to the legs with tight square lashings. About 3/4 of the way up each crossbar, attach two guylines with a roundturn with two half hitches. Stand up the structure where it will be positioned, and hammer the stakes about 12 feet out from the legs at 45° angles. So that good tension can be applied to each leg, you can attach the guylines to the stakes with a simple rope tackle.
On the throwing side, space out three stakes between the legs and hammer them in to the ground about 25 feet from the structure. On the other side space out the three logs.